Chicken Cacciatore

DSC00949

Whenever I pose the question to my husband is there anything you’re craving, the response nine times out of ten will be Chicken Cacciatore.  It’s a dish we’ve been making for nearly as long as we’ve been together.  It has a form of fried chicken as it’s base, so totally in my wheelhouse since the age of 9 or so.  It’s saucy, one of the base criteria for a great dish in my husband’s mind. Last but certainly not least is that it’s even better as leftovers than it is when freshly made.  So even if you are cooking for two make the entire recipe!  The other cool thing is that if you choose to make it with a whole chicken, you will have the makings for some great chicken noodle soup as well.

Over the years I’ve tried numerous variations,  all tasty, but when it comes right down to it, our favorite is based on the one we discovered so many years ago in the Betty Crocker’s International Cookbook.  As with most of the recipes we’ve made from this gem of a cookbook  it has ingredients that are and have been readily available in nearly every grocery store across the country since it was published in 1980. Yet, somehow each recipe seems to remain true to the spirit and flavor of it’s origins.  We made it for the couple who were to become my in-laws in Montevideo MN on the evening before we announced our engagement.  And believe me Montevideo was not the culinary capital of the US either then or now.        

The other aspect that makes me love this cookbook  so much is that the heading of each recipe gives a brief history or some insight into the recipe.  The recipe names are even subtitled with the name in the language  of it’s origin-in this case the recipe is Pollo alla Cacciatora which translates to Chicken Hunter’s Style in Italian.  The legend the heading explains, tells that it was invented by a hunter’s wife who’s husband returned home with only a few mushrooms and olives. I find it totally believable as I’ve witnessed first hand how inventive  Italian cooks are with a few simple ingredients…..(if you check Amazon I think you can still find copies for sale, I’ve given a copy to each of my children)

I’ve made this dish so many times, it now pretty much falls into one of those “cooking without a recipe recipes ” and can vary slightly depending on the ingredients I have on hand  i.e. what’s in the garden, refrigerator and pantry.  However, for this post I’ll  go back to the original and recreate it as written* and leave it to you to make it your own with the ingredients you have and your inspiration.   The next time it hits our table I’ll post it with the minor changes I’ve been making over the years that were never recorded.  For example it could use a bit more sauce and the addition of some wine is not without merit!  However,  the original that I give you here is pretty darn tasty just as it was back in 1980.

The ingredients are pretty simple and I’ve used everything from canned mushrooms (oh my I know -but in rural Minnesota in the 1980’s fresh were unheard of) and plain black olives because who ever heard of Kalamata.  And yes, I’ve even been known to use boneless, skinless chicken-don’t do it unless you are in an extreme hurry.  I’m convinced that good quality bone-in, skin on chicken that you cut up your self is worth the effort.  If you need a tutorial on cutting up a chicken see the post https://tablemb.wordpress.com/2015/05/18/mexico-city-enchiladas/  

DSC00914

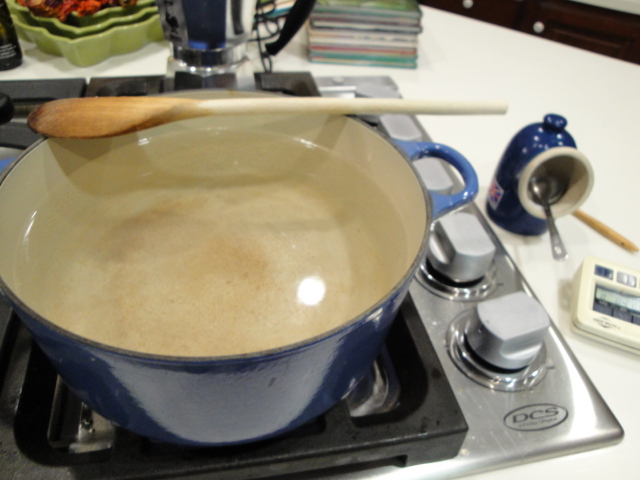
For this recipe I started with a whole fryer that was close to 5 lbs. in weight.  After I cut it into leg and thigh portions and 7 portions  of breast (a wishbone, and each half into three pieces) I had around 2.75 lb of chicken for the Cacciatore.  Perfect for feeding 6 to 8 people or the two of us for at least three meals.  The remaining 2.25 pounds of composed of wings, back etc. will become chicken noodle soup.   That’s a lot of good food from a chicken that cost me $7.73

DSC00919

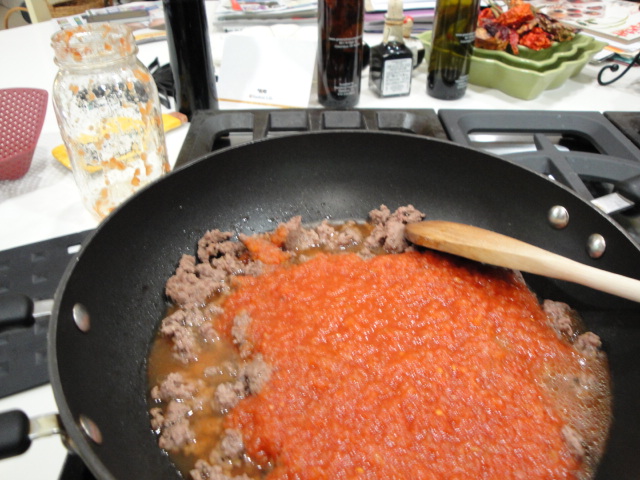
Next comes the mise en place for all of the flavorings-mushrooms (this time they are shitake but I’ve used white button and cremini over the years, all good), sliced kalamata olives, onion, garlic, whole peeled tomatoes in puree (today they are fire roasted because that’s what I had in the cupboard).   I much prefer whole peeled rather than  diced in a saucy dish like this,  they break down into a great sauce.  Just cut them up with some shears.  Onions, garlic and some dried herbs.  In a simmered dish like this I actually prefer the flavor of dried vs. fresh oregano 

DSC00928DSC00931

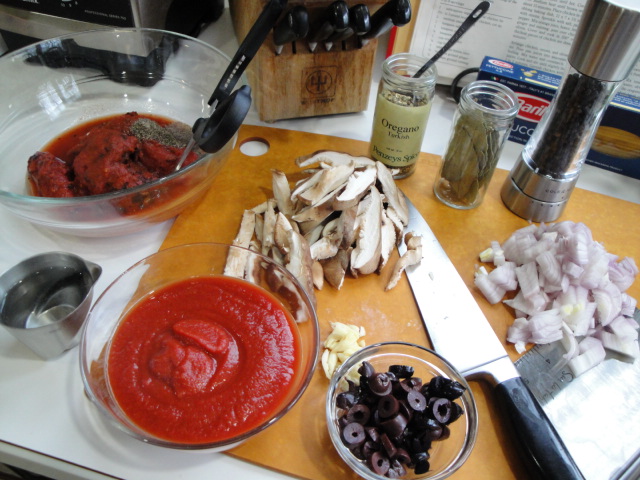
All of these are going in at once, so just put them in a bowl and set aside.  A little unusual not to sauté the onion,garlic and mushrooms before adding the tomatoes but it works!

DSC00933

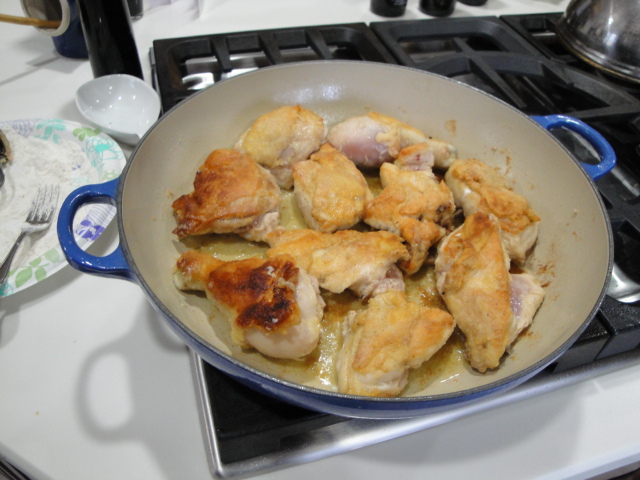
The chicken pieces get dredged in the flour, salt and pepper mixture and then into a large pan with the olive oil.  If you don’t have a pan large enough to brown all of the chicken in an even layer with a little space between each piece, do it in batches.

DSC00923DSC00925

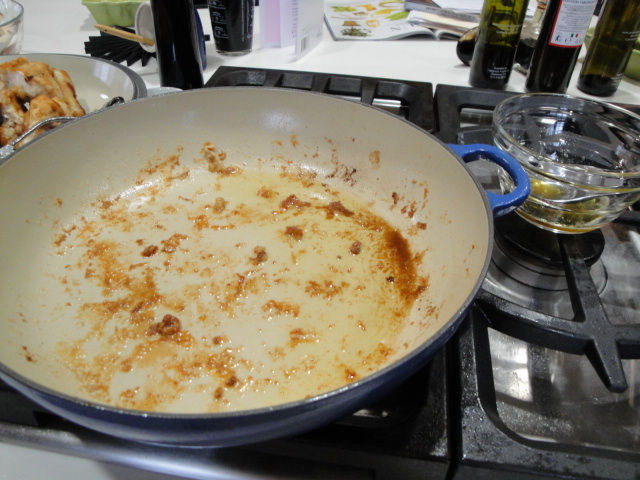
After the chicken is nicely browned on all sides but not cooked through, remove it from the pan and spoon off the excess fat.  Take care to leave all the little brown bits of flavor!

DSC00930 DSC00934

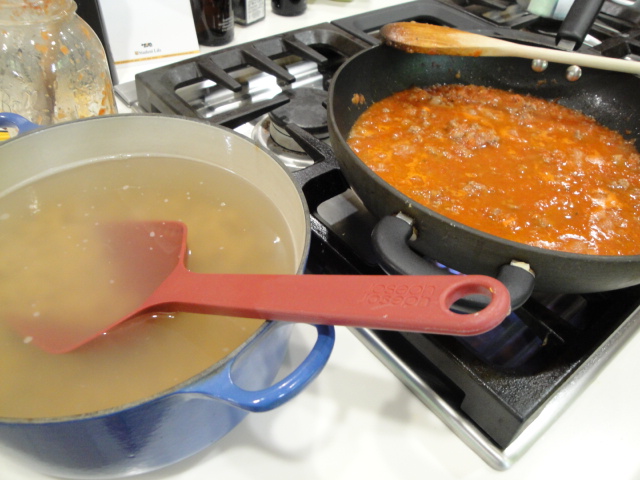
Add the chicken back to the pan and top with the all the remaining ingredients except the parsley.  Cover and simmer for around 30 minutes or until all of the chicken pieces are cooked through.

DSC00933 DSC00936

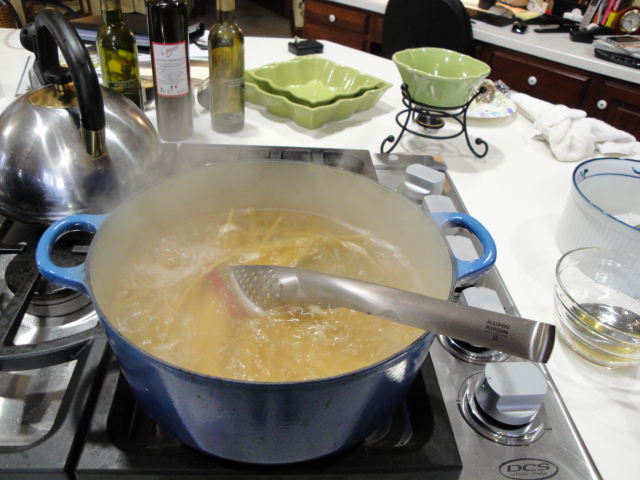
When the chicken is almost done, cook some long pasta.  Remember that excess olive oil and chicken fat you removed from the pan?  Use a bit of that to toss with the cooked pasta-it’s loaded with great flavor.  Remember, this is a sometimes dish, you can go for just olive oil for the everyday food.

DSC00945DSC00946

Sprinkle the chicken with some chopped fresh parsley and pour some light red wine.

DSC00944 DSC00950

So saucy and flavorful, no wonder it’s made it’s way to my table for over three decades!!

DSC00954 DSC00953

I hope you enjoy it as much as we do.  

buon appetito

MB

Chicken Cacciatore

by: M.B. Einerson

Ever so barely adapted from Betty Crocker’s International Cookbook

Servings: 6 to 8

  • ½ cup all-purpose flour
  • 1 tsp. salt
  • ¼ tsp. pepper
  • 1 ½ to 3 lb. broiler-fryer chicken, cut up
  • ¼ cup olive or vegetable oil
  • 1 can (16 ounces) tomatoes *
  • 1 can (8 ounces) tomato sauce
  • 1 cup mushrooms, sliced
  • ¼ cup water (plus a little more to rinse out the cans of tomato products)
  • ¼ cup sliced pitted ripe olives
  • 1 medium onion, chopped
  • 2 cloves garlic, crushed
  • 1 tsp. salt (this one  thing I did omit, as I find older recipes to be a bit high in salt for my taste these days-so leave it out and the add some at the end if you feel it needs it)
  • 1 tsp. crushed oregano leaves (Greek, Turkish etc. not Mexican)
  • ¼ tsp. pepper
  • 1 bay leaf
  • Snipped parsley
  • Hot cooked spaghetti

Mix flour, salt and pepper.  Coat chicken with flour mixture.  Heat oil in 12-inch skillet or Dutch oven until hot.  Cook chicken over medium heat until brown on all sides, about 15 minutes.  Drain fat from skillet.

Mix tomatoes, tomato sauce, mushrooms, water, olives, onion, garlic, salt, oregano, pepper and the bay leaf; break up tomatoes with fork.  Pour over chicken.  Heat to boiling, reduce heat.  Cover and simmer until thickest pieces of chicken are done, about 30 minutes.  Sprinkle with parsley; serve with spaghetti.

* the only thing to note is that there has been a bit of slippage in can volumes between 1980 and now.   The original recipe uses 1 can (16 ounces) tomatoes which have become a 14.5 ounce can!!   In this case I actually weighed the 16 ounces from a 28 ounce can so I could be precise-but normally I would simply throw in the entire 28 ounces.

buon appetito

MB

Missouri Goulash

DSC00457

In Missouri we simply called it Goulash and in the era before packaged and processed foods took over what could be put on the table in a hurry,  it was the easiest meal to prepare from staples always on hand in our home – ground beef taken from the freezer, home canned tomato juice, elbow macaroni, salt and pepper.

To this day,  as much as I love exotic ingredients and recipes from around the world, this is wonderful comfort food for me.  I guess you could call it one of my guilty pleasures because it fits, in a way,  the definition of  foods that one enjoys and considers pleasurable despite feeling  somewhat embarrassed for liking  it so much.  Not that I really feel guilty about it.  No, it’s not sophisticated in the least but it does contain three of the groups on “My Plate”, can be on the table in the time it takes to boil a pot of water and cook pasta and dirties exactly two cooking vessels and a couple of spoons.  There is not even a knife or a cutting board to wash.

If you search the net you will find all sorts of variations on the theme – American Goulash, American Chop Suey, Johnny Marzetti and one I found on Epicurious called Macaroni À La Gisolif.  This one of course it got dissed by some reviewers for not being  sophisticated enough to make an appearance it on the site –  and it had onion, green pepper and Italian seasoning added!   They would really have a field day with my stripped down version.  Other reviewers however,  got it and recounted their versions and memories of this way before Hamburger Helper staple.  Over the years I’ve occasionally added some onion to the ground beef and perhaps a dash of hot sauce but my favorite is the still the bare bones one I grew up on and I get no complaints when I  say” we’re having Goulash for dinner”.  We don’t have it often these days -too many things to try, but when we do I enjoy every mouthful.  Sometimes it’s the simple things prepared with love that are the best and most remembered.

This is it –  Elbow Macaroni, Tomato Juice, Ground Beef, Salt & Pepper 

DSC00444

Heat water to boiling and when it comes to a boil add the salt

DSC00450

While your waiting for the water to boil, start browning the ground beef (I use an 85/15 or 90/10 lean to fat content-then I don’t have to worry about draining off any fat).  Season with several grinds of black pepper.

DSC00448

When the water comes to a boil stir in the elbow macaroni (yes you can use other pasta shapes but the elbows are perfect for curling around the ground beef and soaking up the tomato juice).  I have switched to whole grain-if you haven’t made the switch, this is a great recipe to give it a try.  Cook the pasta to a minute or two less than the al dente directions on your package.

DSC00452

By this point the ground beef should have lost its pink color and started to brown nicely.   Stir in the tomato juice-I’m lucky to still have a few quarts of the juice I canned last summer, but any tomato juice will do.   Reduce to a simmer and let it bubble away until the macaroni is ready.  

DSC00451

To save from getting a pasta steam facial and washing a colander, I scoop the pasta directly into the meat sauce. 

DSC00454DSC00455

Continue to cook until the macaroni is your desired degree of doneness.   Taste and adjust the salt and pepper level-I almost always add a few more grinds of pepper.  The salt will depend on the tomato juice you use and the amount of salt you prefer. 

DSC00456

This batch is a bit on the watery side, partially due to my homemade juice and the fact I was so hungry for my “guilty pleasure” that I didn’t allow the meat sauce to simmer just a bit longer!!

DSC00461

I hope you enjoy this “recipe without a recipe”-nothing measured or timed until preparing for this post,  just learned from the previous generation and now passed to the next  with love.

M.B.


Missouri Goulash

by: M.B. Einerson 

 Servings: 4 generous

  • 3 quarts water (the measurement isn’t super critical, but you want enough to allow the pasta to move freely in the boiling water)
  • 2 Tablespoons salt
  • 6 to 8 oz. elbow macaroni (depending on the shape of the elbows this will be 1 ½ to 2 cups) – I’ve switched to whole grain, but the classic is with the good old white pasta
  • 1 lb. ground beef – I usually use an 85/15 or a 90/10 so I don’t need to drain off fat
  • Freshly Ground Black Pepper
  • 1 quart (32 fluid oz.) tomato juice
  • Salt to taste ( if you salt your pasta cooking water and use regular sodium level tomato juice you will likely not need any additional salt)

Fill pan with water and bring to a boil.  Once the water has come to a boil add the salt.

Meanwhile begin browning the ground beef in a large skillet over medium to high heat (I like my wok skillet for this, but any large cooking vessel that will hold 3 quarts or so will be fine).  Break it up as you put it into the pan or simply dump it in and break it up as it begins to cook with a spoon or potato masher etc. Season with several grinds of black pepper.

When the meat begins to lose its pink color drop the macaroni into the boiling water.   Give it a good stir to make sure the elbows don’t clump together.  Cook the macaroni a minute or two less than the al dente directions on your package.

When the meat is nicely browned, add the tomato juice to the skillet and stir.  Reduce heat to simmer if you haven’t already and let it bubble away until the macaroni is ready.

When the macaroni is ready, drain and add to the meat sauce or using a slotted spoon, spider etc. scoop it directly into the meat sauce.  Stir and cook until the macaroni is your desired degree of doneness.  Taste to check for doneness and to adjust salt and pepper level.

M.B.

Fusilli Lunghi Alla Rustica-Long Fusilli with Bell Peppers and Onions

DSC00251

This post is not so much about this recipe specifically but a nod to another of my favorite cookbooks The Classic Pasta Cookbook by Giuliano Hazan.   Slowly but surely I’m cooking my way through it in Julie &Julia  style but without giving myself the pressure of doing it all in one year and with no whining.   Cooking from this one is easy and satisfying.  This will be the 47th of the 102 recipes that I’ve made from it to date.  The book itself has a permanent home in the recipe stand on my kitchen counter, serving as a backbone of sorts to the myriad of things I’m planning to cook.

I’m certain I purchased it because it was written by the son of the Marcella Hazan, the Julia Child of Italian cuisine.   In the 80’s I had the great fortune to take a series of classes from Marcella at a small shop in Westlake Village CA.  The shop has since grown into the  Westlake Culinary School  (Home of  Let’s Get Cooking) so if you are one of my LA friends check it out!!  They have hosted every one from Marcella to Julia, Wolfgang and Jacques to name drop a few.

This little volume has a heartfelt forward from Marcella, an educational introduction by the author followed by one of my favorite parts-a catalog of pasta.  The pages of the catalog contain beautiful photos of all types of pasta with short descriptions explaining the meaning of their names and how they are most successfully used in dishes.  Today’s recipe for example uses Fusilli Lunghi – “These are “long springs”, like telephone cords.  They are good with chunky sauces, which cling well to the curves in the pasta”

The next section of the book has a tutorial on the equipment used to make home-made pasta, step-by-step instructions on making the dough, rolling the pasta, cutting the pasta, stuffing pasta and ends with cooking and serving tips.

Then come the recipes First a section on Classic Sauces.  There are eleven in all, each one with a beautiful photo of the finished dish as well as an array of the ingredients and picture of pastas that pair best with the sauce.   Needless to say all of them have been prepared in my kitchen on multiple occasions.  My daughter’s specialty was the All’Alfredo, with only 7 ingredients including the pasta and salt & pepper, it was a great starter recipe.   Not only did she master it, but she feed and taught several friends how to make it as well.

Next come recipes organized by pasta shape-long, ribbons, tubes, special shapes, soups and stuffed and baked!   These are the one’s I’m still cooking my way through – 35 down and 55 to go.

It doesn’t end there however.  There is also a section on preparing vegetables-photos of classic techniques for dicing and chopping and a great tip on how to peel a tomato/pepper or any soft fleshed fruit or vegetable.  This last tip is one that his mom taught in those classes I took and that I continue to pass on to those I teach.   Not quite ready to move to video in this blog, but I think you’ll get the gist of it in a still shot when I’m using fresh tomatoes some day soon.  Not today, however-canned diced are the ticket for almost all recipes in early April.

Last but certainly not least there is a section on the Italian Pantry followed by Notes with little gems of knowledge ranging from the meaning of molto al dente to why vegetable oil is sometimes preferred over olive oil in a recipe.

Wow!  I didn’t start this post as a sales pitch for this cookbook, but I do love it.  Sadly it is no longer in print, but available through guess who.  In any case, if you ever run across one at a garage sale, thrift store or in a box on a street curb in Brooklyn grab it.

This particular recipe fulfills my reducetarian goals with just a bit of pancetta for flavor.  It could be completely vegetarian, but that little bit of pork goes a long way when it comes to flavor.    It  does goes a bit out of season with the bell peppers but as with the tomatoes last week I’m craving fresh produce and when I found the lovely fusilli lunghi at the store yesterday I couldn’t resist.  As for the basil,  dried is not a good substitute for fresh  and I’m all out of my frozen stash from last summer’s garden-sooo.

buon appetito!

MB

Yes, that’s the original recipe in the stand on my counter with all of the ingredients I’ll be using to make this dish.  In the original the ingredients are shown in an array according to their inclusion in the recipe and in the form (minced, strips) to be used in your mise en place.

DSC00219

Just in case you need a pictorial of what to do when a recipe calls for onion, thinly sliced

DSC00221DSC00222

DSC00223

Next the pepper.  There are many ways of getting that pepper cut into uniform strips but this is my favorite.  Then I get too munch on the top and bottom while I’m working.

DSC00228DSC00229

DSC00230

Now those olives!  You can totally use pitted green olives of any type, but for Italian dishes I like the color, flavor and texture of Castelvertrano.  Sometimes you can find them in bulk in a good grocery store or market.  To remove the pit, either smash it with you palm on the fat part or the blade of your knife or use a cherry/olive pitter (yep I do like gadgets for some jobs)

DSC00235

I took a short cut with the pancetta (actually I was using up some from a previous recipe) and used pre-diced.  To be true to the recipe buy a 1/4 in slice and cut it into thin strips. 

DSC00232

If you don’t have both parmigiano-reggiano and pecorino romano in refrigerator, stick with the parm.  Much better to have a good quality parmesan (no pre-grated please and don’t even ask about substituting with the stuff in the green canister).  The pecorino has a stronger, sharper flavor but I doubt that in this dish you will miss it.

DSC00246

Now that nearly all of your mise en place is done you can start cooking.

Into the pan with the olive oil.  I find my wok skillet ideal for cooking Italian pasta sauces like this one. If you don’t have a wok, a large skillet is the next best thing.  Now it’s low and slow until the onions are soft and a rich golden color.  This brings out all the natural sweetness in the onions and makes the flavor mellow.

DSC00227

Stir frequently.

DSC00231

Now in with the garlic and red pepper flakes.  

DSC00233

As soon as you get them stirred in,  its time to add the pancetta.  Cook and stir frequently until it’s lightly browned but not crisp.

DSC00234 DSC00236

At this point it’s time to start heating the water to cook the pasta.  Note I have the salt ready and waiting.

DSC00245

Back to the sauce – it’s in with the pepper strips and parsley.  These need to cook until the peppers are tender.  It should take around 5 minutes.

DSC00239

Once the peppers are tender, add the tomatoes and oregano if you’re using dried.  If you are using fresh tomatoes they will need to cook for another 5 minutes or so.  If you are using canned all you need to do is stir them in and let them get warm.

DSC00242DSC00238

Next the olives, capers and basil (fresh oregano if this was your choice).  Stir to combine and then turn off the burner or remove from heat source if your cooking on an electric range.

DSC00243 DSC00244

Add that Tablespoon of salt to your boiling pasta water.  

So here’s the deal-the only thing I now always change when using this book is to cut the amount of dry pasta in half.  I know, I know,  we Americans over sauce our pasta, but even with half the dry weight of pasta, these recipes are never dripping or covered in sauce and actually turn out looking pretty much as pictured.  So I leave it to you to decide!

In any case I almost always weigh my pasta.  

DSC00241

Drop it all into the salted boiling water and give it a good stir to separate the strands.  I set my timer for a minute or two before the package directions indicate so I can check to see how close to that al dente I am.

DSC00247 DSC00248

Once I hit al dente, I move the pasta pot to the sauce and transfer the noodles to the sauce with a pair of tongs.  No pasta water facial from taking this big pot of hot water and trying to pour it into a colander!  Then if I need some of that nice starchy water to thin the sauce a bit, it’s ready and waiting.  But best of all no extra dishes (colander  and bowl to catch pasta water) to wash!!!

Add the cheeses.  Toss it all together and your ready to eat! 

DSC00249 DSC00250

It’s a vegetable pasta, but the flavor of this one needs a light red wine.  My hubby chose a Sangiovese Di Romagna!

DSC00253


Fusilli Lunghi Alla Rustica

by: M.B. Einerson

Barley Adapted from The Classic Pasta Cookbook-Giuliano Hazan

Servings: 4 for a main course and 6 if you are eating Italian style

For ½ lb. fusilli lunghi (note that the original recipe uses 1 lb. pasta) Alternative pastas: fusilli corti, penne, elicoidali

  • ¼ to ½ cup extra virgin olive oil (use ¼ if you are using the pancetta and the full ½ if you’re going vegetarian)
  • 3 cups yellow onion, thinly sliced
  • 1 tsp. finely chopped garlic
  • ½ tsp. red pepper flakes
  • 2 to 3 oz. pancetta, cut into thin strips from a ¼ inch slice or diced into ¼ in cubes
  • 1 large yellow or red bell pepper or ½ of each, cored and seeded, peeled and cut into strips ½ inch wide
  • 2 Tbs. finely chopped flat-leaf parsley
  • 1 lb. fresh ripe plum tomatoes peeled, seeded and cut into ½ inch dice or 1-14.5 oz. can diced tomatoes drained – see comment about adding dried oregano here.
  • ½ cup green olives, pitted and julienned
  • 2 Tbs. capers-drained if in brine or rinsed and drained if salted
  • 1 tsp. coarsely chopped fresh oregano or ½ tsp. dried (I prefer Turkish in Italian dishes and if I’m using dried I add with the tomatoes to give it more time to hydrate)
  • 2 Tbs. fresh basil leaves, torn by hand into small pieces or cut into ribbons
  • Salt – depending on your taste and the amount of salt in the tomatoes you may find there is enough already in the sauce, but be sure to salt the pasta water with 1Tbs of kosher salt
  • 4 Tbs. freshly grated parmigiana-reggiano cheese
  • 2 Tbs. freshly grated pecorino romano cheese (no worries if you don’t have this one-just use all Parmesan

If you’re like us you will want to take an additional piece of cheese to the table for grating on top.

In a large pot add 4 quarts of water and heat over medium-high heat. (You want it to be boiling when the time comes to drop the pasta)

Put the olive oil and onion into a large skillet over medium-low heat and cook until the onion has softened and turned a rich golden color.

Increase heat to medium-high and stir in the garlic, red pepper flakes.  Sauté for 30 seconds or less.  Add the pancetta and cook until it is lightly browned but not crisp.

Add the bell pepper and parsley and cook, stirring occasionally until tender.  Add the tomatoes (and the oregano if using dried) and cook another 5 to 6 minutes.

Stir in the olives, capers, oregano (if using fresh) and basil and remove from heat.

When the pasta water is boiling, add 1 Tbs. salt and drop in the pasta all at once, stirring until the strands are submerged and separated from each other.

When the pasta is cooked al dente (taste a strand about a minute before the package directions indicate it should be done).  Drain it or lift from the water with tongs and toss it with the sauce and the grated cheeses.  Taste for salt and serve at once with a light red wine.

buon appetito!

M.B.