What Do I Do with Those Leftover Chicken Parts Soup

DSC00984

In my previous post on Chicken Cacciatore I used the meaty parts of a whole chicken and was left with almost 2.25 lbs. of chicken with a little bit of meat and loads of flavor.  So, while the Cacciatore was simmering away,  those leftover parts were well on their way to becoming a pot of Chicken Noodle Soup.   I’m a huge supporter of the movement to reduce the amount of food we waste in this country and this is an example of how with a little bit of effort you can turn one chicken into two great meals and use up the dribbles and drabs hanging out in your refrigerator and pantry.  I have been calling  this type of dish “Refrigerator ……” but I think I may start referring to them as Dribbles & Drabs as I just looked it up and Dribs & Drabs is considered an emphatic phrase.  I’m pretty emphatic that this is a good practice!

It starts with all those bony chicken parts that you have when using a whole chicken for pieces in a recipe.  If you don’t have time to deal with them immediately, just throw them into a plastic bag and toss them in the freezer until you do .  However while the Cacciatore is simmering you should have plenty of time to throw them into a pot or pan.  Sprinkle with salt and pepper and put them into a hot oven to roast for approximately an hour.  I usually turn them over about half way during the roasting to make sure all surfaces are nicely browned.

DSC00918DSC00937

When they are browned, set them aside until they are cool enough to handle.  Pull the meat from the bones.  Refrigerate the meat, put the bones back into the pot and cover with cold water.  

DSC00939DSC00941

Simmer for 30 minutes or so and then refrigerate for several hours or overnight to allow the fat to rise and solidify on top.  If you need to you can separate the bones from the broth and transfer to a smaller container but I’m not fond of washing more dishes than I need to, so I’m going to refrigerate it as is. 

DSC00942

Once the fat is at least semi-solid, skim it from the surface and put it into a small skillet (don’t worry if you take some broth with it).   My Jewish friends would call this schmaltz and even though it goes against the “eat less saturated fat principle”, it delivers great flavor to the soup. As long as you don’t over do it on a daily basis, I’m a believer in using the fat I render from the meats I am cooking.   Bring the stock with the bones to a simmer while you work on the rest of the mise en place.

DSC00957 DSC00959

For the remaining Dribbles & Drabs in my soup,  I’m using some carrots, onion, mushrooms (an addition because I had more than I needed for the cacciatore) , thyme (fresh today but dried is fine), bay leaf, celery seed (all out of fresh celery which I would normally use in chicken noodle soup),  the chicken I pulled from the bones, some dried egg noodles (on another day I might make fresh or even throw together some dumplings) and some fresh parsley. 

DSC00963

Slice and dice the fresh stuff.  Heat the chicken fat.

DSC00966DSC00964

Add the fresh stuff along with the dry herbs to the melted fat and cook until the carrots are slightly tender and the onion is translucent.

DSC00974 DSC00976

Strain the bones and skin from the simmering stock and discard (at this point you’ve taken as much from this chicken as it has to give).

DSC00968 DSC00970

You should have 6 to 8 cups of stock, if not add some water to make at least 6 cups.  Add the cooked vegetable mixture, the fresh thyme and the chicken to the pot with the stock and bring to a boil.

DSC00972DSC00978

Once the stock comes to a boil add the noodles and cook according to the package directions.  In the case of the noodle I’m using today that time is around 15 minutes.   The noodles I’m using are Mrs. Millers Old Fashioned Wide Egg Noodles (Extra Fancy Durum Wheat Flour, Fresh Whole Eggs, Water)-Fredericksberg OH.  I think they are quite good for a commercial noodle.   Be sure to taste for salt as you add the noodles, mine needed a teaspoon or so at this point.

DSC00983DSC00980

And there you are, a hearty Chicken Dribbles & Drabs Soup

DSC00985 DSC00987

Enjoy!

MB


What Do I Do with Those Leftover Chicken Parts Soup (Chicken Noodle Soup)

by: M.B. Einerson

Adapted from Rich Chicken Noodle Soup LA Times 1980’s

Servings: 4 to 6

  • Bony chicken parts from a whole chicken (2 or so lb.)
  • Salt and Freshly ground black pepper
  • Cold water to cover bones and skin after meat has been removed
  • Fat skimmed from the top of roasted/simmered chicken parts
  • 1 small or ½ of a large onion, diced
  • 2 medium carrots, diced
  • 2 stalks celery with leaves, sliced or ¼ tsp. celery seed
  • 1 oz. fresh mushrooms, sliced (optional but tasty)
  • 1 bay leaf
  • ¼ tsp. dried thyme or ½ tsp. fresh thyme leaves
  • Meat taken from roasted chicken parts
  • 4 to 6 oz. egg noodles
  • Salt and Pepper to taste
  • Minced parsley

Place bony chicken parts in oven safe dish such as a Dutch oven.  Sprinkle with salt and pepper.  Roast at 400° F for an hour or so, until chicken is nicely browned on all sides.  Remove from oven and let it rest at room temperature until the chicken is cool enough to handle.  Remove the meat from all of the bones and refrigerate,  return the bones and skin to the pot.  Cover with cold water and simmer for approximately 30 minutes.

Refrigerate the pot overnight or until the fat has risen to the top of the pot and is solid enough to remove.

Skim the fat from the surface and place in medium skillet or saucepan.  Bring the stock and chicken bones to a simmer.  Remove from heat and strain the stock to remove the bones and skin.  Add water to the stock if necessary to make 6 to 8 cups of liquid, return to the pot and set aside.

Heat the skimmed fat, add the onion, carrot, celery and bay leaf and sauté until the onion is slightly translucent.  Add the mixture to the soup stock along with the thyme.  Bring to a boil and add the noodles and reserved chicken meat.  Cook at a rolling simmer until the noodles are tender.  Depending on the type of noodle, this will take anywhere from 9 to 15 minutes. Season to taste with salt (you will likely need to add salt, so taste when you begin to cook the noodles so they will be seasoned) and pepper.  Remove from heat and sprinkle each serving with minced parsley.

Enjoy,

MB

Chicken Cacciatore

DSC00949

Whenever I pose the question to my husband is there anything you’re craving, the response nine times out of ten will be Chicken Cacciatore.  It’s a dish we’ve been making for nearly as long as we’ve been together.  It has a form of fried chicken as it’s base, so totally in my wheelhouse since the age of 9 or so.  It’s saucy, one of the base criteria for a great dish in my husband’s mind. Last but certainly not least is that it’s even better as leftovers than it is when freshly made.  So even if you are cooking for two make the entire recipe!  The other cool thing is that if you choose to make it with a whole chicken, you will have the makings for some great chicken noodle soup as well.

Over the years I’ve tried numerous variations,  all tasty, but when it comes right down to it, our favorite is based on the one we discovered so many years ago in the Betty Crocker’s International Cookbook.  As with most of the recipes we’ve made from this gem of a cookbook  it has ingredients that are and have been readily available in nearly every grocery store across the country since it was published in 1980. Yet, somehow each recipe seems to remain true to the spirit and flavor of it’s origins.  We made it for the couple who were to become my in-laws in Montevideo MN on the evening before we announced our engagement.  And believe me Montevideo was not the culinary capital of the US either then or now.        

The other aspect that makes me love this cookbook  so much is that the heading of each recipe gives a brief history or some insight into the recipe.  The recipe names are even subtitled with the name in the language  of it’s origin-in this case the recipe is Pollo alla Cacciatora which translates to Chicken Hunter’s Style in Italian.  The legend the heading explains, tells that it was invented by a hunter’s wife who’s husband returned home with only a few mushrooms and olives. I find it totally believable as I’ve witnessed first hand how inventive  Italian cooks are with a few simple ingredients…..(if you check Amazon I think you can still find copies for sale, I’ve given a copy to each of my children)

I’ve made this dish so many times, it now pretty much falls into one of those “cooking without a recipe recipes ” and can vary slightly depending on the ingredients I have on hand  i.e. what’s in the garden, refrigerator and pantry.  However, for this post I’ll  go back to the original and recreate it as written* and leave it to you to make it your own with the ingredients you have and your inspiration.   The next time it hits our table I’ll post it with the minor changes I’ve been making over the years that were never recorded.  For example it could use a bit more sauce and the addition of some wine is not without merit!  However,  the original that I give you here is pretty darn tasty just as it was back in 1980.

The ingredients are pretty simple and I’ve used everything from canned mushrooms (oh my I know -but in rural Minnesota in the 1980’s fresh were unheard of) and plain black olives because who ever heard of Kalamata.  And yes, I’ve even been known to use boneless, skinless chicken-don’t do it unless you are in an extreme hurry.  I’m convinced that good quality bone-in, skin on chicken that you cut up your self is worth the effort.  If you need a tutorial on cutting up a chicken see the post https://tablemb.wordpress.com/2015/05/18/mexico-city-enchiladas/  

DSC00914

For this recipe I started with a whole fryer that was close to 5 lbs. in weight.  After I cut it into leg and thigh portions and 7 portions  of breast (a wishbone, and each half into three pieces) I had around 2.75 lb of chicken for the Cacciatore.  Perfect for feeding 6 to 8 people or the two of us for at least three meals.  The remaining 2.25 pounds of composed of wings, back etc. will become chicken noodle soup.   That’s a lot of good food from a chicken that cost me $7.73

DSC00919

Next comes the mise en place for all of the flavorings-mushrooms (this time they are shitake but I’ve used white button and cremini over the years, all good), sliced kalamata olives, onion, garlic, whole peeled tomatoes in puree (today they are fire roasted because that’s what I had in the cupboard).   I much prefer whole peeled rather than  diced in a saucy dish like this,  they break down into a great sauce.  Just cut them up with some shears.  Onions, garlic and some dried herbs.  In a simmered dish like this I actually prefer the flavor of dried vs. fresh oregano 

DSC00928DSC00931

All of these are going in at once, so just put them in a bowl and set aside.  A little unusual not to sauté the onion,garlic and mushrooms before adding the tomatoes but it works!

DSC00933

The chicken pieces get dredged in the flour, salt and pepper mixture and then into a large pan with the olive oil.  If you don’t have a pan large enough to brown all of the chicken in an even layer with a little space between each piece, do it in batches.

DSC00923DSC00925

After the chicken is nicely browned on all sides but not cooked through, remove it from the pan and spoon off the excess fat.  Take care to leave all the little brown bits of flavor!

DSC00930 DSC00934

Add the chicken back to the pan and top with the all the remaining ingredients except the parsley.  Cover and simmer for around 30 minutes or until all of the chicken pieces are cooked through.

DSC00933 DSC00936

When the chicken is almost done, cook some long pasta.  Remember that excess olive oil and chicken fat you removed from the pan?  Use a bit of that to toss with the cooked pasta-it’s loaded with great flavor.  Remember, this is a sometimes dish, you can go for just olive oil for the everyday food.

DSC00945DSC00946

Sprinkle the chicken with some chopped fresh parsley and pour some light red wine.

DSC00944 DSC00950

So saucy and flavorful, no wonder it’s made it’s way to my table for over three decades!!

DSC00954 DSC00953

I hope you enjoy it as much as we do.  

buon appetito

MB

Chicken Cacciatore

by: M.B. Einerson

Ever so barely adapted from Betty Crocker’s International Cookbook

Servings: 6 to 8

  • ½ cup all-purpose flour
  • 1 tsp. salt
  • ¼ tsp. pepper
  • 1 ½ to 3 lb. broiler-fryer chicken, cut up
  • ¼ cup olive or vegetable oil
  • 1 can (16 ounces) tomatoes *
  • 1 can (8 ounces) tomato sauce
  • 1 cup mushrooms, sliced
  • ¼ cup water (plus a little more to rinse out the cans of tomato products)
  • ¼ cup sliced pitted ripe olives
  • 1 medium onion, chopped
  • 2 cloves garlic, crushed
  • 1 tsp. salt (this one  thing I did omit, as I find older recipes to be a bit high in salt for my taste these days-so leave it out and the add some at the end if you feel it needs it)
  • 1 tsp. crushed oregano leaves (Greek, Turkish etc. not Mexican)
  • ¼ tsp. pepper
  • 1 bay leaf
  • Snipped parsley
  • Hot cooked spaghetti

Mix flour, salt and pepper.  Coat chicken with flour mixture.  Heat oil in 12-inch skillet or Dutch oven until hot.  Cook chicken over medium heat until brown on all sides, about 15 minutes.  Drain fat from skillet.

Mix tomatoes, tomato sauce, mushrooms, water, olives, onion, garlic, salt, oregano, pepper and the bay leaf; break up tomatoes with fork.  Pour over chicken.  Heat to boiling, reduce heat.  Cover and simmer until thickest pieces of chicken are done, about 30 minutes.  Sprinkle with parsley; serve with spaghetti.

* the only thing to note is that there has been a bit of slippage in can volumes between 1980 and now.   The original recipe uses 1 can (16 ounces) tomatoes which have become a 14.5 ounce can!!   In this case I actually weighed the 16 ounces from a 28 ounce can so I could be precise-but normally I would simply throw in the entire 28 ounces.

buon appetito

MB

Mexico City Enchiladas

When I say “I’m thinking of making a batch of enchiladas.” the first thing my husband says is “Mexico City Enchiladas?”  What last weeks Chicken Enchilada Verdes lack in authenticity, Mexico City Enchiladas make up for in spades.

DSC00438

The source is another of my go to cookbooks – Mexican Cooking by Cynthia Sheer.   It’s one I gave to my then “boy friend-to become husband” for Valentines Day because it had a recipe for Huevos Machaca.  I’m not sure we ever actually tried to make it because nothing could ever live up to the dish as served at Manuel’s Original El Tepeyac  in Boyle Heights, Los Angeles.  If you are ever in LA, it is a place you should try to  visit.  Their claim to fame was the  MANUEL’S SPECIAL BURRITO made with Original Chile Verde Pork It weighed in at 5 lb. and would easily feed a family.   But it was the #9 Machacha dinner that was my favorite.  I loved leaving the line for entry (and there was always a long one) to watch the chef’s sauteeing the shredded beef with  onions, tomatoes, jalapeños, eggs & melted cheddar cheese.  It was their beef that made the dish so unique-aged and air-dried and produced in the northern part of Mexico.  My mouth waters just with the memory.

Even though I never made the Huevos Machaca from Mexican Cooking,  I have made many of it’s recipes and this enchilada is likely the most repeated.   It’s not quite as labor intensive as the Chicken Enclilada Verdes and is certainly a leaner, healthier dish.

The ingredients are pretty basic-Chicken ,spices, onion & garlic, chilies, tomatoes, tortillas and cheese.

DSC00404

I love that this recipe starts with a whole chicken!  Of course you can start with pre-cut chicken parts (no boneless, skinless please) but a whole chicken is a good deal (often under $1.00/lb) and there is just something satisfying about mastering the art of cutting up the bird.   It doesn’t have to be pretty, you just need to get it into manageable pieces that will cook evenly. 

I like to use both a chef’s knife and a pair of kitchen shears on a cutting board with a trough to catch the juices.

DSC00407

Position the bird with the tail toward you.  Pull the leg/thigh away from the body and slice through the skin and flesh until you get to the joint.  You should be able to pop it and cut through the center of the joint with your knife or the shear.   Repeat this same process with the wing.  

DSC00408DSC00409DSC00410DSC00411

Turn the bird over on its breast and using shears, cut through the fine rib bones on both sides of the back.  This will give you one long piece of mostly bones that will give your dish tons of flavor.  You should be able to see the spot where you can cut it into two pieces.  Then cut along the breast bone/cartilage to cut the breast into two pieces.

Like I said, it doesn’t need to be pretty, it just needs to be cut so it can fit into your pot in one layer.

Sprinkle it with salt, cumin, Mexican oregano and red pepper.

DSC00413

Add chopped onion, fire-roasted chilies

DSC00414

then the tomatoes and their liquid and the tomato sauce.  Bring to a boil, reduce to simmer, cover and cook for 1 1/2 hours or until the chicken is very tender.

DSC00415DSC00418

Using a slotted spoon, remove the chicken from the sauce.  I put it into the dish I will use to bake the enchiladas. 

DSC00421DSC00422

While the chicken is cooling, puree the cooking liquid into a smooth sauce with an immersion blender, food processor or blender.   Be careful if you are transferring to a blender etc. and be especially careful if blending a hot liquid.  I highly recommend investing in an immersion blender!  If the sauce seems very thin at this point, bring it back to a simmer and reduce to the consistency of tomato sauce.

DSC00424DSC00425

 When the chicken is cool enough to handle, remove the skin and bones and shred into bite size pieces – you should have about 3 cups of chicken.  Add the tomato, onion and juice that was clinging to the chicken pieces to the bowl with the shredded chicken.  Then stir in 1/2 cup of the blended sauce.

  DSC00429DSC00430

Back to the baking dish that was holding your cooling chicken.  Pour 1 cup of the remaining sauce into it and spread in an even layer.

DSC00431

Today I’m using blue corn tortillas because they caught my eye when I was in the Mexican market, but any corn tortilla will do.  If you can find some that are produced near you go for it, they will be much fresher.  

Instead of the traditional method of heating the tortillas in oil prior to filling, I give them a quick dip in the remaining simmering sauce.  Dip them just long enough to make them soft and pliable.  Alternative is to heat a stack of six for 30 seconds or so in a microwave.

Fill each tortilla with approximately 1/4 cup of the chicken mixture

DSC00432DSC00433

Roll or fold in half and place arrange on top of the sauce in the baking dish. Cover enchiladas with some of the remaining sauce.  I like to keep a bit of extra sauce for serving. Bake, uncovered until bubbly and heated through, 20 to 25 minutes.

DSC00434

Sprinkle with crumbled cheese and thinly sliced red onion and a little cilantro if you like

DSC00436 DSC00437

A few chips, some black beans, fresh tomato, avocado, a dollop of sour cream and of course a margarita Yum!!  And best of all I’ve got great leftovers for lunch or dinner tomorrow.  

DSC00440 DSC00441

 Provecho!

 M.B.

Mexico City Enchiladas

(Enchiladas Mexicanas)

by: M.B. Einerson

 Adapted from Mexican Cooking by Cynthia Scheer 

Servings: 6 generous

  • 1 whole frying chicken, cut up or chicken parts 2 ½ to 3 lbs.
  • ½ tsp salt
  • ¾ tsp ground cumin
  • ½ tsp crumbled oregano (Mexican is best)
  • 1 medium to large onion, chopped
  • 1 small dried red pepper, crushed or ¼ to ½ tsp crushed red pepper flakes
  • 1 to 2 cloves garlic, minced or pressed
  • 1 can green chilies – 4 to 7 oz. depending on your taste
  • 1 – 14.5 oz. can diced or whole peeled tomatoes (the original recipe used a 1 lb. can where oh where have those extra two ounces gone)
  • 1 can tomato sauce the original recipe calls for an 8 oz. can, but I use a 15 oz. can because we like lots of sauce. When I can find it, I substitute a Mexican tomato sauce called El Pato.
  • 12  corn tortillas
  • ½ to 1 cup crumbled Queso fresco , Feta or shredded Monterey Jack cheese
  • 4 thin red onion slices, separated into rings (optional)
  • Cilantro (optional)
  • Sour cream, Mexican crema or crème fraiche (optional)
  • Avocado (optional)

Arrange chicken pieces in a layer in a large skillet or Dutch oven.  Sprinkle with salt, cumin, oregano, chopped onion, red pepper, garlic and green chilies.  Pour on the tomatoes and their liquid and the tomato sauce.  Bring to a boil, reduce heat, cover and simmer for 1 ½ hours or until the chicken is very tender.  Using a slotted spoon, remove the chicken from the sauce.

Pre-heat oven to 375° F

While the chicken is cooling, puree the cooking liquid and solids into a smooth sauce with an immersion blender or in a food processor or blender.  No worries if you don’t have one of those power tools, a chunky sauce will taste mighty fine as well.

When the chicken is cool enough to handle, remove the skin and bones and shred into bite sized pieces.  You should have about 3 cups of chicken.  Add any of the tomato, onion and juice that was clinging to the chicken into the bowl with the shredded chicken.

Mix ½ cup of the reduced sauce with the chicken.  Pour 1 cup of the remaining sauce into an ungreased 9 x 13 inch baking dish.

Dip the tortillas one at a time in the remaining hot sauce to soften slightly and fill each with approximately ¼ cup of the shredded chicken.  Roll or fold in half and arrange on top of the sauce in the baking dish.

Cover enchiladas with some of the remaining sauce. I like to keep a bit of extra sauce for serving. Bake, uncovered until bubbly and heated through, 20 to 25 minutes.  Sprinkle with cheese, red  onion and cilantro.  Serve with sour cream and avocado and extra sauce.

Provecho!

M.B.

Chicken Enchiladas Verdes

DSC00398

These Chicken Enchiladas Verdes,  although not high on authenticity,  definitely  fall into the category of favorites at my table and top the scale on luscious .    The original recipe appeared in the December 1988 issue of Bon Appetit and sadly to say cannot be found on either the Epicurious or Bon Appetit sites today.  What it lacks in authenticity it makes up for in solid comfort.  So with a nod to Cinco do Mayo (yes once again I’m blogging and making dinner at the same time) I give you Chicken Enchiladas Verdes!

Like many recipes of its type, lasagna included, it is a recipe that can be made in stages so that the cook can enjoy it for dinner without spending the whole day in the kitchen.  You could also take some short cuts and use a rotisserie chicken for the filling and stock or broth without the addition of the veggies.  It won’t be quite as tasty, but still pretty darn good.   It also makes a big pan of enchiladas, so you may want to cut it in half if you’re not feeding friends or don’t like leftovers.  A special someone however has been known to eat them for breakfast, lunch and dinner.

The original recipe in Bon Appetit  was from an article titled  Bye-Bye Turkey. Hello Encliladas! in the section Cooking for Friends.  It included a menu and game plan for a Christmas feast with a southwestern accent complete with the enchiladas, a romaine salad, sopaipillas and pumpkin flans for dessert.  The magazine itself was comprised of 208 pages with no less than 130 recipes!  My comments in the margins indicate that I made the Romaine Salad with Avocados, Oranges and Fried Chilies as well, but it’s the Enchiladas that have endured over the years and remained in the memory of one of my most special table companions (although I’m thinking she wasn’t quite ready for enchiladas the first time it was on my table).

We’ll start with the chicken, a few aromatics and some stock.  Bone-in, skin on chicken will give you the best flavor

DSC00369

The poaching method for this one is a very gentle one.  Bring the stock to a boil, reduce the heat and simmer for 5 minutes.  Turn off the heat and let the chicken stand until cooked through – 165°F.  This makes a Dutch oven ideal for the job as it retains its heat during the stand time.  If you have a thinner stockpot or pan, you will likely need to simmer for a bit longer – I’d say 10 minutes minimum.

DSC00371 DSC00373

When the chicken is done, remove it from the stock, pull it off the bone and shred into bit-size pieces.  You can do this a day in advance. Refrigerate the stock with the aromatics and the chicken separately.

DSC00377

On day 2, my next first step is to grate the cheese!  Make sure the Jack cheese is nice and cold for optimal grating.  

DSC00374

Now you can gather the ingredients for the sauce and the enchiladas and pre-heat the oven to 400°F

DSC00379DSC00386

Warm the stock and transfer the aromatics to the food processor that you just grated the cheese in – no need to wash in between!  You are going to have plenty of dishes to wash, so conserve where you can.

DSC00378

In another saucepan melt the butter and stir in the flour – you’re making a roux.  It’s a blond roux, so cook it just until its light golden color and then stir in the hot stock and cook over medium heat until it’s slightly thickened and the floury flavor is cooked out.  Remove from heat and let it cool slightly.

DSC00380 DSC00383

While the sauce is cooling, start sauteing the onions in the vegetable oil in a large skillet.  Cook them until they are soft and translucent.

DSC00381

Next add the spinach and cook just until it is slightly wilted-you want to keep that vibrant green color.

DSC00384 DSC00385

Transfer the spinach mixture to the food processor which has the aromatics from the broth, add the sour cream, green onions and 1/2 can of the chilies.  Blend until smooth

DSC00389

Add as much of the cooled sauce to the processor or blender as possible (there is usually a maximum line on the food processor)and blend again.  If your food processor won’t hold all of the sauce, no worries.  Simply stir the blended  sauce into the rest of the sauce and go from there.  Season to taste with salt and pepper and add the rest of the chilies if  you like.

DSC00391

Butter a 9 x 13 inch baking dish.  Spread 3/4 cup of the blended sauce over the bottom of the baking dish and add 1/2 cup of the sauce along with 2 1/2 cups of the grated cheese to the shredded chicken.  Mix well.

DSC00388DSC00393

You’re on the home stretch now!  Note that the traditional method of preparing the tortillas for filling is to heat them in oil until soft and pliable.  There is plenty of fat in this recipe, so I opt to microwave 6 tortillas at a time until they are soft – about 30 seconds in my microwave.  Lay them out on a cutting board and fill with the chicken/sauce/cheese mixture.

Roll them up and arrange seam side down in the baking dish.

DSC00394DSC00395

Spoon the remaining sauce over the filled enchiladas, cover with foil and bake until heated through.  It will take about as much time as it will take you to get the pots and pans cleaned and dishes in the dishwasher!

DSC00396

Remove foil, sprinkle with the remaining cheese and bake until the cheese melts-about 5 minutes.

DSC00397

Ready for dinner!  I like to serve it with frijoles- either refritos or de olla and black are my favorite and a bit of salsa or pico de gallo on top.

Provecho!

M.B.

DSC00401

DSC00403

Chicken Enchilada Verdes

by: M.B. Einerson

Barely adapted from Bon Appetit, December 1988

 Servings: 6 generous

Filling *

  • 2 to 3 bone-in, skin on chicken breast halves – 2 1/2 lb.
  • 3 cups chicken broth or stock
  • 1 carrot, coarsely chopped
  • ¼ large onion
  • 2 garlic cloves
  • 2 parsley sprigs
  • 1 bay leaf

Sauce

  • 3 Tbsp. butter
  • 3 Tbsp. all-purpose flour
  • 1 ½ tsp. vegetable oil
  • 1 ¼ large onions, chopped
  • 1 bunch spinach, stemmed and coarsely chopped or 6 oz. baby spinach
  • 3/4 cup sour cream
  • 2 to 4 green onions, cut into pieces (use both white and green parts)
  • ½ to 1 four oz. can diced jalapeno or mild green chilies, grained
  • Salt and freshly ground black pepper
  • ¾ lb. Monterey Jack or Pepper Jack cheese, grated
  • Vegetable oil (optional)
  • 12 – 6-inch corn tortillas
  • Salsa

Filling:

Place all ingredients in a large sauce pan or Dutch oven.  Bring to a boil, reduce heat, cover and simmer 5 minutes.  Turn off the heat and let the chicken stand until cooked through, about 1 hour.  Remove chicken from broth and cool slightly.  Remove skin and bones from the chicken and shred the meat.  Put in a medium size bowl and chill.

Pre-heat the oven to 400°F.

Grate Cheese

Sauce:

Transfer the aromatics from the stock to the bowl of the food processor or blender.

Melt the butter in a heavy medium saucepan or Dutch oven over low heat.  Add flour and cook until light brown, stirring frequently, about 5 minutes.  Whisk in the reserved chicken cooking liquid.  Increase the heat to medium and cook until the sauce thickens, stirring occasionally.  Cool.

Heat 1 ½ tsp. oil in a large skillet over medium heat.  Add the onions and cook until soft, stirring occasionally, about 5 minutes.  Add spinach and stir until wilted, about 2 minutes.  Transfer the mixture to the food processor or blender.  Add sour cream, green onions and ½ can chilies.  Puree until smooth.   Add as much of the cooled sauce to the processor or blender as possible (there is usually a maximum line on the food processor)and blend again.  If your food processor won’t hold all of the sauce, no worries.  Simply stir the blended  sauce into the rest of the sauce and go from there.  Season to taste with salt and pepper and add the rest of the chilies if  you like.

Butter a 9 x 13-inch baking dish.  Spread 3/4 cup of the sauce over the bottom.  Add ½ cup sauce to the chicken along with 2 ½ cups grated cheese.

** Pour ½ to 1 inch of vegetable oil into a small to medium skillet.  Heat over low-medium heat.  Add 1 tortilla and cook until softened, about 5 seconds.  Drain on paper towels.  Repeat with the remaining tortillas. **

Divide the chicken filling among the tortillas and roll up.  Arrange seam side down in buttered dish.  If baking immediately, spoon remaining sauce over the filled enchiladas. Cover with foil. (This part can also be prepared 1 day ahead.  Refrigerate the enchiladas and sauce separately.  Bring the enchiladas to room temperature before baking.)

Bake covered in the 400°F oven until just heated through, about 20 minutes.  Uncover, sprinkle with remaining cheese and bake until the cheese melts, about 5 minutes.  Serve with salsa

Provecho!

M.B.

* The filling can be prepared a day in advance.  Chill the shredded chicken and broth separately.

** Note this step can be skipped if you want to reduce the amount of fat in the recipe a bit.  Simply put the stack of tortillas in the microwave and heat until soft and pliable.  You’ll need to work quickly, so they don’t get stiff again, but you can do it!!


“Peking” Duck Pizza – II

DSC00364

As promised last week, I’m going to give you a simpler version of “Peking” Duck Pizza.  In fact if you live in a city with a China Town, you may be able to lose the ” ” from the recipe and make your pizza with authentic Peking Duck.   Where I live, however  I will rely on another great duck product that has become increasingly available over the years – Duck Leg Confit.    Somewhere down the line I will likely show how to make your own Duck confit.  It’s actually pretty simple, but for now I’m going back to D’Artagnan and using one of theirs.   If you live in Columbus, you can also find great Duck Confit at North Market Poultry and Game.  And if you are a vegetarian consider making a “Peking” Mushroom  Pizza by losing the duck altogether.

The second short-cut in this post is the use of pre-made Naan for the crust.   I  like it much better as a fast pizza crust than the pre-made pizza crusts that are in the grocery stores these days.  The two brands I like best are La Brea Bakery Naan Bread and Stonefire Authentic Flatbreads.   Both have great flavor and texture with no hydrogenated oils or preservatives.  This means they have a relatively short shelf-life if kept at room temperature, so I keep my freezer stocked with them.  I use them for pizza, sandwiches and of course as a scooper for dal and other Indian dishes.

The La Brea breads are approximately 10 inches x 4 1/2 inches and the Stonefire breads are approximately 8 1/2 inches x 7 inches, so both perfect for perfect for a single serving pizza.   The Stonefire is a bit thicker and more like a hand tossed crust while the La Brea is a tad thinner and closer to a thin crust pizza.  I’m fairly certain you’ll be able to find something to your liking in a grocery or market near you.  If not you can always go back to “Peking” Pizza I and make your own.

The flavors will be very similar to “Peking” Duck Pizza – I , but the ingredient list is much simpler.   And as I said if you want to venture out even further, you could ditch the duck and increase the quantity of mushrooms  and onions and have a “Peking” Mushroom Pizza!!!

DSC00346

Let’s start with the onion.  In the first recipe of this blog, I specified slivered onion and from your comments I realize that this is not a well-known term.  To many this cut is likely called a julienne, but I reserve this term for thin straight strips of food which you will never get from an onion.  If I cut the onion thinly across its equator I refer to it as thinly sliced. It can be cut into full rounds or half-moon slices.  However if I cut an onion in thin pieces from pole to pole I refer to is as slivered.  Think slivered almonds.  Does it really matter?  Probably not, but the slivers will be straighter than half-moon slices and sometimes I like them ;-).

Start by slicing off the stem end of the onion.  Then cut in half from pole to pole.

DSC00351 DSC00352

In this recipe I only needed 1/4th of the onion so I laid it flat and cut one half in 1/2 again.  Then I started cutting thin slivers.  When I get to the point where I have little to hold on two as shown below and to the right, I flip it onto that broader surface and continue to slice/sliver

DSC00353 DSC00354

When I’m finished I have a nice pile of slivers!

DSC00355

Start pre-heating your oven now.  It’s not as critical to heat it so long when you are using a pre-cooked crust.

Next the duck leg.  Cut and pull all of the meat, fat and skin from the bone.  Take a little bite because it is fully cooked and yummy just as it is.

DSC00356

Thickly slice the mushrooms and head to the stove.

DSC00357

Start with the duck and the onions, with the duck on the bottom.  Heat on medium-high heat until the onion starts to soften and the duck starts to sizzle.  Notice that today I’m using a stainless steel pan rather than a non-stick.  Either is fine, but the stainless will give me a slightly better sear.

DSC00359

When the onion is softened,  add the balsamic, honey, hoisin and soy sauce.  Stir well to de-glaze the pan and get all those yummy duck bits off the bottom.

DSC00360 DSC00361 DSC00362

Spread the naan (I’m using both types to show you this difference in shape) with additional hoisin, top with the duck filling and grated cheese (mozzarella today).  Pop them in the pre-heated oven.   

DSC00363

Bake until the cheese is melted and bubbly – approximately 5 minutes.  Top with sprouts- today I’m using pea sprouts because they are so pretty.

DSC00365

Enjoy!!  As you can see from the second shoot, I did.

DSC00366 DSC00368


“Peking” Duck Pizza – II

Using Duck Confit or purchased Peking Duck or Roast Chicken

by: M.B. Einerson

 Inspiration from California Pizza Kitchen and many others

 Servings: 2 to 4

Pizza Crust

  • 2 Naan flatbreads (any flatbread or pre-made pizza crust will do) or you can make the crust using the recipe found in “Peking” Duck Pizza – I

Pizza Topping

  • One duck leg confit or approximately ¼ lb. Peking duck or roasted chicken (if you are using chicken you will need a tsp. or so of oil)
  • ¼ of a medium onion, cut into slivers
  • ¼ lb. mushrooms-shiitake are my preference, thickly sliced
  • 1 ½ tsp. balsamic vinegar
  • 1 ½ tsp. honey
  • 1 Tbs. hoisin sauce
  • 1 tsp. soy sauce – I use low sodium
  • 1 to 2 Tbsp. hoisin sauce
  • ¾ to 1 cup coarsely grated mozzarella or Manchego cheese
  • ½ to ¾ cup sprouts-sprouts or pea shoots. Onion sprouts are my favorite but alfalfa, mung bean or any micro-green will be great as well.

Pre-heat oven and pizza stone if you have one to 425° F

Remove all duck fat and meat from the duck leg confit and coarsely chop.  In a medium skillet, heat the duck (fat included) and the onion until the onion just starts to soften.  If you are using chicken, you will need to add tsp. or so of oil to the skillet.   Add the sliced mushrooms.  Cook until the mushrooms are just beginning to soften a bit.  Stir in the balsamic vinegar, honey, hoisin sauce and the soy sauce.

Assemble & Bake the Pizza using Naan

Spread the Naan, other flatbread or pre-baked pizza crusts with hoisin sauce.  Top with the duck filling and sprinkle with the grated cheese.  Place the pizza on the hot stone or on a baking sheet and bake until the cheese is melted and starting to brown.  This should take approximately 5 to 10 minutes.

Remove the pizza (s) from the oven and top with sprouts.

Enjoy!


To Assemble & Bake the Pizza using Quick Flatbread Pizza Dough – see post “Peking” Duck Pizza – I.


“Peking” Duck Pizza – I

DSC00341

In our family the follow-up to Duck Dinner could be “Peking” Duck Pizza.  It started back in the days when I was ordering duck product from D’Artagnan and tended to order extra items enough to make the shipping cost worth while.  One of the things I tried was their Smoked Magret Duck Breast.  It was tasty alone but seemed like it would be a great pizza topping – probably because we lived in Southern California at the time when thanks to Wolfgang Puck and California Pizza Kitchen founders, Rick Rosenfield & Larry Flax , pizza toppings were moving beyond tomato, cheese and pepperoni!

I don’t remember the “recipe” from the first time I made Pizza with that Smoked Magret years ago.  As with many things that have appeared on our table over the years, it was likely done on the fly with ingredients I had on hand and never recorded except in the memory of those who ate it.  When I was discussing items that should make their way to this blog with my daughter, “Peking” Duck Pizza was one that came up early.

So here we go.  I’m going to give you two versions of “Peking” Duck pizza that pay homage to the creations of Puck and the early days of CPK.  The first in this post uses leftovers from Duck Dinner and a quick flat bread like pizza crust that you can make in almost the time it takes delivery to arrive.   The second, in a following post will use another great duck product (duck leg confit) with pre-made Naan for the crust.  So if you don’t have Roast Duck leftovers or are short on time, fear not.  You will be able to enjoy a “Peking” Duck pizza too.

NOTE if you are making this you will want to do it within a couple of days following your Duck Dinner.  If that’s not going to work into your schedule, freeze  the duck breast and sauce and use them within a couple of weeks.   The duck fat will keep well in either the refrigerator or freezer for much longer.

“Peking Duck” Pizza – I

The  crust ingredients are simple – All-purpose flour, yeast, whole milk  (or non fat milk with a bit of olive oil) and salt.  This will make either two 10 inch thin crust pizzas or one thick crust pizza,  you choose.

DSC00308

I buy my yeast in one pound packages from King Arthur Flour or Sur la Table.   One pound of SAF-instant yeast  is $5.95 and if kept in the freezer will last 5 years-so even if you don’t bake a lot it’s a good deal.  A triple packet of yeast was $1.69 last time I checked, so the difference is paying $0.37 per ounce vs. $2.25 per oz.   If a pound still seems like it’s too much for you, you can buy a 4 oz. jar of the same yeast that is in the little packets for around $1.55 per ounce.

No scale, no worries-the 1/2 oz. you will need is 4 tsp.

DSC00310

Room temperature milk-you don’t need to wait for it to warm up.  Just give it a nudge in the microwave (10 to 15 seconds should do).   Just make sure the temperature is not above 115°F when you add the yeast.

DSC00311

Stir the salt into the flour

DSC00312

Add the milk/yeast mixture to the flour and stir until a dough is formed.  It will seem dry at first, but keep stirring.  It just takes a bit of time for the flour to absorb the liquid.

DSC00313 DSC00314

When most of the flour has been stirred you should be able to pull the dough into a ball with your hands.

DSC00315

Place the rough ball onto a lightly floured surface and knead slightly, until it’s smooth.  If you are planning to make thin crust pizzas, divide the dough into two balls now.

DSC00316

Place the dough ball(s) into a lightly oiled bowl and cover with plastic wrap or one of those fancy silicone bowl covers I love to use!  Put the bowl in a warm place for 30 to 45 minutes.  I find that my microwave which sits on top of my oven  is a perfect spot.

If you want to split the work up into two days.  You can make the dough ahead and refrigerate for a day.  Just make sure to remove to from the refrigerator for 45 prior to rolling. 

DSC00317 DSC00318

There are several ways to bake your pizza.  If you have a pizza stone that’s great, but if not a large cast iron skillet makes a great pizza baking vessel.  If you don’t have either of those a pizza pan or cookie sheet will do (you just won’t get as great a crust).  In any case, pre-heat your oven to 425° with your pizza stone or cast iron skillet inside.

While the dough rises and your oven pre-heats you can work on your topping- using all of the great scraps from your Duck Dinner. The only new ingredients you need are some mushrooms, sprouts and cheese along with some Hoisin Sauce and Soy Sauce

DSC00323

Thickly slice the mushrooms (I like shiitake but any fresh mushroom will do) and coarsely chop the duck (don’t toss that skin-it will crisp up and add great flavor to your pizza) 

DSC00326 DSC00327

Start with the mushrooms and a bit of duck fat in a medium size skillet over medium heat.  Once the mushrooms have started to soften and brown, add the duck and cook until the duck starts to sizzle a bit.

DSC00328 DSC00331

Stir in the hoisin and soy sauce (I use low sodium) and stir until well combined.  Remove from heat.

DSC00334

Roll one of the dough balls into a circle the diameter of your skillet*.   Lucky me, my silicone cover is the perfect template!  It’s not extremely critical however, so wing it if you don’t have something close at hand that is approximately the size of your skillet.

DSC00335

* Instructions for both thick crust and pizza on a stone are in the recipe below.

Remove the HOT skillet from the oven and place your dough in it.  Because it is so hot, it will sear the crust almost immediately, so if you don’t hit center on the first try, you will be able to re-position it easily.

DSC00336

Put the skillet back into the hot oven  and bake for 5 minutes.  Remove from the oven, flip the crust over and spread with another Tbs. of hoisin

DSC00337

Top with the duck/mushroom filling, leftover roast onions (if you managed to save them) and grated cheese.  If you like loaded pizza use all of them on this crust, if you want two less loaded pizzas use only half and repeat the process for a second pizza after you’ve finished this one!  I made this one “loaded” and then made a simple hoisin sauce, cheese and sprout pizza with the second crust.   The other option is to use up some of the other bits you have hanging about in the refrigerator or pop the second crust in the freezer for another day ;-).

DSC00338 DSC00339

Back into the oven for 5 to 10 minutes for a thin crust pizza.

DSC00340

Using a big spatula, lift the pizza from the skillet onto a cutting board and top with the sprouts of your choice.   The original version from CPK was topped with crispy fried wonton strips and slivered scallions but I like the freshness of the sprouts and the crust has plenty of crunch factor for me.

DSC00342

That’s a pair of kitchen shears you see on the edge-my favorite tool for cutting pizza.DSC00343

Yum!  The only thing it needs is a nice crisp beer to balance the sweetness of the hoisin and the richness of the duck.

DSC00345

Enjoy!

M.B.


“Peking” Duck Pizza – I

Using Leftovers from Roast Duck with Balsamic Pan Sauce

by: M.B. Einerson

 Inspiration from California Pizza Kitchen and many others

Servings: 2

Quick Flat Bread Pizza Dough – makes two 10 inch thin crust pizzas or one thick crust

  • ½ oz. (2 packets or 4 tsp.) active dry or instant yeast
  • ½ cup whole milk, room temperature or ½ cup non-fat milk plus 1 tsp. olive oil
  • 1 cup plus 3 Tbs. all-purpose flour, plus more for rolling
  • 1 tsp. kosher salt

Pizza Topping –amped up leftovers from Roast Duck Breast with Balsamic Pan Sauce

  • 1 tsp. duck fat
  • ¼ lb. mushrooms-shiitake are my preference, thickly sliced
  • ¾ to 1 cup coarsely chopped duck, including skin and fat layer
  • 1 Tbs. pan sauce or 1 ½ tsp. balsamic vinegar plus 1 ½ tsp. honey
  • 1 Tbs. hoisin sauce
  • 1 tsp. soy sauce – I use low sodium
  • 1 Tbsp. hoisin sauce
  • 2 to 3 Tbsp. onions left from making the pan sauce
  • ¾ to 1 cup coarsely grated mozzarella or Manchego cheese
  • ½ to ¾ cup sprouts-sprouts or pea shoots. Onion sprouts are my favorite but alfalfa, mung bean or any micro-green will be great as well.

Quick Flat Bread Pizza Dough

Stir the yeast into the room temperature milk.  Room temperature milk-you don’t need to wait for it to warm up.  Just give it a nudge in the microwave (10 to 15 seconds should do).   Just make sure the temperature is not above 115°F when you add the yeast.

Stir the salt into the flour

Add the milk/yeast mixture to the flour and stir until a dough is formed.  It will seem dry at first, but keep stirring.  It just takes a bit of time for the flour to absorb the liquid.

When most of the flour has been stirred you should be able to pull the dough into a ball with your hands.

Place the rough ball onto a lightly floured surface and knead slightly, until it’s smooth.  If you are planning to make thin crust pizzas, divide the dough into two balls now.

Place the dough ball(s) into a lightly oiled bowl and cover with plastic wrap or a clean towel. Put the bowl in a warm place for 30 to 45 minutes or until nearly doubled in size.  If you want you can make the dough a day ahead and refrigerate.*

Pre-heat your oven to 425° with your pizza stone or cast iron skillet inside.

Pizza Topping

In a medium skillet, heat the duck fat and add the sliced mushrooms.  Cook until the mushrooms are just beginning to soften.  Add the chopped duck breast and heat until the duck is starting to sizzle a bit.  Stir in the left over pan sauce or balsamic/honey mixture and the soy sauce.  Remove from heat and set aside while you prepare the pizza dough.

Assemble the Pizza – Cast Iron Skillet

Roll the dough ball(s) or into a size the diameter of your cast iron skillet.  Carefully remove the skillet from the oven and place the dough in the pan.  Don’t worry if you don’t hit the center.  The pan should be sufficiently hot to sear the dough enough so you can position it in the center.  Put the skillet back into the oven and bake for 5 minutes.

Remove the skillet from the oven and using a pair of tongs, flip the crust over.  Spread 1 Tbs. of hoisin sauce over the surface of the crust.  Top with the duck filling, the leftover onions if you have them and the cheese.  Put the skillet back into the oven and bake.  It will take 5 to 10 minutes if you are making a thin crust (1/2 of your dough) or 10 to 15 minutes if you are making a thick crust pizza.

Remove from the oven and lift the pizza carefully from the skillet with a large spatula.  Top with sprouts.

Assemble the Pizza – Pizza Stone

Roll the dough ball(s) into 10 to 12 inch diameter.   Put a generous sprinkling of cornmeal on a pizza peel.  Place a dough round onto the peel, and shake to make sure it will slide easily.  Spread 1 Tbs. of hoisin sauce over the surface of the crust.  Top with the duck filling, the leftover onions if you have them and the cheese.  Slide onto the hot pizza stone and bake for 10 to 15 minutes depending on the thickness of your crust.  Using the peel, slide the pizza from the oven.  Top with sprouts.

* Remove the dough from the refrigerator at least ½ hour before rolling to bake.  This is the same amount of time you will need to pre-heat the oven etc.


Duck Dinner-Roast Duck Breast with Wild & Brown Rice Risotto

DSC00305

Before I chose Lamb for our Easter feast,  I was thinking Duck Dinner.  Like Lamb,  Roasted  Duck Breast is another of my go to’s for special occasion meals.  For many years it was something I ordered in restaurants because I thought it was tricky to cook it well at home (not sure how I got that idea in my head)! Then I discovered how easy it was and it’s been on our festive list ever since.

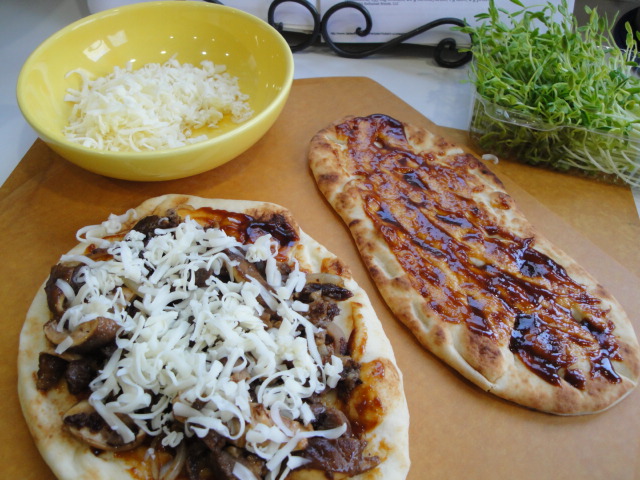
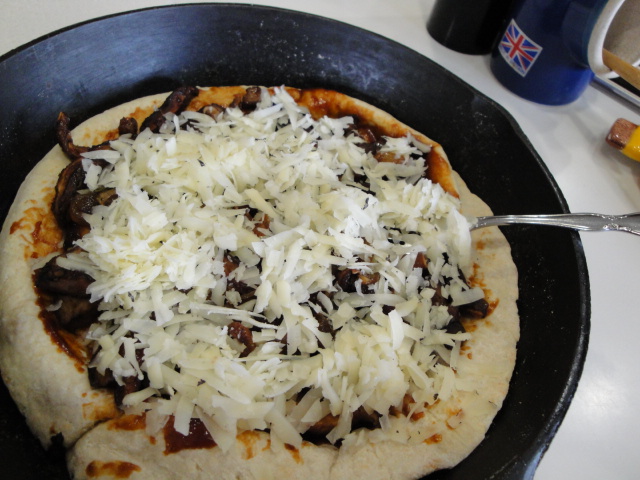
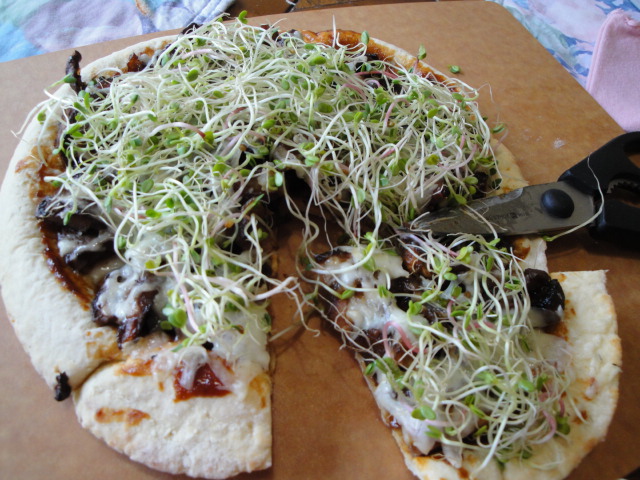
There was a point in time when great duck wasn’t so easily found in Columbus and I ordered it from that great purveyor of specialty meats-D’Artagnan.   I like the fact that they are committed to free-range, natural production and sustainable, humane farming practices.   And as with the great meat I get from Bluescreek Farms, the quality shows up on the fork.  The shipping cost was a bit prohibitive, so it only made it to our table occasionally.  However, as Columbus became more of a food town I was able to find great duck  at North Market Poultry and Game in the North Market and then low and behold D’Artagnan fresh Margret Duck breast showed up in the meat case at Giant Eagle Market District stores.  At $10.99 per pound it may seem a bit pricey for poultry, but one 1 lb. duck breast will easily serve 3 to 4 people as part of a Duck Dinner or 2 with leftovers for making  “Peking” Duck Pizza (guess what next weeks post will be about).   And then there’s that liquid gold,  duck fat that comes as a by product of properly cooking a duck breast.

So here we go!  I think of this recipe as Scarborough Fair Duck as it utilizes that classic combo of Parsely, Sage, Rosemary and Thyme.   Unlike the tale of the ballad however, the task of cooking this dish is the exact opposite of impossible.  Also unlike the ballad which is English, the recipe has it roots in Italian cuisine and comes from Academia Barilla with just a couple of little tweaks.

 To pair with the Duck I often go with some type of Wild Rice as a side dish.  Somehow in my mind Duck and  Wild Rice go together.  Perhaps it’s from watching ducks swimming around on the lakes of Northern Minnesota where the best wild rice is grown.   The recipe here takes a slightly different tack on cooking a combo of rice types.   The inspiration for the recipe comes from a Gourmet 2002 recipe for Wild Rice and Toasted Almond Pilaf.  After making it once, as written and finding it a bit lacking,  I took some of the suggestions by some of the 20 other reviews and punched it up a bit in flavor and changed the cooking method from pilaf to risotto technique.   The cooking time wasn’t reduced much from the original (natural wild and brown rices just take time) but I preferred the finished texture. It’s not exactly like a classic risotto from Arborio rice because the starches are so different,  but pretty darn tasty.

Now the only thing to do before we start cooking is to stream some Simon & Garfunkel to put us in a Scarborough Fair frame of mind.

The Rice

We’ll start with the rice as it will take the longest time to prepare.  I’m using Wild Rice and Converted Brown Rice.  I’ve also made this dish with one of the Rice blends that are showing up in the bulk sections of many grocery stores these days.  It was very pretty but I like the texture and flavor of the simple wild and brown best.

 DSC00270

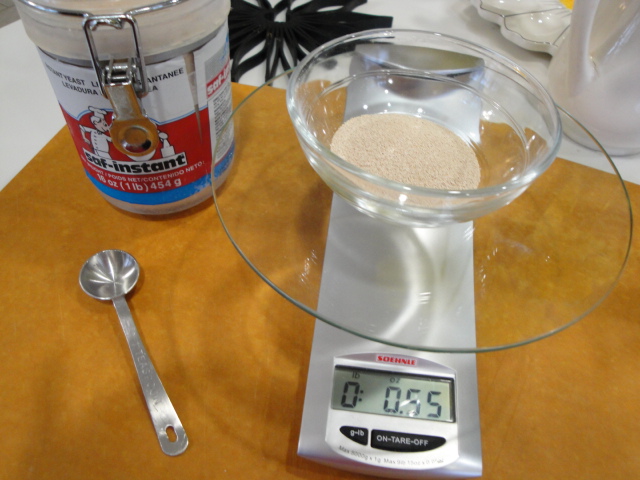
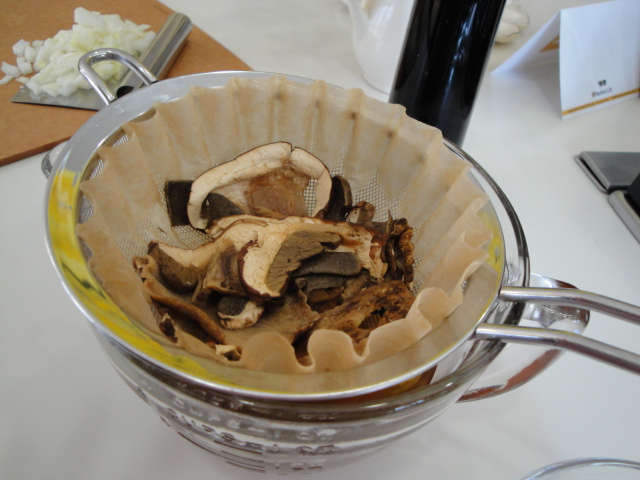
Start by soaking the dried porchini mushrooms in boiling water.  I’m weighing them because I also buy these from the bulk section and depending on the size of pieces you have, a volumetric measurement would be off.  But it’s not a critical amount, so if you don’t have a scale yet go for what seems right to you.

DSC00272DSC00275

Let the mushrooms soak for 10 to 15 minutes.  While the mushrooms are soaking you can work on dicing the onions and mincing the garlic.

After soaking,  the mushrooms should be soft and pliable and the soaking water a rich brown color.  Transfer them to a mesh strainer lined with a coffee filter.  If you don’t have either of these, no worries.  Simply lift the mushrooms out with a slotted spoon or fork.  The goal is to have grit free mushrooms and mushroom “stock” . 

DSC00276

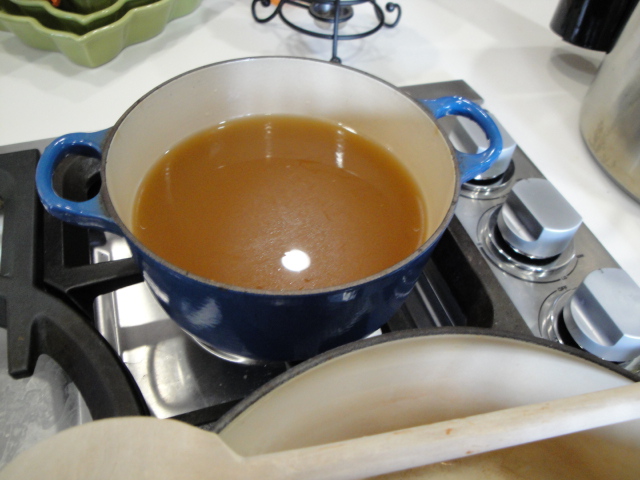
Chop the mushrooms and add the mushroom “stock” and the chicken broth into a small pot over low-medium heat

DSC00277DSC00279

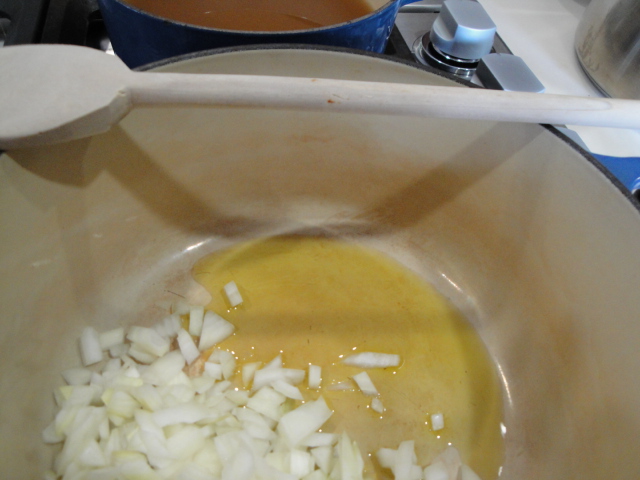
Now your ready to start cooking.  Heat olive oil in medium size heavy pot.  Add chopped onions and cook until the onions are soft and translucent.

DSC00280

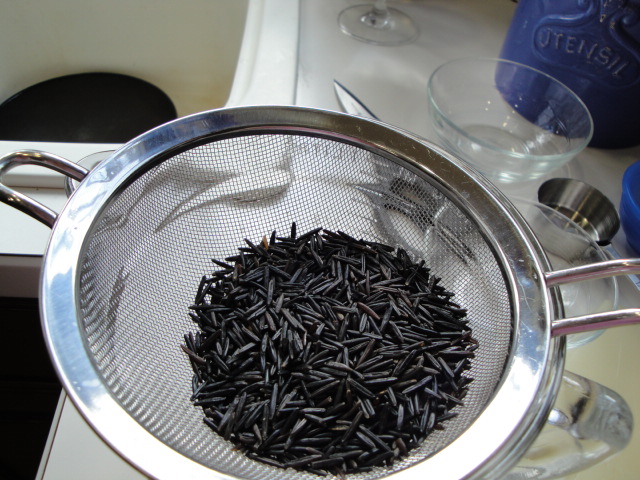
While the onion is cooking, rinse the wild rice.

DSC00278

Add the wild and brown rice to the onions and cook, stirring until the rice is well coated with oil.

DSC00282

Add the chopped mushrooms and minced garlic and cook for a couple of minutes.  Turn the burner to low.

DSC00283

Add a ladle full (1/2 cup) of hot stock to the mixture and stir until the liquid is nearly all evaporated.  Continue cooking and stirring and adding stock in this manner until the rice is tender but not mushy.  You don’t have to stir constantly, but if you can put a glass of wine in someone’s hand and assign the task to them, go for it!  It will take a good 45 minutes or so to cook the rice.  When you have added nearly all of the broth, add salt and pepper to taste and check the rice for doneness.  If it still seems a bit underdone continue adding additional hot water in ½ cup increments.  

DSC00284

Once you’ve achieved the desired tenderness, stir in the butter and cheese and taste again for salt.   Wow-sorry for the blur.  The is the first time I’ve attempted to blog and put dinner on the table at the same time ;-)!  You’ll be stirring this in as the duck is coming out of the oven if all goes according to plan.  

DSC00300


The Duck

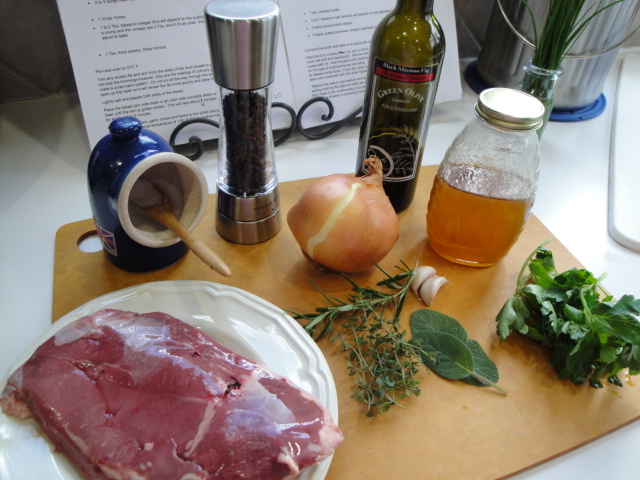
A simple set of ingredients and yeah it’s time to put in some fresh herbs by my front door. They won’t mind if I snip a few leaves for dinner.

DSC00286DSC00266

Pre-heat the oven to 375°F.  This is going to come together fast.

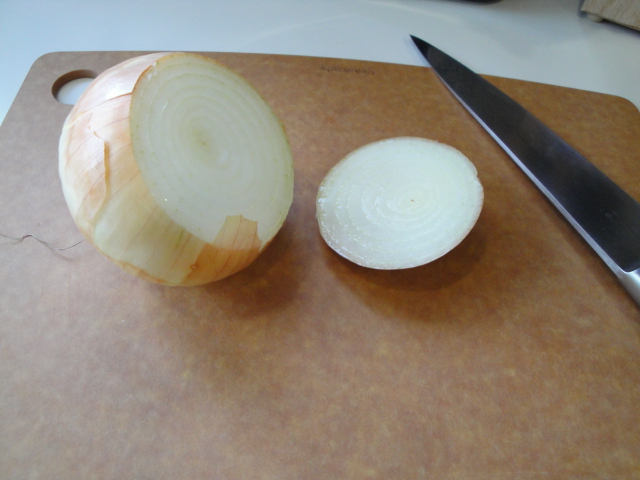
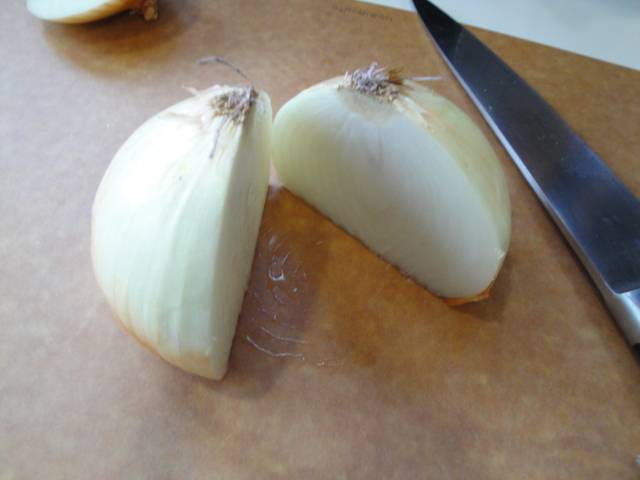
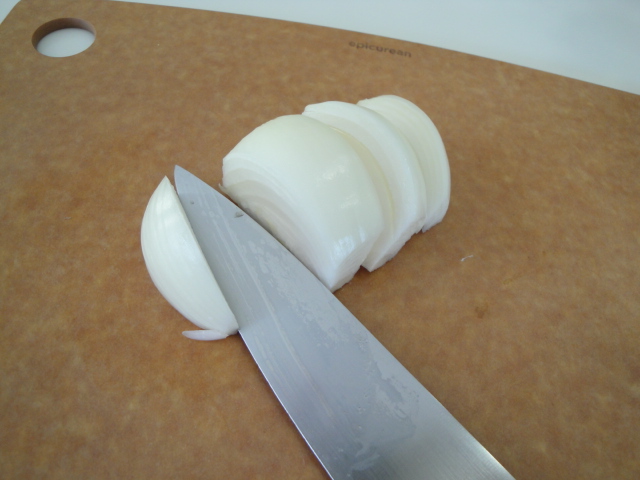
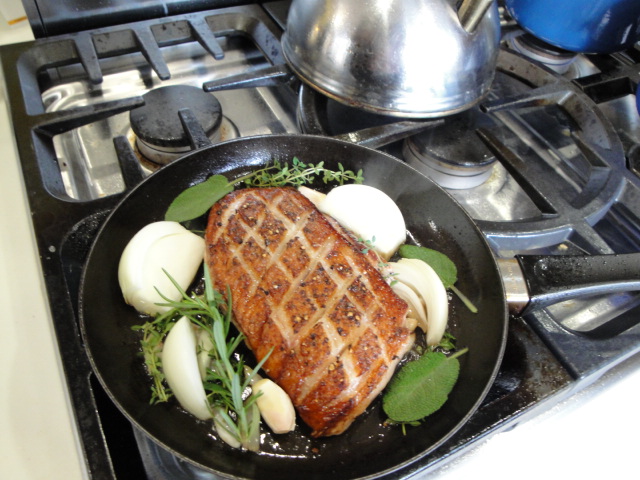
Cut the onion half into 4 pieces.

DSC00288

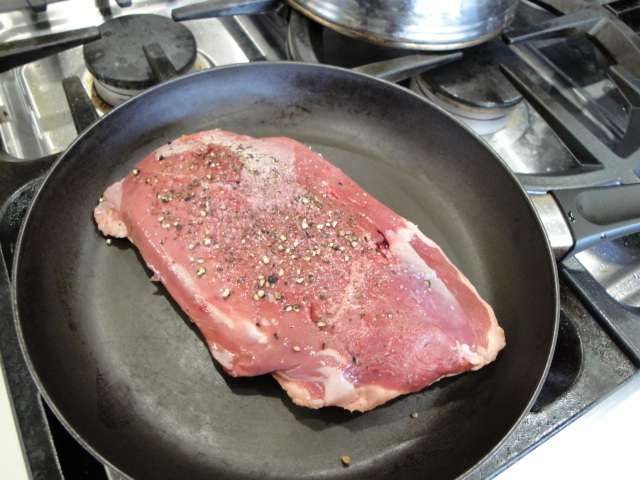
Lightly salt and pepper both sides of the duck breast and carefully score the skin to make a cross hatch pattern.  Be careful not to cut all the way into the flesh.  You just want to open up the fat layer so it will render more quickly and allow the meat to cook more evenly.

DSC00290

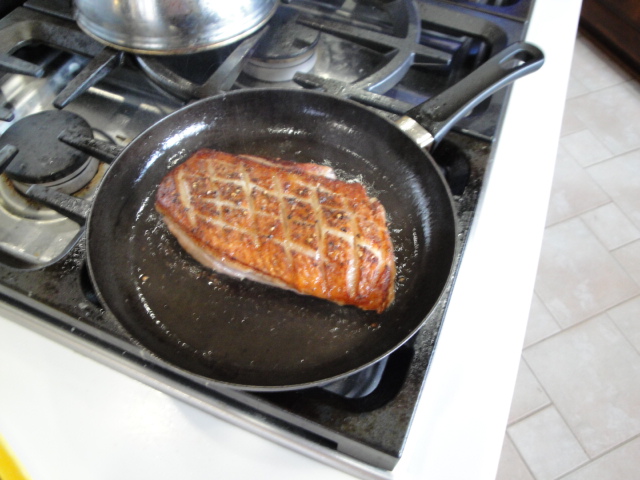
Place the duck breast skin side down in an oven safe skillet and place over medium-high heat and sear until golden brown.  This will take about 4 to 5 minutes.  

DSC00291

Flip the breast over, turn the heat up a bit and sear on the flesh side for another couple of minutes.

DSC00293

Scatter the onion, garlic (whole cloves with outer skin on), and herbs around the breast and put into the pre-heated oven for 15 to 20 minutes.  

DSC00294DSC00295

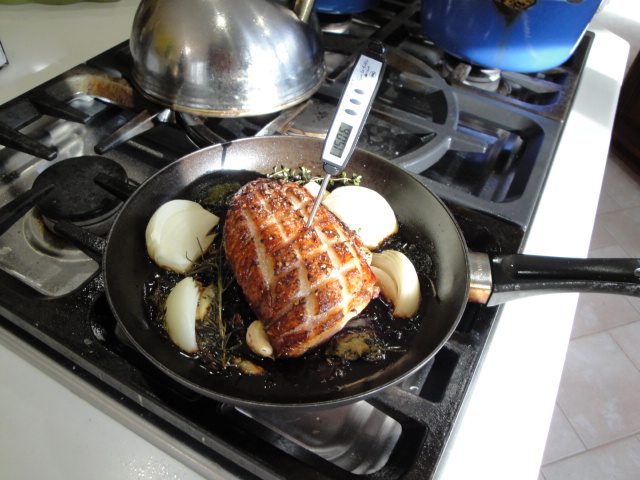
Check the internal temperature.  135° to 140° F is what you’re looking for if you want medium-rare.  

The official food safety word from the USDA is that duck breast should be cooked to 165°F.  If you cook a duck breast to 160°F (assuming that carryover cooking will continue to raise the temperature to 165°F as the duck rests), it will be medium well—safe to eat and maybe a little pink in the center, but drier than I like.   When cooking meat from a purveyor like -D’Artagnan, I’m comfortable with medium-rare.

DSC00296

Remember the skillet handle is very hotput a pot holder, dish cloth or one of those fancy pot handle covers on it.

Remove the breast to a warm plate and tent with foil.  Spoon out the excess duck fat and save for another day.  Press on those garlic cloves to extract all of that yummy flavor.

DSC00297DSC00298

Add the honey and balsamic vinegar to the skillet (today I’m using a  Black Mission Fig Balsamic I got for Christmas)

DSC00299

Heat until the sauce is slightly reduced and syrupy.  The amount of time will depend on the age and thickness of the balsamic you are using.  Strain the sauce by placing it in that fine mesh strainer you’ve been using for preparing this entire meal.  Press down on the onions and herbs to extract all of their goodness.

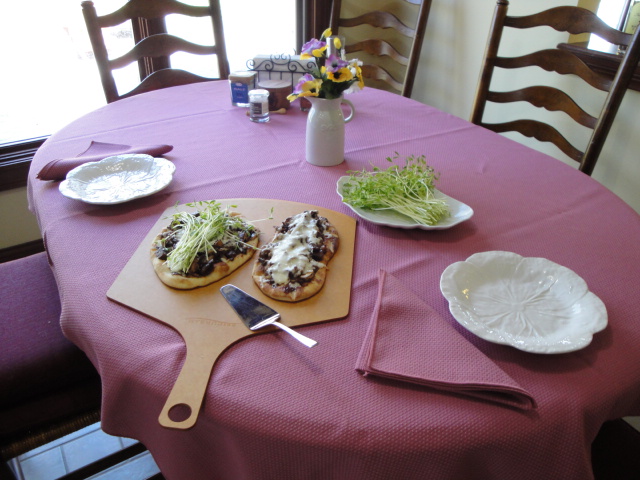
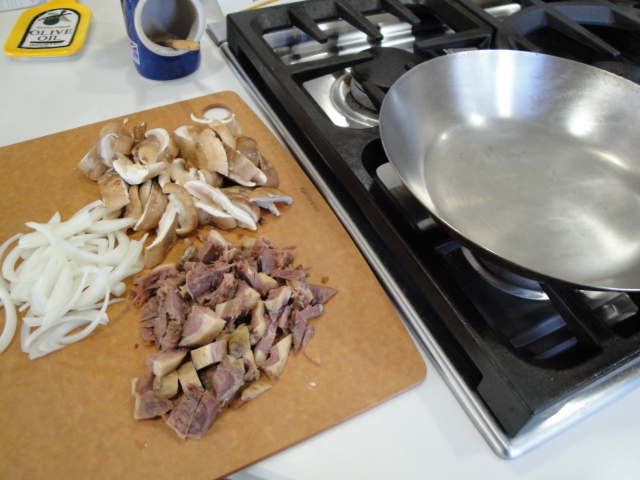
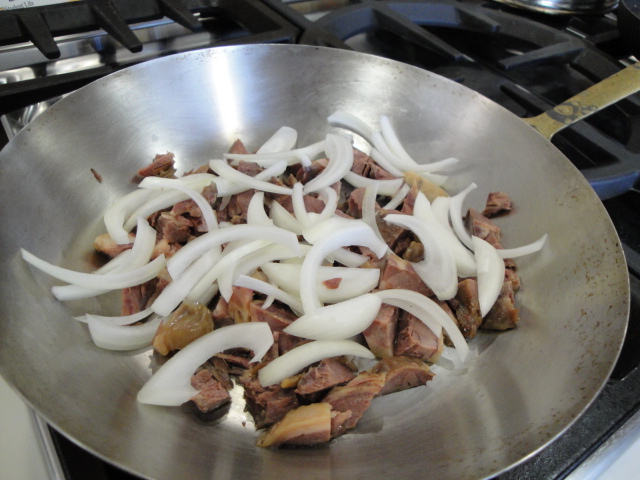
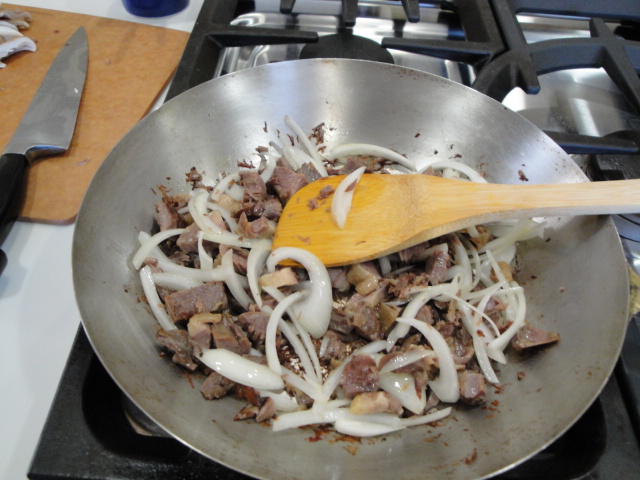
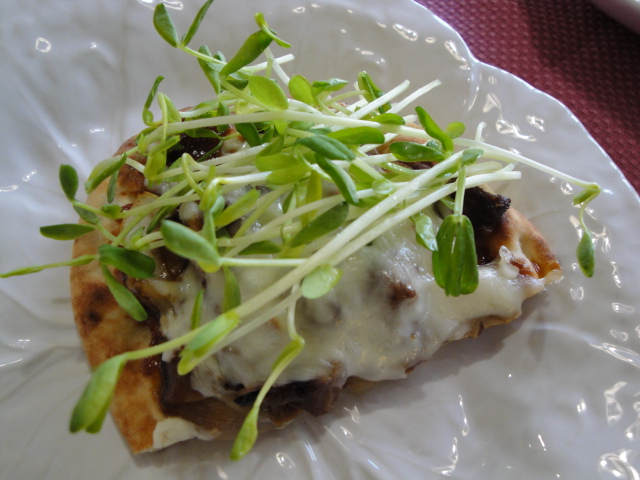
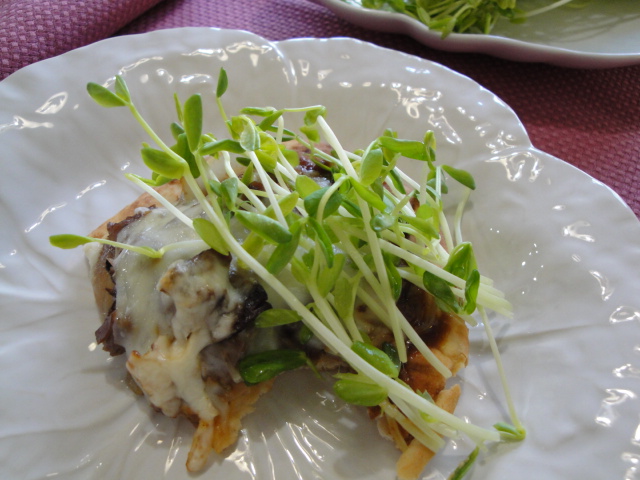
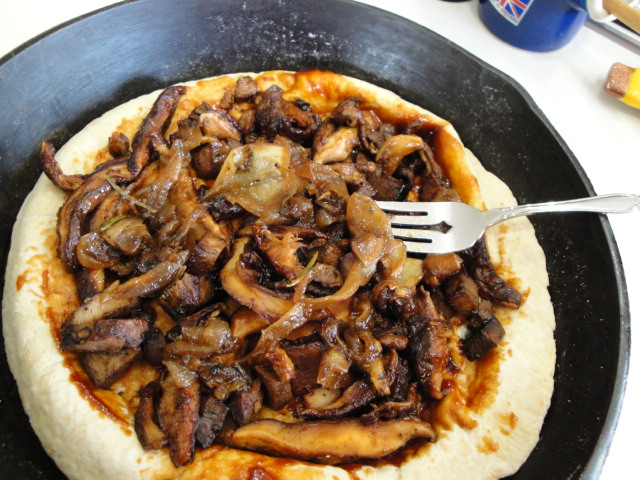
In the original recipe the stuff in the strainer would be discarded, but those onions roasted in duck fat are delicious, so feel free to pick out the herbs and send the onions to the table (if you can keep you family from eating them immediately) or save them for use  in another recipe- i.e. pizza topping!

 DSC00302

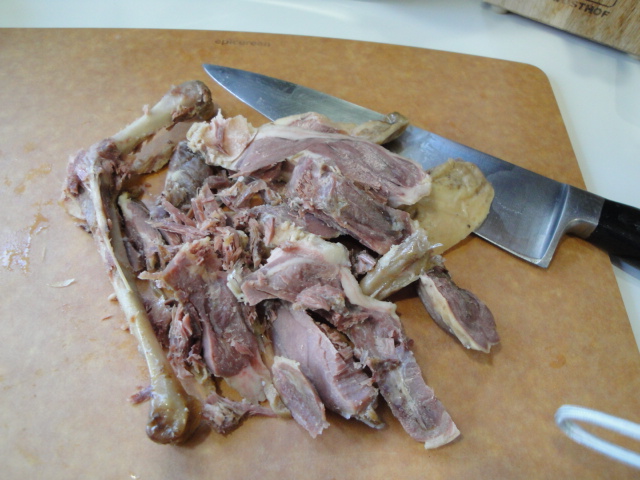
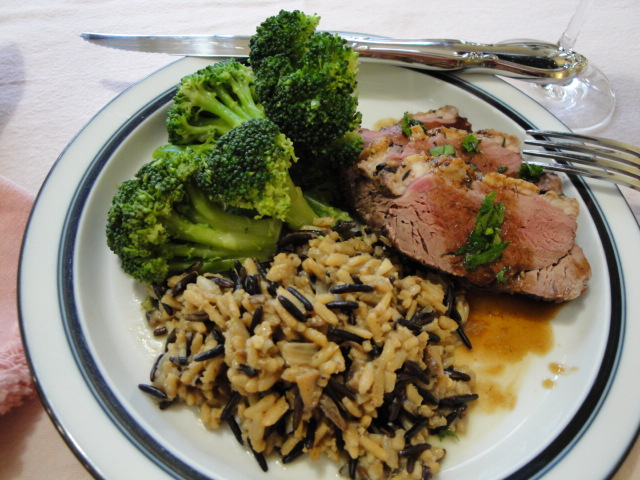
Remove to rested breast from the foil and slice diagonally.  

DSC00303

Arrange on warm plates and drizzle with the pan sauce.  I’d planned to serve this with steamed asparagus, but it’s still a bit early here in Ohio for local stuff and the imported at the market was sad.  So microwave steamed broccoli it is.

DSC00321

Enjoy!

M.B.


Wild & Brown Rice Risotto Style

by: M.B. Einerson

 Adapted from Wild Rice and Toasted Almond Pilaf – Gourmet March 2002

 Servings: 4

  •  5 oz. dried porcini mushrooms reconstituted in 2 cups boiling water
  • 2 cups chicken or vegetable broth
  •  1 Tbs. olive oil
  • ½ medium onion, finely chopped
  • ½ cup wild rice – rinsed under cold running water and drained
  • ½ cup brown rice
  • 1 clove garlic, minced
  • 1 tsp. unsalted butter
  • ½ to 1 teaspoon salt (amount will depend on the saltiness of the broth you are using)
  • Freshly ground black pepper
  • Freshly grated parmesan cheese (optional) or ½ cup toasted almonds

Soak the mushrooms in boiling water for 10 to 15 minutes.  Once the mushrooms are soft and the liquid is a golden brown color, strain the mushrooms in a fine mesh strainer lined with a coffee filter or paper towel.  Coarsely chop the mushrooms and set aside.

Combine the mushroom soaking liquid and the chicken broth in a sauce pan and bring to a low simmer.

Heat the oil in a heavy 3 qt. pot or Dutch oven over medium-high heat.  Add the onion and cook until soft and translucent.  Add the wild and brown rice and cook, stirring until the rice is well coated with oil.  Add the garlic and mushrooms and cook for 2 minutes.

Reduce the heat to low-medium and stir in a ladle full (approximately 1/2 cup) of hot broth.  Continue stirring and adding broth by the ladle full when most of the previous broth has been absorbed by the rice.  You don’t need to stir continuously if you are preparing other dishes to go with this risotto, but if you can put a glass of wine in someone’s hand and assign them the task, go for it!

When you have added nearly all of the broth (45 minutes minimum), add salt and pepper to taste and check the rice for doneness.  If it still seems a bit underdone continue adding additional water in ½ cup increments.

Once you’ve achieved your desired degree of doneness, remove the pot from the heat and stir in the butter and cheese or almonds depending on your preference.  I make the call based on what I’m paring the “risotto” with.


Scarborough Fair Duck

Roast Duck Breast with Balsamic Pan Sauce

by: M.B. Einerson

Barely Adapted from Academia Barilla 

Servings: 2 to 4 (duck breast is very rich and flavorful so a little goes a long way)

  • 1 lb. duck breast removed from refrigeration approximately 30 minutes before cooking
  • Kosher salt and freshly ground black pepper
  • ½ medium yellow onion, quartered
  • 1 to 2 cloves garlic, ends trimmed and at least one layer of skin left on
  • 1 sprig fresh rosemary or ¼ tsp. cracked dried rosemary
  • 2 to 3 fresh sage leaves or ½ tsp. dried whole leaf sage
  • 2 to 3 sprigs fresh thyme or ¼ tsp. dried thyme leaves
  • 1 ½ tsp. honey
  • 1 to 3 Tbs. balsamic vinegar (this will depend on the quality of balsamic you are using-if it’s a young and thin vinegar use 3 Tbs. and if it’s an older, thicker vinegar start with 1 Tbs. and adjust to taste.
  • 1 Tbs. fresh parsley, finely minced

Pre-heat oven to 375° F.

Trim any excess fat and skin from the sides of the duck breast to produce a nice, even shape.  Do not toss the trimmings however, they are the makings of culinary gold.  Carefully score the skin to make a cross-hatch pattern.  Do not cut all the way through the skin into the flesh, you just want to open up this layer so it will render the fat more quickly and allow the meat to cook evenly.

Lightly salt and pepper both sides of the breast.

Place the breast skin side down in an oven safe non-stick skillet  along with any trimmings and place over medium-high heat.  Sear until the skin is golden brown.  This will take 4 to 5 minutes.  Flip the breast so the skin side is up and turn the heat to high and sear for another 2 to 3 minutes.

Add the onion quarters, garlic cloves and herbs to the skillet and place in the oven for 15 to 20 minutes or to an internal temperature of 135° F (this is medium-rare so if you want it less pink inside roast it longer).

Once the duck is cooked, remove it from the skillet and wrap in aluminum foil to keep it warm and allow it to rest while you prepare the pan sauce.   Remember the skillet handle is very hot-put a pot holder, dish cloth or one of those fancy pot handle covers on it.

Spoon out and save the excess duck fat.  You will want approximately 1 Tbs. left in the skillet. Smash the garlic cloves to get all that good stuff from the center.   Add the honey and balsamic vinegar to the skillet and heat until the sauce is reduced slightly.  The amount of time will depend on the type of balsamic you have chosen.  Strain the sauce by placing it in a fine mesh strainer and pressing down on the herbs and onions to extract all of their goodness.  In the original recipe this would be discarded, but those onions roasted in duck fat are delicious, so feel free to pick out the herbs and send the onions to the table as well or save them for use in another recipe- i.e. pizza topping!

Remove the duck breast from the foil and slice diagonally.  Arrange servings on warm plates and drizzle with the pan sauce and sprinkle with the minced parsley.

Enjoy!

M.B.