Mexico City Enchiladas

When I say “I’m thinking of making a batch of enchiladas.” the first thing my husband says is “Mexico City Enchiladas?”  What last weeks Chicken Enchilada Verdes lack in authenticity, Mexico City Enchiladas make up for in spades.

DSC00438

The source is another of my go to cookbooks – Mexican Cooking by Cynthia Sheer.   It’s one I gave to my then “boy friend-to become husband” for Valentines Day because it had a recipe for Huevos Machaca.  I’m not sure we ever actually tried to make it because nothing could ever live up to the dish as served at Manuel’s Original El Tepeyac  in Boyle Heights, Los Angeles.  If you are ever in LA, it is a place you should try to  visit.  Their claim to fame was the  MANUEL’S SPECIAL BURRITO made with Original Chile Verde Pork It weighed in at 5 lb. and would easily feed a family.   But it was the #9 Machacha dinner that was my favorite.  I loved leaving the line for entry (and there was always a long one) to watch the chef’s sauteeing the shredded beef with  onions, tomatoes, jalapeños, eggs & melted cheddar cheese.  It was their beef that made the dish so unique-aged and air-dried and produced in the northern part of Mexico.  My mouth waters just with the memory.

Even though I never made the Huevos Machaca from Mexican Cooking,  I have made many of it’s recipes and this enchilada is likely the most repeated.   It’s not quite as labor intensive as the Chicken Enclilada Verdes and is certainly a leaner, healthier dish.

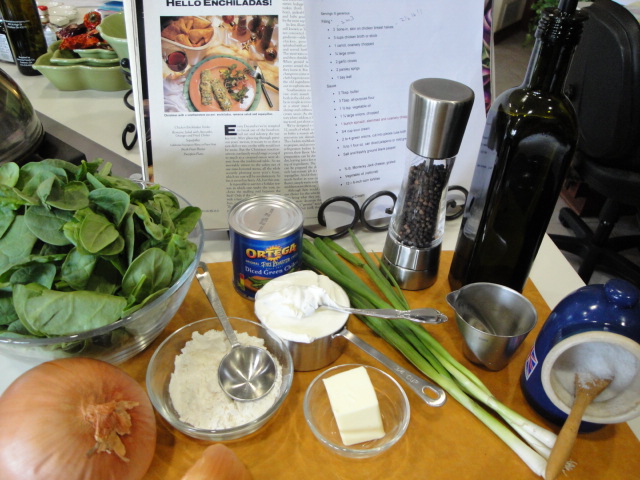
The ingredients are pretty basic-Chicken ,spices, onion & garlic, chilies, tomatoes, tortillas and cheese.

DSC00404

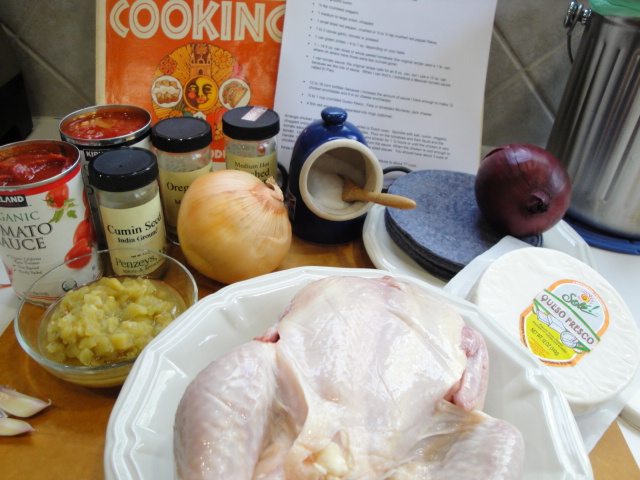
I love that this recipe starts with a whole chicken!  Of course you can start with pre-cut chicken parts (no boneless, skinless please) but a whole chicken is a good deal (often under $1.00/lb) and there is just something satisfying about mastering the art of cutting up the bird.   It doesn’t have to be pretty, you just need to get it into manageable pieces that will cook evenly. 

I like to use both a chef’s knife and a pair of kitchen shears on a cutting board with a trough to catch the juices.

DSC00407

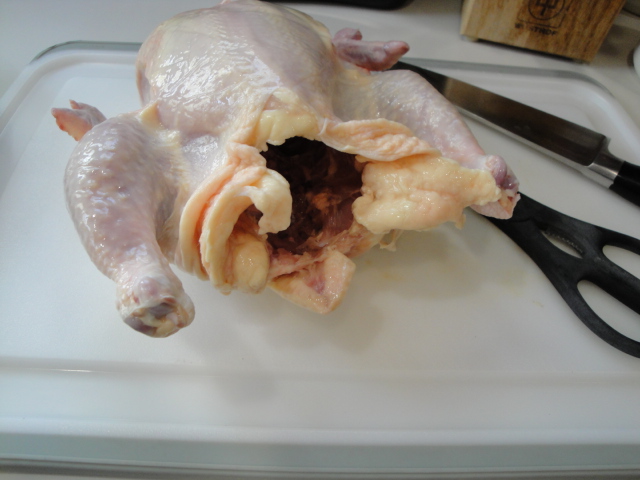
Position the bird with the tail toward you.  Pull the leg/thigh away from the body and slice through the skin and flesh until you get to the joint.  You should be able to pop it and cut through the center of the joint with your knife or the shear.   Repeat this same process with the wing.  

DSC00408DSC00409DSC00410DSC00411

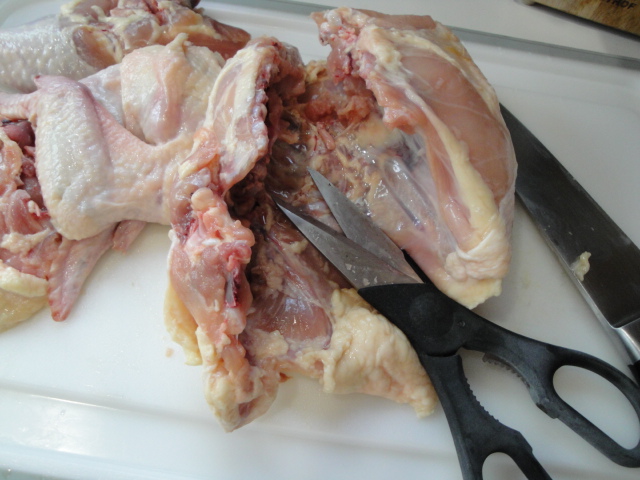
Turn the bird over on its breast and using shears, cut through the fine rib bones on both sides of the back.  This will give you one long piece of mostly bones that will give your dish tons of flavor.  You should be able to see the spot where you can cut it into two pieces.  Then cut along the breast bone/cartilage to cut the breast into two pieces.

Like I said, it doesn’t need to be pretty, it just needs to be cut so it can fit into your pot in one layer.

Sprinkle it with salt, cumin, Mexican oregano and red pepper.

DSC00413

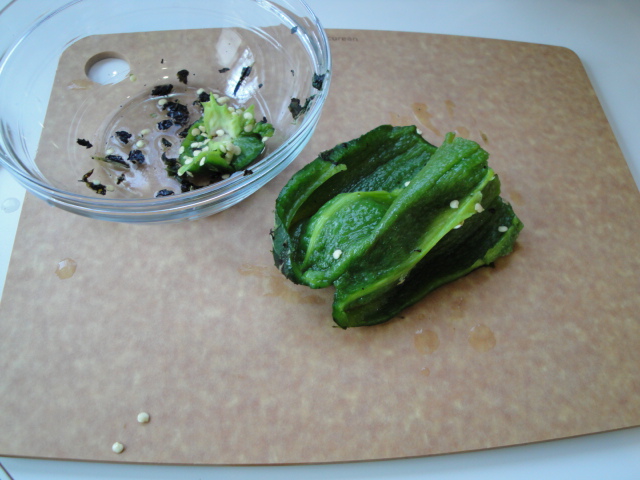
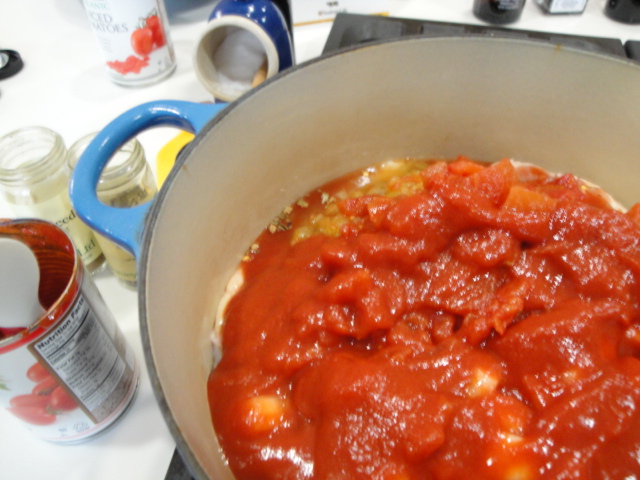
Add chopped onion, fire-roasted chilies

DSC00414

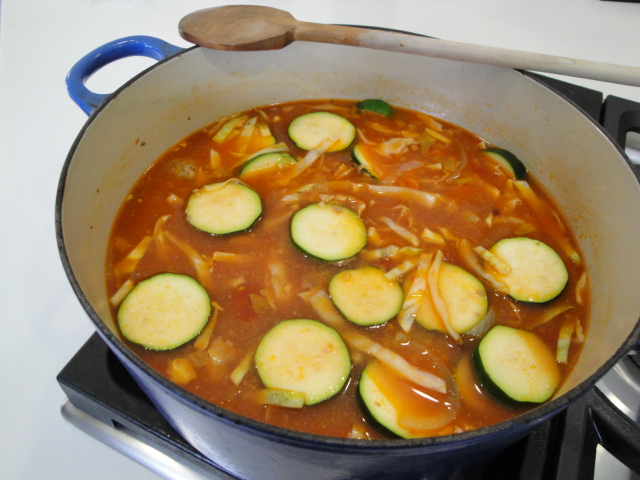
then the tomatoes and their liquid and the tomato sauce.  Bring to a boil, reduce to simmer, cover and cook for 1 1/2 hours or until the chicken is very tender.

DSC00415DSC00418

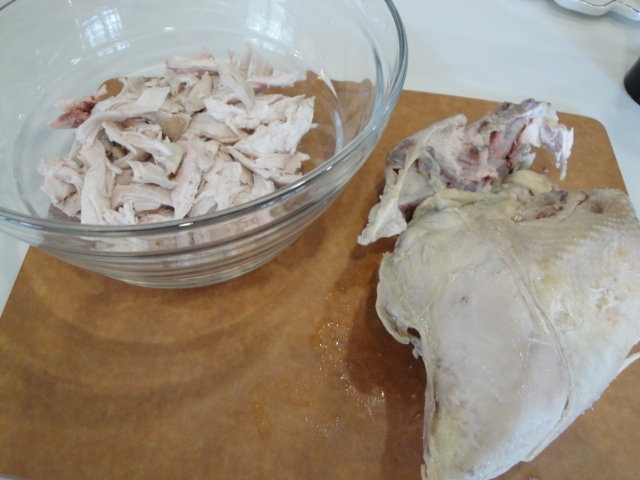
Using a slotted spoon, remove the chicken from the sauce.  I put it into the dish I will use to bake the enchiladas. 

DSC00421DSC00422

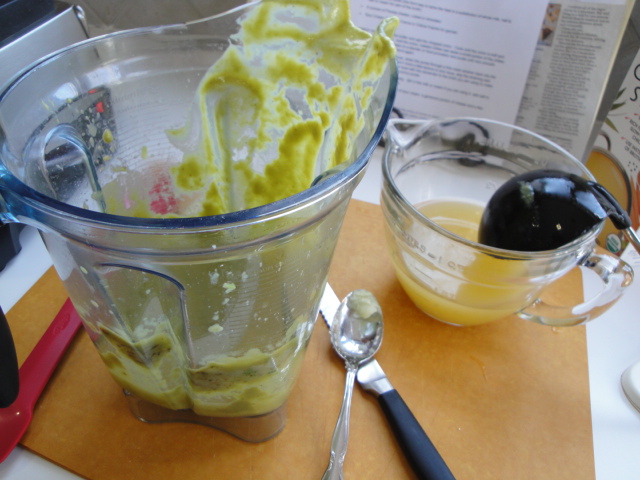
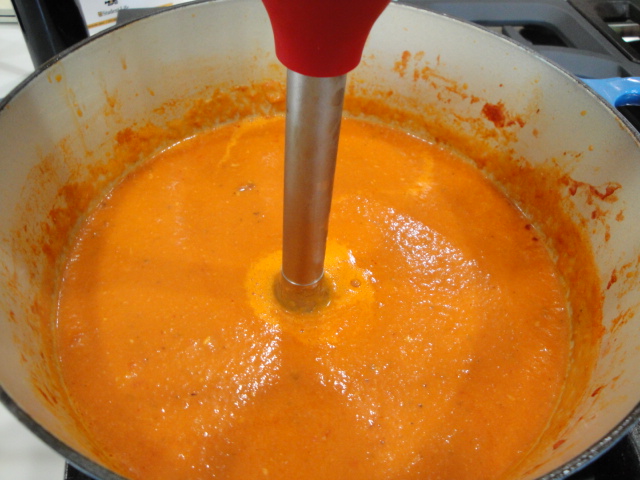
While the chicken is cooling, puree the cooking liquid into a smooth sauce with an immersion blender, food processor or blender.   Be careful if you are transferring to a blender etc. and be especially careful if blending a hot liquid.  I highly recommend investing in an immersion blender!  If the sauce seems very thin at this point, bring it back to a simmer and reduce to the consistency of tomato sauce.

DSC00424DSC00425

 When the chicken is cool enough to handle, remove the skin and bones and shred into bite size pieces – you should have about 3 cups of chicken.  Add the tomato, onion and juice that was clinging to the chicken pieces to the bowl with the shredded chicken.  Then stir in 1/2 cup of the blended sauce.

  DSC00429DSC00430

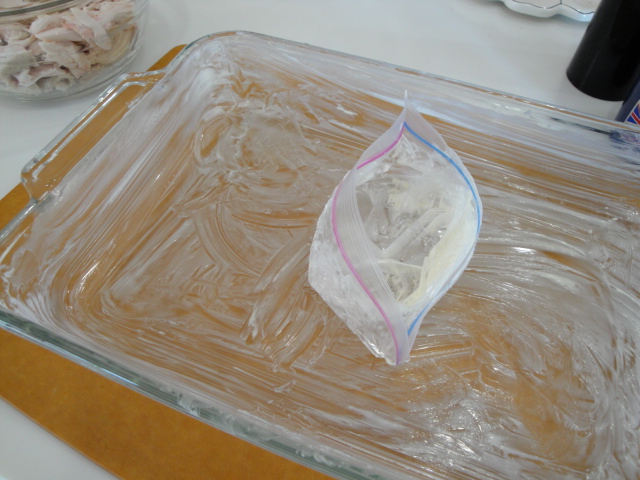
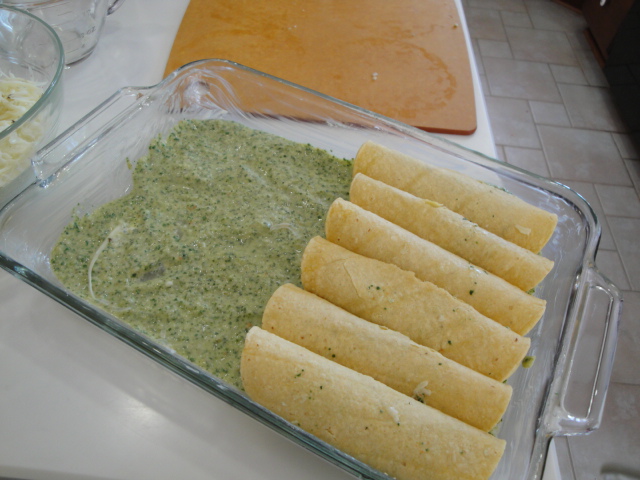
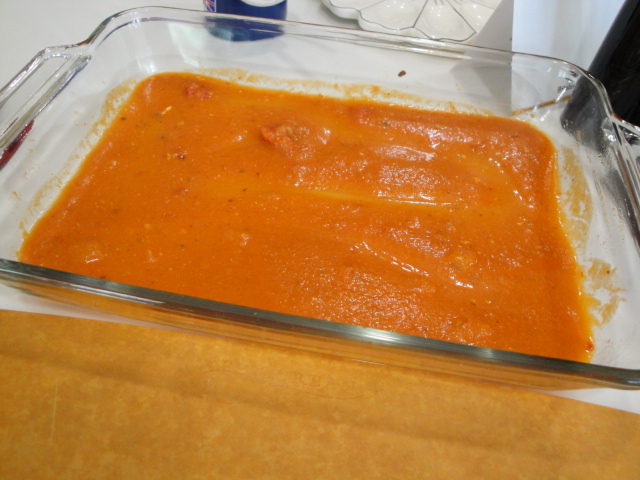
Back to the baking dish that was holding your cooling chicken.  Pour 1 cup of the remaining sauce into it and spread in an even layer.

DSC00431

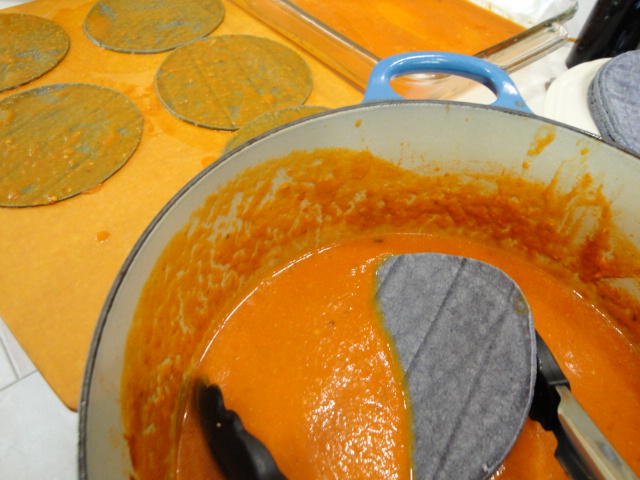
Today I’m using blue corn tortillas because they caught my eye when I was in the Mexican market, but any corn tortilla will do.  If you can find some that are produced near you go for it, they will be much fresher.  

Instead of the traditional method of heating the tortillas in oil prior to filling, I give them a quick dip in the remaining simmering sauce.  Dip them just long enough to make them soft and pliable.  Alternative is to heat a stack of six for 30 seconds or so in a microwave.

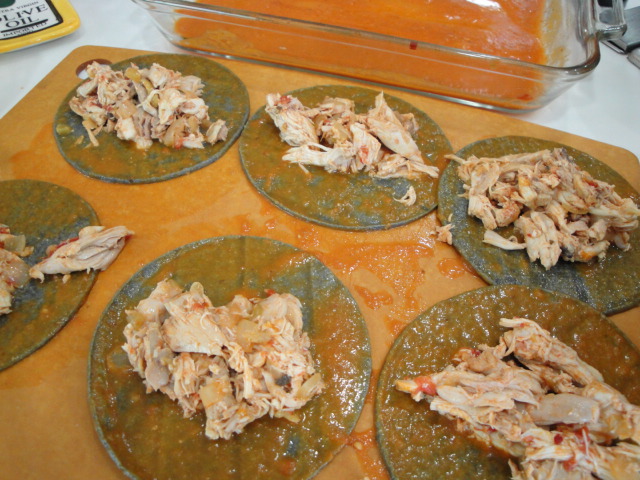
Fill each tortilla with approximately 1/4 cup of the chicken mixture

DSC00432DSC00433

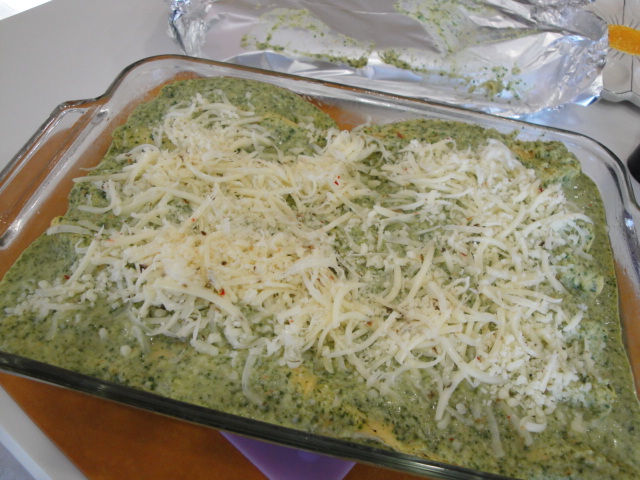
Roll or fold in half and place arrange on top of the sauce in the baking dish. Cover enchiladas with some of the remaining sauce.  I like to keep a bit of extra sauce for serving. Bake, uncovered until bubbly and heated through, 20 to 25 minutes.

DSC00434

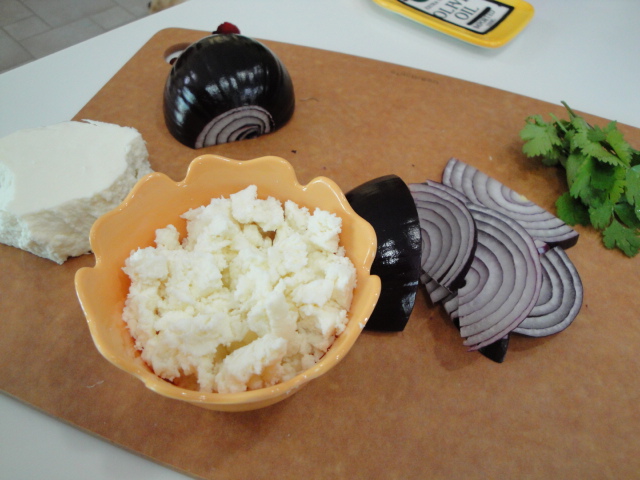
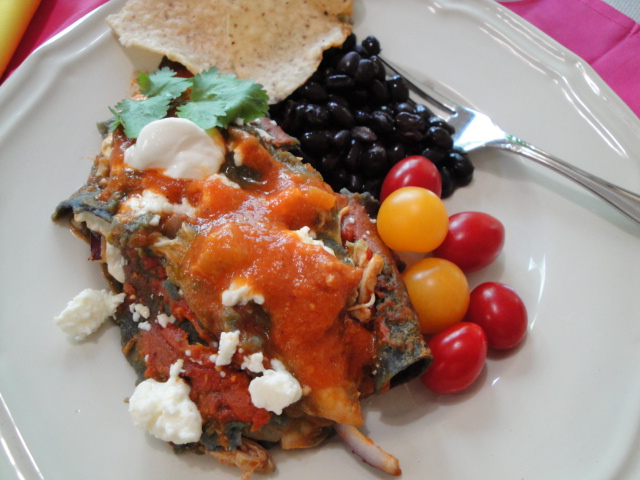
Sprinkle with crumbled cheese and thinly sliced red onion and a little cilantro if you like

DSC00436 DSC00437

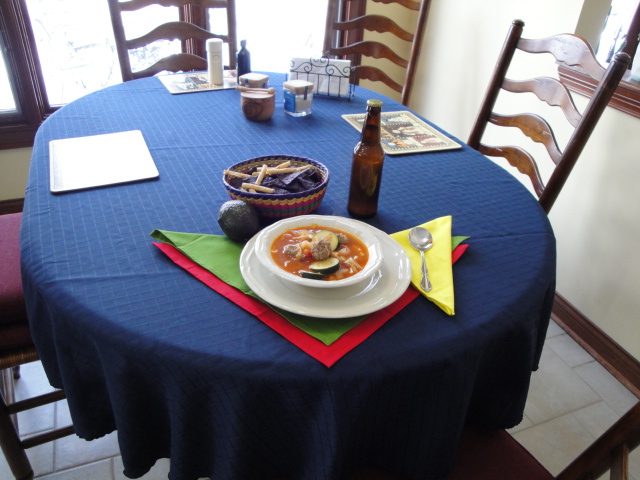
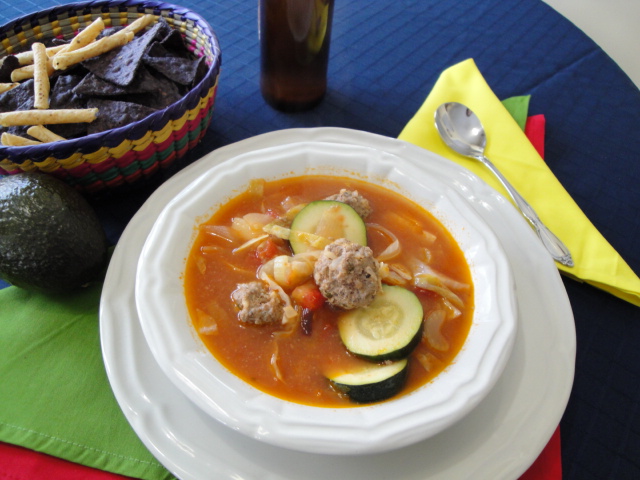
A few chips, some black beans, fresh tomato, avocado, a dollop of sour cream and of course a margarita Yum!!  And best of all I’ve got great leftovers for lunch or dinner tomorrow.  

DSC00440 DSC00441

 Provecho!

 M.B.

Mexico City Enchiladas

(Enchiladas Mexicanas)

by: M.B. Einerson

 Adapted from Mexican Cooking by Cynthia Scheer 

Servings: 6 generous

  • 1 whole frying chicken, cut up or chicken parts 2 ½ to 3 lbs.
  • ½ tsp salt
  • ¾ tsp ground cumin
  • ½ tsp crumbled oregano (Mexican is best)
  • 1 medium to large onion, chopped
  • 1 small dried red pepper, crushed or ¼ to ½ tsp crushed red pepper flakes
  • 1 to 2 cloves garlic, minced or pressed
  • 1 can green chilies – 4 to 7 oz. depending on your taste
  • 1 – 14.5 oz. can diced or whole peeled tomatoes (the original recipe used a 1 lb. can where oh where have those extra two ounces gone)
  • 1 can tomato sauce the original recipe calls for an 8 oz. can, but I use a 15 oz. can because we like lots of sauce. When I can find it, I substitute a Mexican tomato sauce called El Pato.
  • 12  corn tortillas
  • ½ to 1 cup crumbled Queso fresco , Feta or shredded Monterey Jack cheese
  • 4 thin red onion slices, separated into rings (optional)
  • Cilantro (optional)
  • Sour cream, Mexican crema or crème fraiche (optional)
  • Avocado (optional)

Arrange chicken pieces in a layer in a large skillet or Dutch oven.  Sprinkle with salt, cumin, oregano, chopped onion, red pepper, garlic and green chilies.  Pour on the tomatoes and their liquid and the tomato sauce.  Bring to a boil, reduce heat, cover and simmer for 1 ½ hours or until the chicken is very tender.  Using a slotted spoon, remove the chicken from the sauce.

Pre-heat oven to 375° F

While the chicken is cooling, puree the cooking liquid and solids into a smooth sauce with an immersion blender or in a food processor or blender.  No worries if you don’t have one of those power tools, a chunky sauce will taste mighty fine as well.

When the chicken is cool enough to handle, remove the skin and bones and shred into bite sized pieces.  You should have about 3 cups of chicken.  Add any of the tomato, onion and juice that was clinging to the chicken into the bowl with the shredded chicken.

Mix ½ cup of the reduced sauce with the chicken.  Pour 1 cup of the remaining sauce into an ungreased 9 x 13 inch baking dish.

Dip the tortillas one at a time in the remaining hot sauce to soften slightly and fill each with approximately ¼ cup of the shredded chicken.  Roll or fold in half and arrange on top of the sauce in the baking dish.

Cover enchiladas with some of the remaining sauce. I like to keep a bit of extra sauce for serving. Bake, uncovered until bubbly and heated through, 20 to 25 minutes.  Sprinkle with cheese, red  onion and cilantro.  Serve with sour cream and avocado and extra sauce.

Provecho!

M.B.

Chicken Enchiladas Verdes

DSC00398

These Chicken Enchiladas Verdes,  although not high on authenticity,  definitely  fall into the category of favorites at my table and top the scale on luscious .    The original recipe appeared in the December 1988 issue of Bon Appetit and sadly to say cannot be found on either the Epicurious or Bon Appetit sites today.  What it lacks in authenticity it makes up for in solid comfort.  So with a nod to Cinco do Mayo (yes once again I’m blogging and making dinner at the same time) I give you Chicken Enchiladas Verdes!

Like many recipes of its type, lasagna included, it is a recipe that can be made in stages so that the cook can enjoy it for dinner without spending the whole day in the kitchen.  You could also take some short cuts and use a rotisserie chicken for the filling and stock or broth without the addition of the veggies.  It won’t be quite as tasty, but still pretty darn good.   It also makes a big pan of enchiladas, so you may want to cut it in half if you’re not feeding friends or don’t like leftovers.  A special someone however has been known to eat them for breakfast, lunch and dinner.

The original recipe in Bon Appetit  was from an article titled  Bye-Bye Turkey. Hello Encliladas! in the section Cooking for Friends.  It included a menu and game plan for a Christmas feast with a southwestern accent complete with the enchiladas, a romaine salad, sopaipillas and pumpkin flans for dessert.  The magazine itself was comprised of 208 pages with no less than 130 recipes!  My comments in the margins indicate that I made the Romaine Salad with Avocados, Oranges and Fried Chilies as well, but it’s the Enchiladas that have endured over the years and remained in the memory of one of my most special table companions (although I’m thinking she wasn’t quite ready for enchiladas the first time it was on my table).

We’ll start with the chicken, a few aromatics and some stock.  Bone-in, skin on chicken will give you the best flavor

DSC00369

The poaching method for this one is a very gentle one.  Bring the stock to a boil, reduce the heat and simmer for 5 minutes.  Turn off the heat and let the chicken stand until cooked through – 165°F.  This makes a Dutch oven ideal for the job as it retains its heat during the stand time.  If you have a thinner stockpot or pan, you will likely need to simmer for a bit longer – I’d say 10 minutes minimum.

DSC00371 DSC00373

When the chicken is done, remove it from the stock, pull it off the bone and shred into bit-size pieces.  You can do this a day in advance. Refrigerate the stock with the aromatics and the chicken separately.

DSC00377

On day 2, my next first step is to grate the cheese!  Make sure the Jack cheese is nice and cold for optimal grating.  

DSC00374

Now you can gather the ingredients for the sauce and the enchiladas and pre-heat the oven to 400°F

DSC00379DSC00386

Warm the stock and transfer the aromatics to the food processor that you just grated the cheese in – no need to wash in between!  You are going to have plenty of dishes to wash, so conserve where you can.

DSC00378

In another saucepan melt the butter and stir in the flour – you’re making a roux.  It’s a blond roux, so cook it just until its light golden color and then stir in the hot stock and cook over medium heat until it’s slightly thickened and the floury flavor is cooked out.  Remove from heat and let it cool slightly.

DSC00380 DSC00383

While the sauce is cooling, start sauteing the onions in the vegetable oil in a large skillet.  Cook them until they are soft and translucent.

DSC00381

Next add the spinach and cook just until it is slightly wilted-you want to keep that vibrant green color.

DSC00384 DSC00385

Transfer the spinach mixture to the food processor which has the aromatics from the broth, add the sour cream, green onions and 1/2 can of the chilies.  Blend until smooth

DSC00389

Add as much of the cooled sauce to the processor or blender as possible (there is usually a maximum line on the food processor)and blend again.  If your food processor won’t hold all of the sauce, no worries.  Simply stir the blended  sauce into the rest of the sauce and go from there.  Season to taste with salt and pepper and add the rest of the chilies if  you like.

DSC00391

Butter a 9 x 13 inch baking dish.  Spread 3/4 cup of the blended sauce over the bottom of the baking dish and add 1/2 cup of the sauce along with 2 1/2 cups of the grated cheese to the shredded chicken.  Mix well.

DSC00388DSC00393

You’re on the home stretch now!  Note that the traditional method of preparing the tortillas for filling is to heat them in oil until soft and pliable.  There is plenty of fat in this recipe, so I opt to microwave 6 tortillas at a time until they are soft – about 30 seconds in my microwave.  Lay them out on a cutting board and fill with the chicken/sauce/cheese mixture.

Roll them up and arrange seam side down in the baking dish.

DSC00394DSC00395

Spoon the remaining sauce over the filled enchiladas, cover with foil and bake until heated through.  It will take about as much time as it will take you to get the pots and pans cleaned and dishes in the dishwasher!

DSC00396

Remove foil, sprinkle with the remaining cheese and bake until the cheese melts-about 5 minutes.

DSC00397

Ready for dinner!  I like to serve it with frijoles- either refritos or de olla and black are my favorite and a bit of salsa or pico de gallo on top.

Provecho!

M.B.

DSC00401

DSC00403

Chicken Enchilada Verdes

by: M.B. Einerson

Barely adapted from Bon Appetit, December 1988

 Servings: 6 generous

Filling *

  • 2 to 3 bone-in, skin on chicken breast halves – 2 1/2 lb.
  • 3 cups chicken broth or stock
  • 1 carrot, coarsely chopped
  • ¼ large onion
  • 2 garlic cloves
  • 2 parsley sprigs
  • 1 bay leaf

Sauce

  • 3 Tbsp. butter
  • 3 Tbsp. all-purpose flour
  • 1 ½ tsp. vegetable oil
  • 1 ¼ large onions, chopped
  • 1 bunch spinach, stemmed and coarsely chopped or 6 oz. baby spinach
  • 3/4 cup sour cream
  • 2 to 4 green onions, cut into pieces (use both white and green parts)
  • ½ to 1 four oz. can diced jalapeno or mild green chilies, grained
  • Salt and freshly ground black pepper
  • ¾ lb. Monterey Jack or Pepper Jack cheese, grated
  • Vegetable oil (optional)
  • 12 – 6-inch corn tortillas
  • Salsa

Filling:

Place all ingredients in a large sauce pan or Dutch oven.  Bring to a boil, reduce heat, cover and simmer 5 minutes.  Turn off the heat and let the chicken stand until cooked through, about 1 hour.  Remove chicken from broth and cool slightly.  Remove skin and bones from the chicken and shred the meat.  Put in a medium size bowl and chill.

Pre-heat the oven to 400°F.

Grate Cheese

Sauce:

Transfer the aromatics from the stock to the bowl of the food processor or blender.

Melt the butter in a heavy medium saucepan or Dutch oven over low heat.  Add flour and cook until light brown, stirring frequently, about 5 minutes.  Whisk in the reserved chicken cooking liquid.  Increase the heat to medium and cook until the sauce thickens, stirring occasionally.  Cool.

Heat 1 ½ tsp. oil in a large skillet over medium heat.  Add the onions and cook until soft, stirring occasionally, about 5 minutes.  Add spinach and stir until wilted, about 2 minutes.  Transfer the mixture to the food processor or blender.  Add sour cream, green onions and ½ can chilies.  Puree until smooth.   Add as much of the cooled sauce to the processor or blender as possible (there is usually a maximum line on the food processor)and blend again.  If your food processor won’t hold all of the sauce, no worries.  Simply stir the blended  sauce into the rest of the sauce and go from there.  Season to taste with salt and pepper and add the rest of the chilies if  you like.

Butter a 9 x 13-inch baking dish.  Spread 3/4 cup of the sauce over the bottom.  Add ½ cup sauce to the chicken along with 2 ½ cups grated cheese.

** Pour ½ to 1 inch of vegetable oil into a small to medium skillet.  Heat over low-medium heat.  Add 1 tortilla and cook until softened, about 5 seconds.  Drain on paper towels.  Repeat with the remaining tortillas. **

Divide the chicken filling among the tortillas and roll up.  Arrange seam side down in buttered dish.  If baking immediately, spoon remaining sauce over the filled enchiladas. Cover with foil. (This part can also be prepared 1 day ahead.  Refrigerate the enchiladas and sauce separately.  Bring the enchiladas to room temperature before baking.)

Bake covered in the 400°F oven until just heated through, about 20 minutes.  Uncover, sprinkle with remaining cheese and bake until the cheese melts, about 5 minutes.  Serve with salsa

Provecho!

M.B.

* The filling can be prepared a day in advance.  Chill the shredded chicken and broth separately.

** Note this step can be skipped if you want to reduce the amount of fat in the recipe a bit.  Simply put the stack of tortillas in the microwave and heat until soft and pliable.  You’ll need to work quickly, so they don’t get stiff again, but you can do it!!


Crema de Chile Poblano

DSC00165

Sometimes in life you need a personal vacation.  This is a time to venture off on your own to follow a passion without having to consider anyone else’s needs or desires.   I fondly call it time to  contemplate the great undifferentiated aesthetic continuum.  Not sure I ever really grasped the deep meaning of this one but love the way it rolls off one’s tongue.  For me it was about taking some time away from the responsibilities of work and family to do something I really loved and charge my batteries.

I’ve done this a few times over the years, mostly by extending a business trip with a few days of personal time to explore a new country or city on my own.  Once however, I took an entire week just for me. My destination was  La Villa Bonita Cooking School.  At that time the school was located in the  lovely and then relatively safe city of Cuernavaca, Mexico.  The city  which is about a 30 minute drive south of Mexico City, lived up to its name of  the City of Eternal Spring with beautiful weather during my entire stay.  The school was located in a former convent just down the street from a beautiful cathedral, the Museo Robert Brady and a short walk to the Zócolo.   As with nearly all of the homes lining the streets of Cuernavaca, the beauty of the spot was completely unnoticeable from the street, sitting behind high walls and locked doors.  Inside however, was an oasis of vegetation and a beautiful courtyard leading into a spacious kitchen perfect for conducting small hands on classes.  The school has since outgrown this spot (it had only three guest rooms) and moved to a more spacious and luxurious spot in the Tepoztlán  mountains.   If there weren’t so many other spots on my bucket list, I’d be headed back there to check it out!  This time I wouldn’t need to carry back the binder filled with recipes, tortilla press and molcajete that came as a part of the class (long before the airline 50 lb weight restrictions).

This trip came when I was still missing some of the foods I loved in Los Angeles.  In particular I was craving  the hand-made tamales I bought by the dozen from the parents of one of my colleagues.   The other dish I was determined to master an authentic  Mole Colorado.  These were the two that I left home determined to add to my culinary repertoire.  However, as is usually the case when I travel I discovered several dishes that I had never experienced before – Chiles en nogada, Quesadillas with Squash Blossoms and Huitlachoche just to name a few.   I always feel a little sad when I  hear someone declare “I don’t like Mexican food”.  I’m also  fairly certain that their exposure to this fabulous cuisine doesn’t go much beyond Taco Bell.  From simple street tacos to complex moles I love it all.

Of all of the dishes that I experienced on this culinary adventure, the one that has definitely become a favorite at my table and has been shared with many others over the years is a simple Poblano Soup.  Before this trip, poblano’s weren’t yet on my radar and hadn’t gained the popularity that they have so rightfully claimed since.  Today we can find them year round in most supermarkets and buy plants  or seeds for our gardens at most nurseries.  They are an easy to grow and prolific plant, so having several recipes in which to enjoy  the fruits of my garden is a must for me.  The other great thing about them, is they can be roasted and frozen for use in soups such as this one, all winter long.

The soup could be made entirely from my frozen stock, but let’s start with a fresh pepper so you can master this one in any season

Roasting the Peppers-over an open flame until blackened and blistered over the entire surface.

DSC00145

If you’re making a dish that requires only a few peppers this is my go to method.  It’s also the way I first learned to do it during my stay in Cuernavaca.   If you are not lucky enough to be cooking with gas, you can achieve much the same result by roasting them on a sheet pan under the broiler unit of your oven. I suggest cutting them in half to speed up the process and limit the number of times you have to go into the oven to turn them.

In the summer  when I’m working from my garden I use my gas grill (just wait a few months and you’ll see)!!

Let it steam!

DSC00146DSC00149

I’m a big fan of these silicone covers but plastic wrap works as well.  Simply place the charred peppers in a bowl and cover.  It will take only a few minutes for the steam to loosen the skin from the peppers, but you will be peeling it by hand, so wait until you can handle the pepper comfortably.

If you have sensitive hands you may want to wear gloves, but most poblanos are on the lower end of the heat scale so you may be able to handle them bare handed.  In any case the most important thing to remember is Do no rinse them under running water.  I know that you will want to do it, because it just seems to be the natural thing to do, but you’ve worked hard to get those lovely roasted, charred flavors and you don’t want to rinse them away.  Simply peel off the loosened skin with your fingers or a small paring knife.  Remove the stem and cut the pepper open and remove the seeds and veins (those tough white parts running down the length of the pepper).

DSC00152

Now you’re ready to concentrate on making the soup!

Ingredients

DSC00150

So I have one freshly roasted pepper in the front and the last remaining peppers from my freezer stock are  just behind.  I use them all winter long in dishes like this soup where I want the flavor but don’t need great texture.  The only other things you need are onion,  potato, butter, stock, milk/cream, a soft, creamy cheese and perhaps some sour cream/crema/crème fraiche.

Start with diced onion in melted butter on medium heat.  You just want to soften the onion until it is translucent but not browned.  In the original version of the recipe it suggests straining out the onion and just using the onion flavored butter, but that’s definitely not my style!

DSC00153

Next you need a cooked potato.  You can cook it anyway you choose-boil, steam,bake etc.  For me the easiest method is to poke a few holes in it and microwave until it’s soft.  Depending on your microwave , a rather large russet potato like this one it will take from 5 to 8 minutes.  Any type of potato good for baking (Russet, Yukon Gold etc..) will do. Just stay away from waxy boiling potatoes (often red,)these are great for potato salad but not for soup or mashed potatoes

DSC00157

Cut the potato in half and scoop out the fluffy interior (don’t throw away that skin though)

DSC00159

Peppers, cooked onion and potato all go into a blender or food processor.    This is one puréed soup where I actually prefer using one of these devices over my immersion/stick blender.  I like this soup to be perfectly smooth and silky and since I’m not working with a hot liquid or dirtying an extra pot, it’s the way to go for me.

DSC00161

Puree these ingredients until perfectly smooth.  You may need to stop the blender and scrape down the sides a few times and you can add a bit of the room temperature stock after a bit of blending.

DSC00162

Pour the puree into the pot where you sautéed the onion.  Rinse the blender with the remaining broth. I start with a total of 4 cups of broth and then taste to see how much more I will use.   If the soup seems really spicy to you, you will want to use whole milk and/ or heavy cream for the rest liquid.  In this batch I ended up using 1 cup of cream and 2 cups of whole milk.  It’s really up to you and how spicy vs. creamy you want it to be.

DSC00163

If you’re using all fresh peppers, the soup will be a brighter and more vibrant green.  The freezing process takes a bit of a toll on the color, but in mid March when my garden is still months away from producing, I’m happy to have a bowl of homemade soup made from frozen peppers!

DSC00164

Now all you need is some cheese and for those who like it spicy some of that pepper you saved for garnish.   The cheese of choice is Mexican Panela.  I found it in my local Mexican Market-La Michoacana for $4.99/lb.  If you can’t find Panela, most stores carry Queso Blanco-generic for white cheese.  The beauty of Panela is that it gets soft in the hot soup but does not melt or string as a mozzarella or Jack cheese would.  Queso Blanco has a very similar flavor and is just a tad more crumbly in texture, so if you can’t find panela it makes a great substitute.

Today this soup is so delicious and creamy it  doesn’t even need the addition of the crème fraiche I had planned to top it with.  This, I attribute to the goodness of the Snowville Creamery whole milk and whipping cream I use.

DSC00168

But what this blogger really enjoyed for lunch was that leftover potato skin, topped with some soup, that lovely panela cheese and of course a cerveza!

DSC00172


Crema de Chile Poblano

Panela

by: M.B. Einerson

 Adapted from La Villa Bonita Cooking School

One of the most popular fresh cheeses in Mexico, this cheese is mild, white and crumbly.  Like Queso Blanco, it will not run when heated—it will get soft and creamy but will not lose its shape.  The cheese is used in Mexico for many cooked dishes and is commonly crumbled over salads, tacos, chili and burritos.

 Servings: 4 to 6

  • 3 to 6 poblano chilies, roasted, cleaned and de-veined. (6 will make it very spicy depending on the heat level in your chilies, so adjust according to your heat tolerance and size of chilies.)
  • 1 large cooked and skinned baking potato (a second way to tame the heat-use more potato)
  • 2 Tbs. butter
  • ½ medium white onion*, chopped
  • 7 cups chicken broth (the third way to tame the heat is a substitution of whole milk, half & half or cream for part of the broth-I often use 4 cups of broth and then a combo of whole milk and cream)
  • 6 ounces of Panela cheese, cubed or shredded (it’s an add in to your bowl, so don’t fret about the weight/ quantity.  I add between 1/4 and 1/2 cup of cubes per serving)
  • Sour Cream, Mexican Crema or Crème Fraiche for garnish

In a medium soup pot melt the butter and add the chopped onion.  Cook until the onion is soft and translucent, but not browned.  Add the onion, roasted chilies (set aside a small portion of the chilies for garnish if you wish) and potato to a blender or food processor and puree until very smooth.  Add a small portion of the broth and blend again.

If you are a silky, smooth soup lover, strain the puree through a fine mesh strainer back into the soup pot.  If you are like me and don’t mind a little texture to your soup, skip the straining part.  Rinse the blender or food processor bowl with the remainder of the broth you are using to make sure you get every last drop of that yummy puree.

Simmer the soup until it thickens slightly.  Stir in the milk or cream if you are using it, add salt to taste and heat to serving temperature.

Ladle into bowls and top with a dollop of sour cream, a generous portion of cheese and a few pieces of roasted chile poblano.

* Yes, any onion will do but the white variety is the onion of choice in classic Mexican cooking. They have a clean, sharp flavor, have less of a sulfurous bite than yellow onions and are tender and thin-skinned.


Sopa de Albondigas

DSC00054

Welcome to the first post of MB’s Table.  I hope you enjoy my journey as I sift through my recipe files and cookbooks and pull out my favorites recipes to recreate and share. These recipes will include some of the best meals I’ve cooked with family and friends over the years.   As I explained in “About” they are for the most part not my own unique creations.  The unique recipes have generally never been recorded, as I’m cooking them on the fly with whatever I happen to have on hand, borrowing from the classic techniques I’ve learned over the years from many other great chefs and cooks.  Maybe someday I’ll start recording them as I go!!

This first recipe however is one that I do consider my own and I’ve spent many years perfecting it.  As with many of the great recipes in life it came about as the necessity of invention.  In the 80’s and 90’s I had the good fortune of living in Southern California where Mexican food was wonderful and inexpensive-i.e. no need to cook your own.  On nearly every Friday our family and friends would get take out from Alamo Rotisserie in Granary Square.   One of the of the staples we ordered at the request of my son was the Albondigas Soup. Loaded with lots of flavor and vegetables it was a working mom’s dream.   When we moved to Columbus Ohio in 1994 – no Alamo and no soup to be found!!  So I set about creating a soup from my flavor memory with the ingredients I could find at hand.  Today I’m giving you the scaled down version of the soup that I’ve been making a minimum of two or three times a year for the last 20 odd years.  At one point I purchased a 16 qt stock pot to hold the quantity required to feed the many people at my table for at least two meals.  The scaled down version will still make 6 to 8 servings, but trust me, as with most soups of this style it just gets better on the 2nd or 3rd day, so don’t worry that it’s still a lot of soup.

Here’s hoping you enjoy this heart warming soup on a cold and blustery day.

DSC00053

Sopa de Albondigas

(Mexican Meatball Soup) by: M.B. Einerson

Servings: 6 to 8

The Albondigas (Meatballs)

DSC00043

Garlic, onion, cilantro, lean ground beef, egg, salt, pepper, Mexican oregano, cayenne pepper, cumin and uncooked rice

DSC00046

When I make a double batch I chop the garlic, onion and cilantro in a food processor but for this scaled down version it’s easiest to do it by hand! Now for the Soup

DSC00045

Oil, onion, garlic, chile de arbol, broth, celery, tomato sauce, diced tomatoes in juice, potato, carrots, green cabbage and zucchini.

DSC00047

Start with the slivered onion in oil and sweat until it starts to become translucent.

DSC00048

Then add the garlic and chilies. This is important to insure that the garlic and chile don’t become burt and bitter. In this batch I used just one chile and Kyle noticed that it was a bit lower in heat!! So adjust to your level of comfort.

DSC00049

As soon as you can smell the garlic add the broth, celery, tomato sauce and diced tomatoes and bring it to a simmer.

DSC00050

Once the soup comes to a simmer, add the potatoes, carrots and meatballs. Be sure to add the meatballs one at a time to keep the temperature of the soup at a simmer. A wide 7 1/4 quart dutch oven like this one is ideal! Once all of the meatballs are in, bring the soup to a low boil, cover, reduce the heat to a simmer and cook for 30 to 45 minutes.

DSC00051

Remove the lid, add the cabbage and squash (in a double batch I like to use one zucchini and one yellow squash) and simmer uncovered for an additional 10 minutes or until the squash is just tender.

SOPA DE ALBONDIGAS

       (Mexican Meatball Soup) 

by: M.B. Einerson

Servings: 6 to 8

The Albondigas (Meatballs)

  • 1 to 2 cloves garlic (so I really mean 2!)
  • ½ of a small onion, cut into wedges
  • 2 Tablespoons cilantro leaves
  • 1 lb. lean ground beef
  • 1 egg
  • 1 teaspoon salt
  • ½ teaspoon dried Mexican oregano
  • ¼ teaspoon cayenne or chipotle pepper
  • ¼ teaspoon freshly ground black pepper
  • ¼ teaspoon cumin
  • 2 Tablespoons uncooked rice (any type will do but I use brown)

The Soup

  • 1 Tablespoon vegetable oil
  • 1 medium onion, cut in wedges and thinly slivered
  • 1 to 2 cloves garlic, minced (so again it’s always 2 if not more)
  • 1 to 2  dried chile de arbol, broken and stems removed or ¼ to ½ teaspoon red chili flakes
  • 8 cups broth or stock (I prefer a mixture of chicken and beef and generally use a 50/50 blend)
  • 1 stalk celery including the leaves, coarsely chopped
  • 3/4 cup tomato sauce (this is approximately ½ of a 15 oz. can)
  • 1 cup diced canned tomatoes with juice ( this is approximately ½ of a 14.5 oz. can) or 1 large fresh tomato diced (use fresh only if in season but in this recipe I think canned works best)
  • 1 medium potato, diced (a red or other boiling potato is best if you want to keep pieces of potato intact)
  • 2 medium carrots, thinly sliced
  •  Meatballs from the above recipe
  • 2 cups thinly shredded green cabbage ( about ¼ of a medium sized head)
  • 1 medium zucchini or yellow summer squash, sliced

Meatballs: By hand or in a food processor, finely mince the onion, garlic and cilantro leaves.  Add the finely minced onion mixture to a medium bowl with the remaining meatball ingredients and combine (your hands will be the best tool here).  Form into 1 inch meatballs and set aside until needed in the soup. To be honest I actually wait until I’m ready to add them to the soup to form them as it helps keep the soup at the best temperature if I’m forming them just as I am dropping them into the soup.

Soup: Add the oil to a large stock pot or Dutch Oven (a 7 ¼ quart is a great size) and heat gently.  Add the onion slivers and let them sauté until they are just starting to become translucent.  Add garlic and dried chilies and sauté for less than a minute-when you can smell the garlic it’s enough.  Add the broth, celery, tomato sauce and diced tomatoes. Bring the mixture to simmer and add the potatoes, carrots and then add the meatballs one at a time so the temperature of the broth doesn’t drop significantly.  Once all of the meatballs are in, bring the broth to a low boil, cover and reduce to a simmer.  Allow the soup to simmer covered for 45 minutes.  Remove the lid and add the cabbage and squash and simmer uncovered for an additional 10 minutes or until the squash is crisp tender.