Chicken Enchiladas Verdes

DSC00398

These Chicken Enchiladas Verdes,  although not high on authenticity,  definitely  fall into the category of favorites at my table and top the scale on luscious .    The original recipe appeared in the December 1988 issue of Bon Appetit and sadly to say cannot be found on either the Epicurious or Bon Appetit sites today.  What it lacks in authenticity it makes up for in solid comfort.  So with a nod to Cinco do Mayo (yes once again I’m blogging and making dinner at the same time) I give you Chicken Enchiladas Verdes!

Like many recipes of its type, lasagna included, it is a recipe that can be made in stages so that the cook can enjoy it for dinner without spending the whole day in the kitchen.  You could also take some short cuts and use a rotisserie chicken for the filling and stock or broth without the addition of the veggies.  It won’t be quite as tasty, but still pretty darn good.   It also makes a big pan of enchiladas, so you may want to cut it in half if you’re not feeding friends or don’t like leftovers.  A special someone however has been known to eat them for breakfast, lunch and dinner.

The original recipe in Bon Appetit  was from an article titled  Bye-Bye Turkey. Hello Encliladas! in the section Cooking for Friends.  It included a menu and game plan for a Christmas feast with a southwestern accent complete with the enchiladas, a romaine salad, sopaipillas and pumpkin flans for dessert.  The magazine itself was comprised of 208 pages with no less than 130 recipes!  My comments in the margins indicate that I made the Romaine Salad with Avocados, Oranges and Fried Chilies as well, but it’s the Enchiladas that have endured over the years and remained in the memory of one of my most special table companions (although I’m thinking she wasn’t quite ready for enchiladas the first time it was on my table).

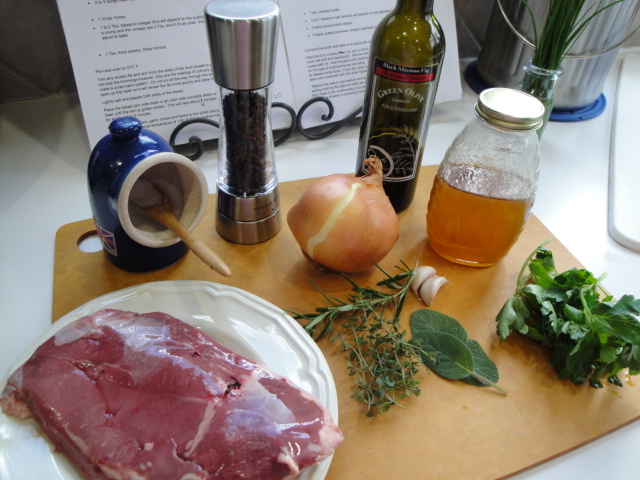
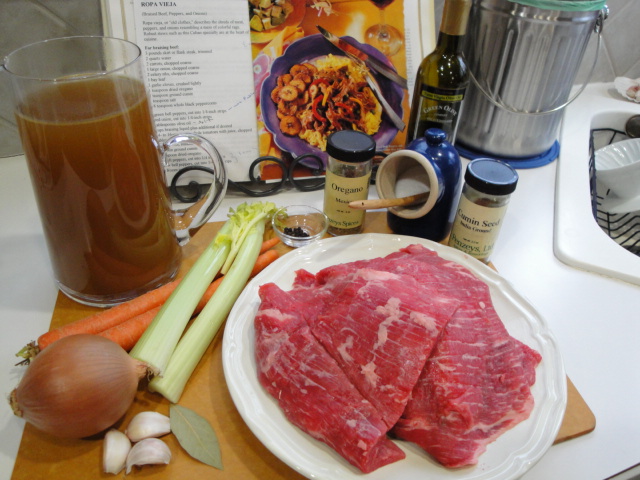
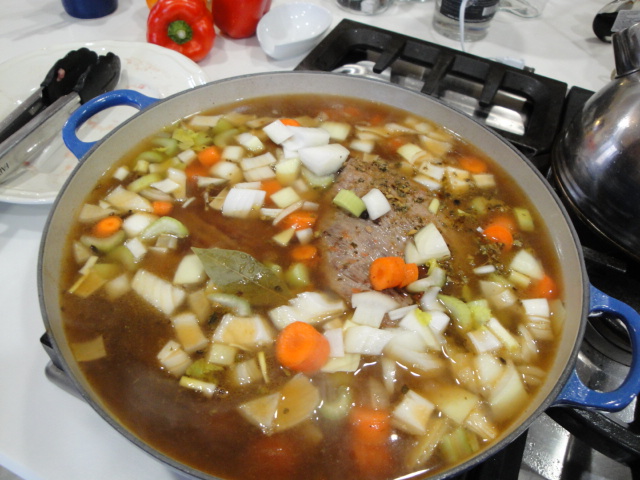
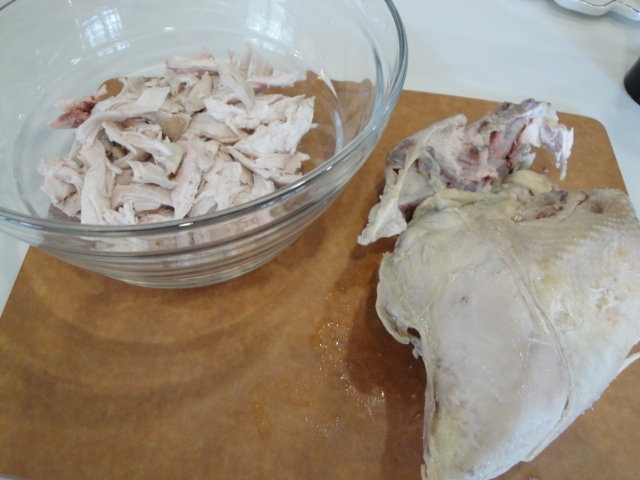
We’ll start with the chicken, a few aromatics and some stock.  Bone-in, skin on chicken will give you the best flavor

DSC00369

The poaching method for this one is a very gentle one.  Bring the stock to a boil, reduce the heat and simmer for 5 minutes.  Turn off the heat and let the chicken stand until cooked through – 165°F.  This makes a Dutch oven ideal for the job as it retains its heat during the stand time.  If you have a thinner stockpot or pan, you will likely need to simmer for a bit longer – I’d say 10 minutes minimum.

DSC00371 DSC00373

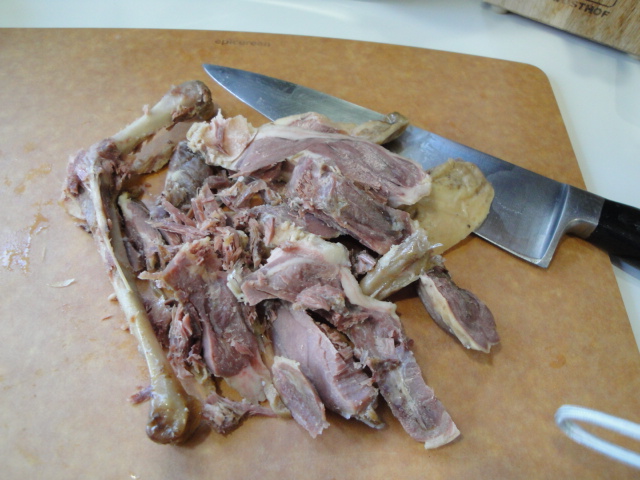
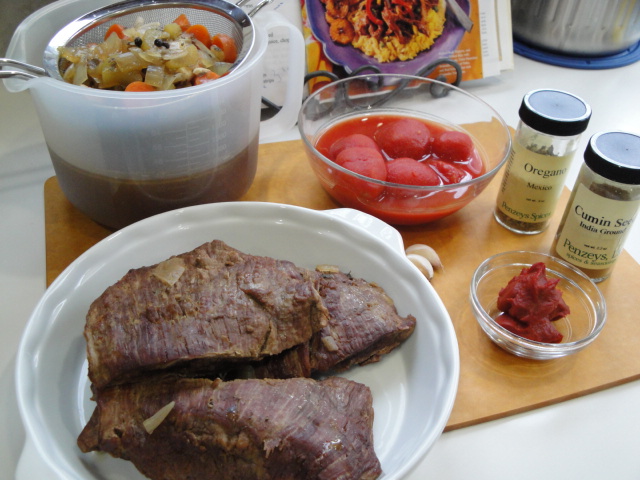
When the chicken is done, remove it from the stock, pull it off the bone and shred into bit-size pieces.  You can do this a day in advance. Refrigerate the stock with the aromatics and the chicken separately.

DSC00377

On day 2, my next first step is to grate the cheese!  Make sure the Jack cheese is nice and cold for optimal grating.  

DSC00374

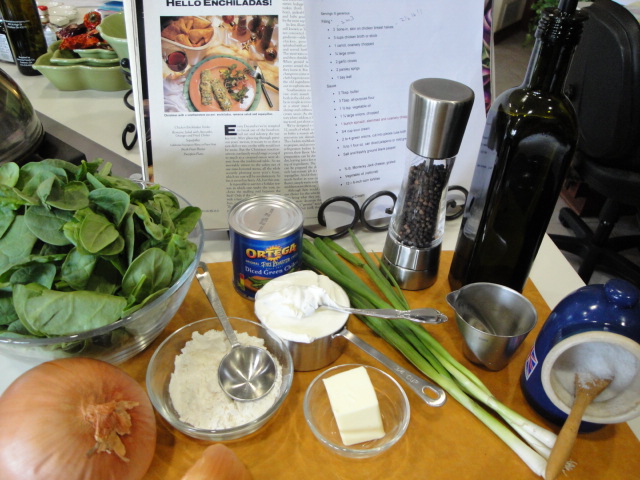
Now you can gather the ingredients for the sauce and the enchiladas and pre-heat the oven to 400°F

DSC00379DSC00386

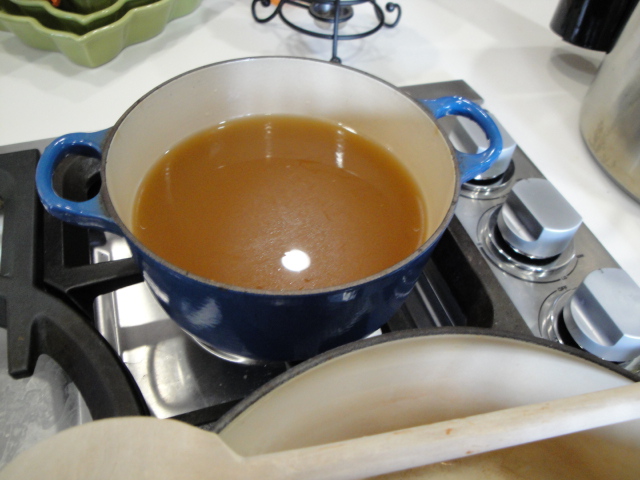
Warm the stock and transfer the aromatics to the food processor that you just grated the cheese in – no need to wash in between!  You are going to have plenty of dishes to wash, so conserve where you can.

DSC00378

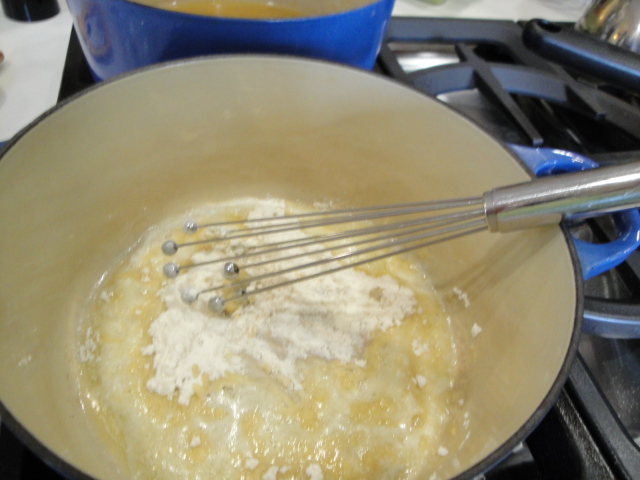
In another saucepan melt the butter and stir in the flour – you’re making a roux.  It’s a blond roux, so cook it just until its light golden color and then stir in the hot stock and cook over medium heat until it’s slightly thickened and the floury flavor is cooked out.  Remove from heat and let it cool slightly.

DSC00380 DSC00383

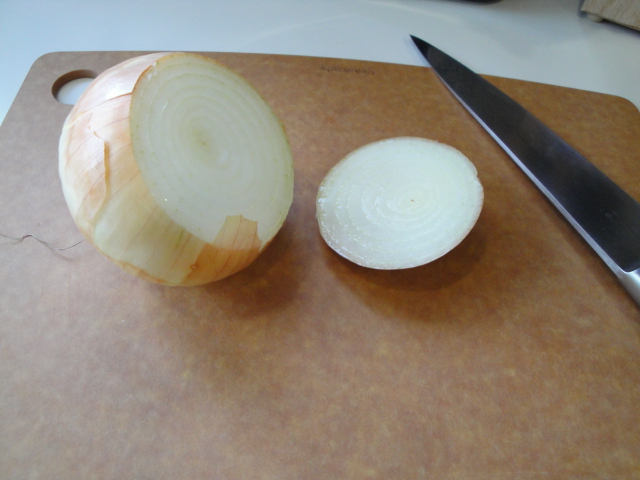
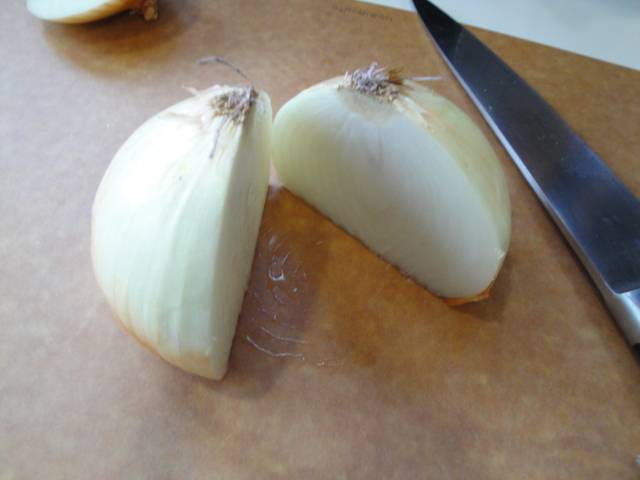
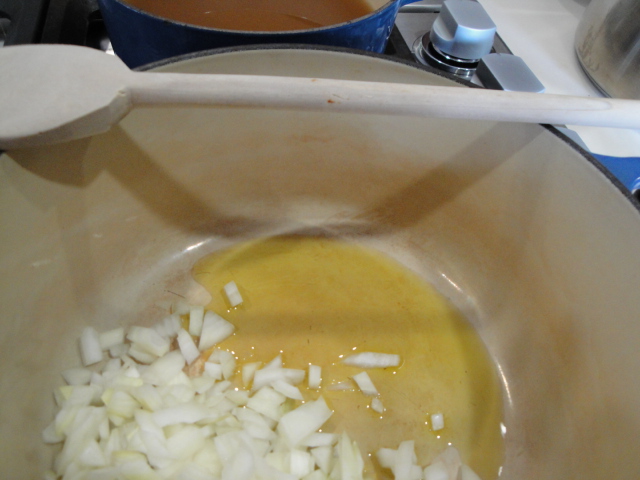
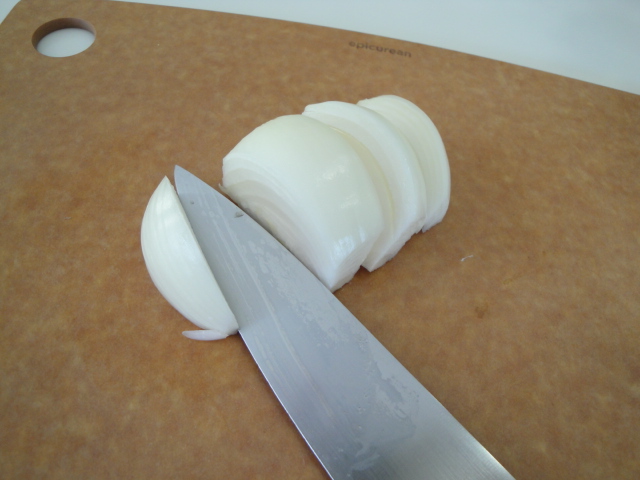
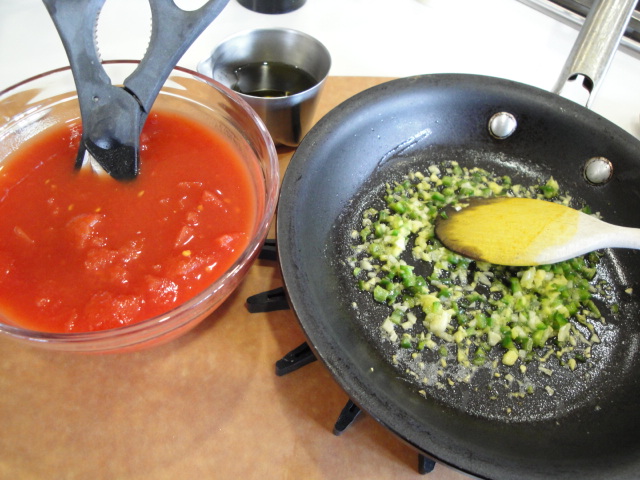
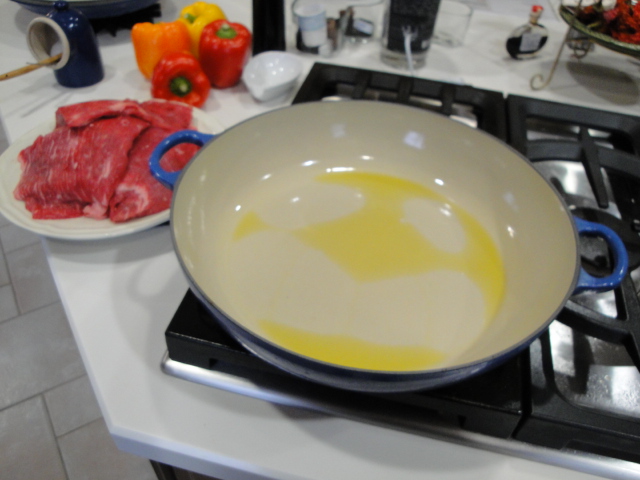
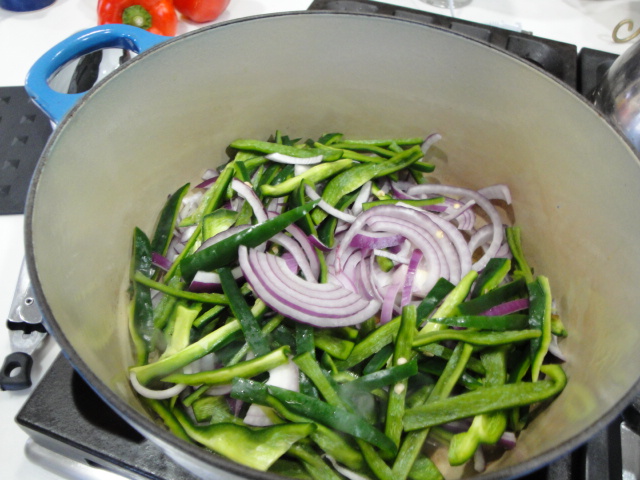
While the sauce is cooling, start sauteing the onions in the vegetable oil in a large skillet.  Cook them until they are soft and translucent.

DSC00381

Next add the spinach and cook just until it is slightly wilted-you want to keep that vibrant green color.

DSC00384 DSC00385

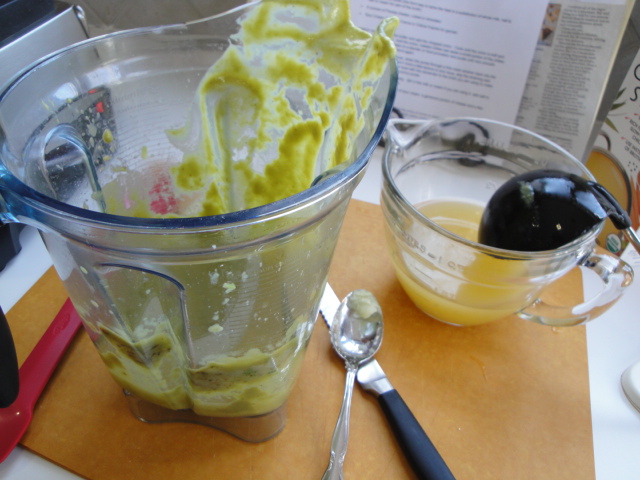
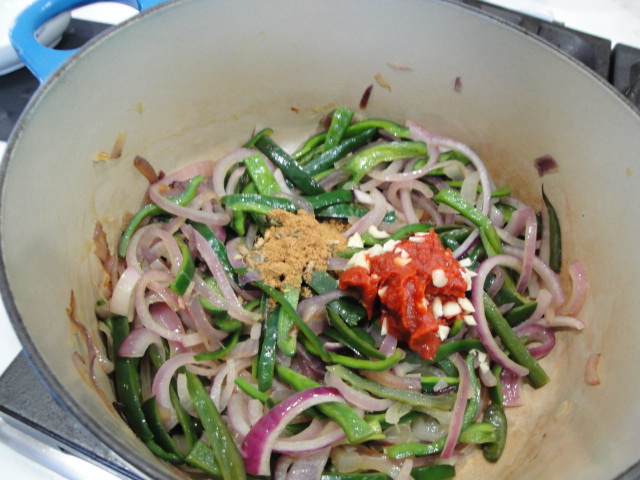
Transfer the spinach mixture to the food processor which has the aromatics from the broth, add the sour cream, green onions and 1/2 can of the chilies.  Blend until smooth

DSC00389

Add as much of the cooled sauce to the processor or blender as possible (there is usually a maximum line on the food processor)and blend again.  If your food processor won’t hold all of the sauce, no worries.  Simply stir the blended  sauce into the rest of the sauce and go from there.  Season to taste with salt and pepper and add the rest of the chilies if  you like.

DSC00391

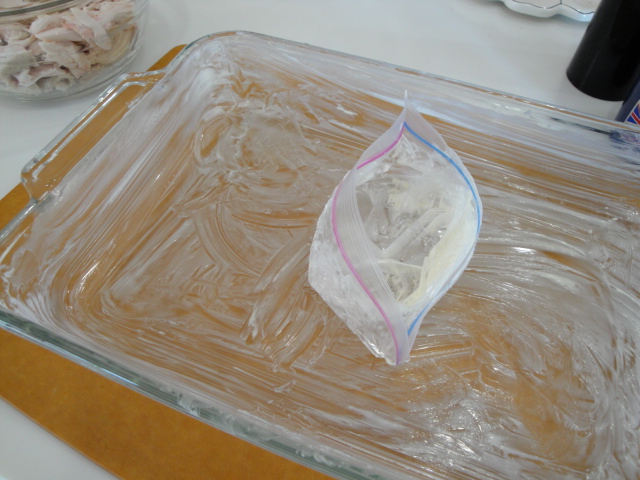
Butter a 9 x 13 inch baking dish.  Spread 3/4 cup of the blended sauce over the bottom of the baking dish and add 1/2 cup of the sauce along with 2 1/2 cups of the grated cheese to the shredded chicken.  Mix well.

DSC00388DSC00393

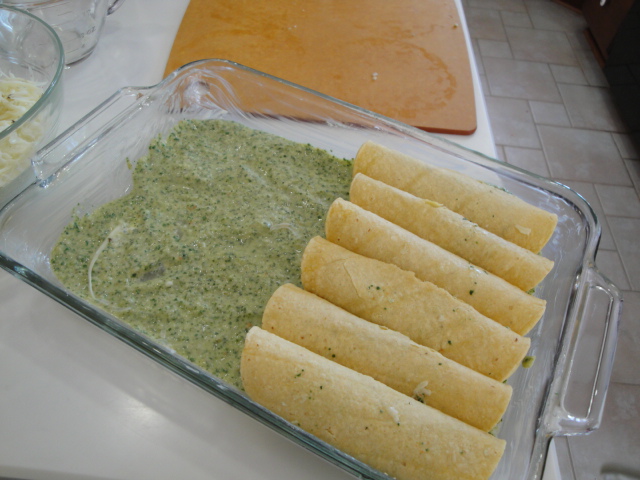
You’re on the home stretch now!  Note that the traditional method of preparing the tortillas for filling is to heat them in oil until soft and pliable.  There is plenty of fat in this recipe, so I opt to microwave 6 tortillas at a time until they are soft – about 30 seconds in my microwave.  Lay them out on a cutting board and fill with the chicken/sauce/cheese mixture.

Roll them up and arrange seam side down in the baking dish.

DSC00394DSC00395

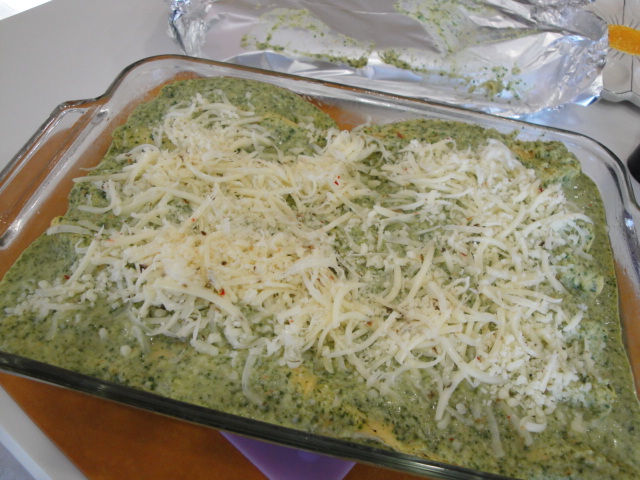
Spoon the remaining sauce over the filled enchiladas, cover with foil and bake until heated through.  It will take about as much time as it will take you to get the pots and pans cleaned and dishes in the dishwasher!

DSC00396

Remove foil, sprinkle with the remaining cheese and bake until the cheese melts-about 5 minutes.

DSC00397

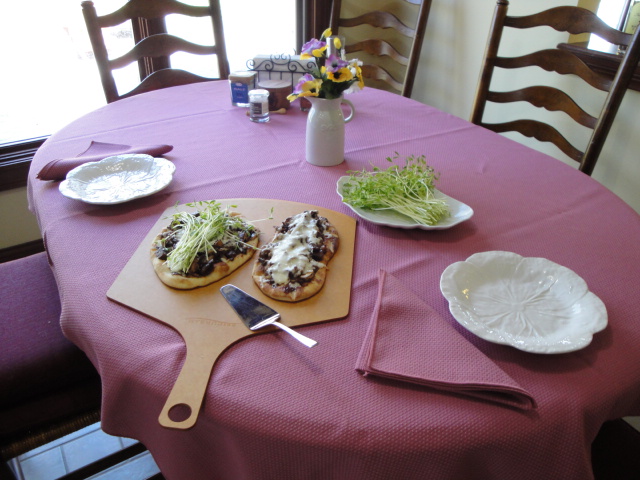
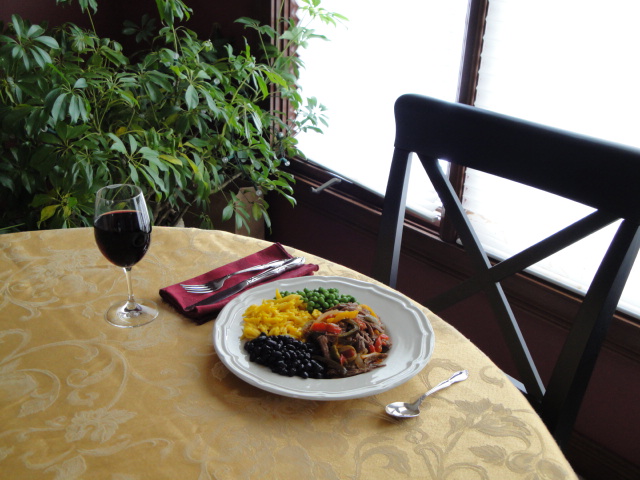
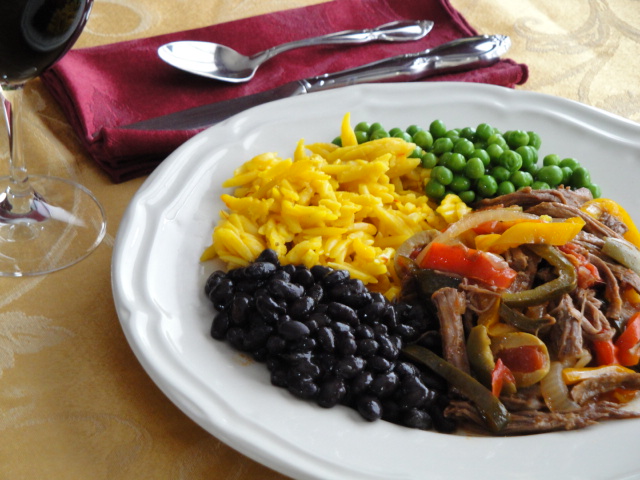
Ready for dinner!  I like to serve it with frijoles- either refritos or de olla and black are my favorite and a bit of salsa or pico de gallo on top.

Provecho!

M.B.

DSC00401

DSC00403

Chicken Enchilada Verdes

by: M.B. Einerson

Barely adapted from Bon Appetit, December 1988

 Servings: 6 generous

Filling *

  • 2 to 3 bone-in, skin on chicken breast halves – 2 1/2 lb.
  • 3 cups chicken broth or stock
  • 1 carrot, coarsely chopped
  • ¼ large onion
  • 2 garlic cloves
  • 2 parsley sprigs
  • 1 bay leaf

Sauce

  • 3 Tbsp. butter
  • 3 Tbsp. all-purpose flour
  • 1 ½ tsp. vegetable oil
  • 1 ¼ large onions, chopped
  • 1 bunch spinach, stemmed and coarsely chopped or 6 oz. baby spinach
  • 3/4 cup sour cream
  • 2 to 4 green onions, cut into pieces (use both white and green parts)
  • ½ to 1 four oz. can diced jalapeno or mild green chilies, grained
  • Salt and freshly ground black pepper
  • ¾ lb. Monterey Jack or Pepper Jack cheese, grated
  • Vegetable oil (optional)
  • 12 – 6-inch corn tortillas
  • Salsa

Filling:

Place all ingredients in a large sauce pan or Dutch oven.  Bring to a boil, reduce heat, cover and simmer 5 minutes.  Turn off the heat and let the chicken stand until cooked through, about 1 hour.  Remove chicken from broth and cool slightly.  Remove skin and bones from the chicken and shred the meat.  Put in a medium size bowl and chill.

Pre-heat the oven to 400°F.

Grate Cheese

Sauce:

Transfer the aromatics from the stock to the bowl of the food processor or blender.

Melt the butter in a heavy medium saucepan or Dutch oven over low heat.  Add flour and cook until light brown, stirring frequently, about 5 minutes.  Whisk in the reserved chicken cooking liquid.  Increase the heat to medium and cook until the sauce thickens, stirring occasionally.  Cool.

Heat 1 ½ tsp. oil in a large skillet over medium heat.  Add the onions and cook until soft, stirring occasionally, about 5 minutes.  Add spinach and stir until wilted, about 2 minutes.  Transfer the mixture to the food processor or blender.  Add sour cream, green onions and ½ can chilies.  Puree until smooth.   Add as much of the cooled sauce to the processor or blender as possible (there is usually a maximum line on the food processor)and blend again.  If your food processor won’t hold all of the sauce, no worries.  Simply stir the blended  sauce into the rest of the sauce and go from there.  Season to taste with salt and pepper and add the rest of the chilies if  you like.

Butter a 9 x 13-inch baking dish.  Spread 3/4 cup of the sauce over the bottom.  Add ½ cup sauce to the chicken along with 2 ½ cups grated cheese.

** Pour ½ to 1 inch of vegetable oil into a small to medium skillet.  Heat over low-medium heat.  Add 1 tortilla and cook until softened, about 5 seconds.  Drain on paper towels.  Repeat with the remaining tortillas. **

Divide the chicken filling among the tortillas and roll up.  Arrange seam side down in buttered dish.  If baking immediately, spoon remaining sauce over the filled enchiladas. Cover with foil. (This part can also be prepared 1 day ahead.  Refrigerate the enchiladas and sauce separately.  Bring the enchiladas to room temperature before baking.)

Bake covered in the 400°F oven until just heated through, about 20 minutes.  Uncover, sprinkle with remaining cheese and bake until the cheese melts, about 5 minutes.  Serve with salsa

Provecho!

M.B.

* The filling can be prepared a day in advance.  Chill the shredded chicken and broth separately.

** Note this step can be skipped if you want to reduce the amount of fat in the recipe a bit.  Simply put the stack of tortillas in the microwave and heat until soft and pliable.  You’ll need to work quickly, so they don’t get stiff again, but you can do it!!


“Peking” Duck Pizza – II

DSC00364

As promised last week, I’m going to give you a simpler version of “Peking” Duck Pizza.  In fact if you live in a city with a China Town, you may be able to lose the ” ” from the recipe and make your pizza with authentic Peking Duck.   Where I live, however  I will rely on another great duck product that has become increasingly available over the years – Duck Leg Confit.    Somewhere down the line I will likely show how to make your own Duck confit.  It’s actually pretty simple, but for now I’m going back to D’Artagnan and using one of theirs.   If you live in Columbus, you can also find great Duck Confit at North Market Poultry and Game.  And if you are a vegetarian consider making a “Peking” Mushroom  Pizza by losing the duck altogether.

The second short-cut in this post is the use of pre-made Naan for the crust.   I  like it much better as a fast pizza crust than the pre-made pizza crusts that are in the grocery stores these days.  The two brands I like best are La Brea Bakery Naan Bread and Stonefire Authentic Flatbreads.   Both have great flavor and texture with no hydrogenated oils or preservatives.  This means they have a relatively short shelf-life if kept at room temperature, so I keep my freezer stocked with them.  I use them for pizza, sandwiches and of course as a scooper for dal and other Indian dishes.

The La Brea breads are approximately 10 inches x 4 1/2 inches and the Stonefire breads are approximately 8 1/2 inches x 7 inches, so both perfect for perfect for a single serving pizza.   The Stonefire is a bit thicker and more like a hand tossed crust while the La Brea is a tad thinner and closer to a thin crust pizza.  I’m fairly certain you’ll be able to find something to your liking in a grocery or market near you.  If not you can always go back to “Peking” Pizza I and make your own.

The flavors will be very similar to “Peking” Duck Pizza – I , but the ingredient list is much simpler.   And as I said if you want to venture out even further, you could ditch the duck and increase the quantity of mushrooms  and onions and have a “Peking” Mushroom Pizza!!!

DSC00346

Let’s start with the onion.  In the first recipe of this blog, I specified slivered onion and from your comments I realize that this is not a well-known term.  To many this cut is likely called a julienne, but I reserve this term for thin straight strips of food which you will never get from an onion.  If I cut the onion thinly across its equator I refer to it as thinly sliced. It can be cut into full rounds or half-moon slices.  However if I cut an onion in thin pieces from pole to pole I refer to is as slivered.  Think slivered almonds.  Does it really matter?  Probably not, but the slivers will be straighter than half-moon slices and sometimes I like them ;-).

Start by slicing off the stem end of the onion.  Then cut in half from pole to pole.

DSC00351 DSC00352

In this recipe I only needed 1/4th of the onion so I laid it flat and cut one half in 1/2 again.  Then I started cutting thin slivers.  When I get to the point where I have little to hold on two as shown below and to the right, I flip it onto that broader surface and continue to slice/sliver

DSC00353 DSC00354

When I’m finished I have a nice pile of slivers!

DSC00355

Start pre-heating your oven now.  It’s not as critical to heat it so long when you are using a pre-cooked crust.

Next the duck leg.  Cut and pull all of the meat, fat and skin from the bone.  Take a little bite because it is fully cooked and yummy just as it is.

DSC00356

Thickly slice the mushrooms and head to the stove.

DSC00357

Start with the duck and the onions, with the duck on the bottom.  Heat on medium-high heat until the onion starts to soften and the duck starts to sizzle.  Notice that today I’m using a stainless steel pan rather than a non-stick.  Either is fine, but the stainless will give me a slightly better sear.

DSC00359

When the onion is softened,  add the balsamic, honey, hoisin and soy sauce.  Stir well to de-glaze the pan and get all those yummy duck bits off the bottom.

DSC00360 DSC00361 DSC00362

Spread the naan (I’m using both types to show you this difference in shape) with additional hoisin, top with the duck filling and grated cheese (mozzarella today).  Pop them in the pre-heated oven.   

DSC00363

Bake until the cheese is melted and bubbly – approximately 5 minutes.  Top with sprouts- today I’m using pea sprouts because they are so pretty.

DSC00365

Enjoy!!  As you can see from the second shoot, I did.

DSC00366 DSC00368


“Peking” Duck Pizza – II

Using Duck Confit or purchased Peking Duck or Roast Chicken

by: M.B. Einerson

 Inspiration from California Pizza Kitchen and many others

 Servings: 2 to 4

Pizza Crust

  • 2 Naan flatbreads (any flatbread or pre-made pizza crust will do) or you can make the crust using the recipe found in “Peking” Duck Pizza – I

Pizza Topping

  • One duck leg confit or approximately ¼ lb. Peking duck or roasted chicken (if you are using chicken you will need a tsp. or so of oil)
  • ¼ of a medium onion, cut into slivers
  • ¼ lb. mushrooms-shiitake are my preference, thickly sliced
  • 1 ½ tsp. balsamic vinegar
  • 1 ½ tsp. honey
  • 1 Tbs. hoisin sauce
  • 1 tsp. soy sauce – I use low sodium
  • 1 to 2 Tbsp. hoisin sauce
  • ¾ to 1 cup coarsely grated mozzarella or Manchego cheese
  • ½ to ¾ cup sprouts-sprouts or pea shoots. Onion sprouts are my favorite but alfalfa, mung bean or any micro-green will be great as well.

Pre-heat oven and pizza stone if you have one to 425° F

Remove all duck fat and meat from the duck leg confit and coarsely chop.  In a medium skillet, heat the duck (fat included) and the onion until the onion just starts to soften.  If you are using chicken, you will need to add tsp. or so of oil to the skillet.   Add the sliced mushrooms.  Cook until the mushrooms are just beginning to soften a bit.  Stir in the balsamic vinegar, honey, hoisin sauce and the soy sauce.

Assemble & Bake the Pizza using Naan

Spread the Naan, other flatbread or pre-baked pizza crusts with hoisin sauce.  Top with the duck filling and sprinkle with the grated cheese.  Place the pizza on the hot stone or on a baking sheet and bake until the cheese is melted and starting to brown.  This should take approximately 5 to 10 minutes.

Remove the pizza (s) from the oven and top with sprouts.

Enjoy!


To Assemble & Bake the Pizza using Quick Flatbread Pizza Dough – see post “Peking” Duck Pizza – I.


“Peking” Duck Pizza – I

DSC00341

In our family the follow-up to Duck Dinner could be “Peking” Duck Pizza.  It started back in the days when I was ordering duck product from D’Artagnan and tended to order extra items enough to make the shipping cost worth while.  One of the things I tried was their Smoked Magret Duck Breast.  It was tasty alone but seemed like it would be a great pizza topping – probably because we lived in Southern California at the time when thanks to Wolfgang Puck and California Pizza Kitchen founders, Rick Rosenfield & Larry Flax , pizza toppings were moving beyond tomato, cheese and pepperoni!

I don’t remember the “recipe” from the first time I made Pizza with that Smoked Magret years ago.  As with many things that have appeared on our table over the years, it was likely done on the fly with ingredients I had on hand and never recorded except in the memory of those who ate it.  When I was discussing items that should make their way to this blog with my daughter, “Peking” Duck Pizza was one that came up early.

So here we go.  I’m going to give you two versions of “Peking” Duck pizza that pay homage to the creations of Puck and the early days of CPK.  The first in this post uses leftovers from Duck Dinner and a quick flat bread like pizza crust that you can make in almost the time it takes delivery to arrive.   The second, in a following post will use another great duck product (duck leg confit) with pre-made Naan for the crust.  So if you don’t have Roast Duck leftovers or are short on time, fear not.  You will be able to enjoy a “Peking” Duck pizza too.

NOTE if you are making this you will want to do it within a couple of days following your Duck Dinner.  If that’s not going to work into your schedule, freeze  the duck breast and sauce and use them within a couple of weeks.   The duck fat will keep well in either the refrigerator or freezer for much longer.

“Peking Duck” Pizza – I

The  crust ingredients are simple – All-purpose flour, yeast, whole milk  (or non fat milk with a bit of olive oil) and salt.  This will make either two 10 inch thin crust pizzas or one thick crust pizza,  you choose.

DSC00308

I buy my yeast in one pound packages from King Arthur Flour or Sur la Table.   One pound of SAF-instant yeast  is $5.95 and if kept in the freezer will last 5 years-so even if you don’t bake a lot it’s a good deal.  A triple packet of yeast was $1.69 last time I checked, so the difference is paying $0.37 per ounce vs. $2.25 per oz.   If a pound still seems like it’s too much for you, you can buy a 4 oz. jar of the same yeast that is in the little packets for around $1.55 per ounce.

No scale, no worries-the 1/2 oz. you will need is 4 tsp.

DSC00310

Room temperature milk-you don’t need to wait for it to warm up.  Just give it a nudge in the microwave (10 to 15 seconds should do).   Just make sure the temperature is not above 115°F when you add the yeast.

DSC00311

Stir the salt into the flour

DSC00312

Add the milk/yeast mixture to the flour and stir until a dough is formed.  It will seem dry at first, but keep stirring.  It just takes a bit of time for the flour to absorb the liquid.

DSC00313 DSC00314

When most of the flour has been stirred you should be able to pull the dough into a ball with your hands.

DSC00315

Place the rough ball onto a lightly floured surface and knead slightly, until it’s smooth.  If you are planning to make thin crust pizzas, divide the dough into two balls now.

DSC00316

Place the dough ball(s) into a lightly oiled bowl and cover with plastic wrap or one of those fancy silicone bowl covers I love to use!  Put the bowl in a warm place for 30 to 45 minutes.  I find that my microwave which sits on top of my oven  is a perfect spot.

If you want to split the work up into two days.  You can make the dough ahead and refrigerate for a day.  Just make sure to remove to from the refrigerator for 45 prior to rolling. 

DSC00317 DSC00318

There are several ways to bake your pizza.  If you have a pizza stone that’s great, but if not a large cast iron skillet makes a great pizza baking vessel.  If you don’t have either of those a pizza pan or cookie sheet will do (you just won’t get as great a crust).  In any case, pre-heat your oven to 425° with your pizza stone or cast iron skillet inside.

While the dough rises and your oven pre-heats you can work on your topping- using all of the great scraps from your Duck Dinner. The only new ingredients you need are some mushrooms, sprouts and cheese along with some Hoisin Sauce and Soy Sauce

DSC00323

Thickly slice the mushrooms (I like shiitake but any fresh mushroom will do) and coarsely chop the duck (don’t toss that skin-it will crisp up and add great flavor to your pizza) 

DSC00326 DSC00327

Start with the mushrooms and a bit of duck fat in a medium size skillet over medium heat.  Once the mushrooms have started to soften and brown, add the duck and cook until the duck starts to sizzle a bit.

DSC00328 DSC00331

Stir in the hoisin and soy sauce (I use low sodium) and stir until well combined.  Remove from heat.

DSC00334

Roll one of the dough balls into a circle the diameter of your skillet*.   Lucky me, my silicone cover is the perfect template!  It’s not extremely critical however, so wing it if you don’t have something close at hand that is approximately the size of your skillet.

DSC00335

* Instructions for both thick crust and pizza on a stone are in the recipe below.

Remove the HOT skillet from the oven and place your dough in it.  Because it is so hot, it will sear the crust almost immediately, so if you don’t hit center on the first try, you will be able to re-position it easily.

DSC00336

Put the skillet back into the hot oven  and bake for 5 minutes.  Remove from the oven, flip the crust over and spread with another Tbs. of hoisin

DSC00337

Top with the duck/mushroom filling, leftover roast onions (if you managed to save them) and grated cheese.  If you like loaded pizza use all of them on this crust, if you want two less loaded pizzas use only half and repeat the process for a second pizza after you’ve finished this one!  I made this one “loaded” and then made a simple hoisin sauce, cheese and sprout pizza with the second crust.   The other option is to use up some of the other bits you have hanging about in the refrigerator or pop the second crust in the freezer for another day ;-).

DSC00338 DSC00339

Back into the oven for 5 to 10 minutes for a thin crust pizza.

DSC00340

Using a big spatula, lift the pizza from the skillet onto a cutting board and top with the sprouts of your choice.   The original version from CPK was topped with crispy fried wonton strips and slivered scallions but I like the freshness of the sprouts and the crust has plenty of crunch factor for me.

DSC00342

That’s a pair of kitchen shears you see on the edge-my favorite tool for cutting pizza.DSC00343

Yum!  The only thing it needs is a nice crisp beer to balance the sweetness of the hoisin and the richness of the duck.

DSC00345

Enjoy!

M.B.


“Peking” Duck Pizza – I

Using Leftovers from Roast Duck with Balsamic Pan Sauce

by: M.B. Einerson

 Inspiration from California Pizza Kitchen and many others

Servings: 2

Quick Flat Bread Pizza Dough – makes two 10 inch thin crust pizzas or one thick crust

  • ½ oz. (2 packets or 4 tsp.) active dry or instant yeast
  • ½ cup whole milk, room temperature or ½ cup non-fat milk plus 1 tsp. olive oil
  • 1 cup plus 3 Tbs. all-purpose flour, plus more for rolling
  • 1 tsp. kosher salt

Pizza Topping –amped up leftovers from Roast Duck Breast with Balsamic Pan Sauce

  • 1 tsp. duck fat
  • ¼ lb. mushrooms-shiitake are my preference, thickly sliced
  • ¾ to 1 cup coarsely chopped duck, including skin and fat layer
  • 1 Tbs. pan sauce or 1 ½ tsp. balsamic vinegar plus 1 ½ tsp. honey
  • 1 Tbs. hoisin sauce
  • 1 tsp. soy sauce – I use low sodium
  • 1 Tbsp. hoisin sauce
  • 2 to 3 Tbsp. onions left from making the pan sauce
  • ¾ to 1 cup coarsely grated mozzarella or Manchego cheese
  • ½ to ¾ cup sprouts-sprouts or pea shoots. Onion sprouts are my favorite but alfalfa, mung bean or any micro-green will be great as well.

Quick Flat Bread Pizza Dough

Stir the yeast into the room temperature milk.  Room temperature milk-you don’t need to wait for it to warm up.  Just give it a nudge in the microwave (10 to 15 seconds should do).   Just make sure the temperature is not above 115°F when you add the yeast.

Stir the salt into the flour

Add the milk/yeast mixture to the flour and stir until a dough is formed.  It will seem dry at first, but keep stirring.  It just takes a bit of time for the flour to absorb the liquid.

When most of the flour has been stirred you should be able to pull the dough into a ball with your hands.

Place the rough ball onto a lightly floured surface and knead slightly, until it’s smooth.  If you are planning to make thin crust pizzas, divide the dough into two balls now.

Place the dough ball(s) into a lightly oiled bowl and cover with plastic wrap or a clean towel. Put the bowl in a warm place for 30 to 45 minutes or until nearly doubled in size.  If you want you can make the dough a day ahead and refrigerate.*

Pre-heat your oven to 425° with your pizza stone or cast iron skillet inside.

Pizza Topping

In a medium skillet, heat the duck fat and add the sliced mushrooms.  Cook until the mushrooms are just beginning to soften.  Add the chopped duck breast and heat until the duck is starting to sizzle a bit.  Stir in the left over pan sauce or balsamic/honey mixture and the soy sauce.  Remove from heat and set aside while you prepare the pizza dough.

Assemble the Pizza – Cast Iron Skillet

Roll the dough ball(s) or into a size the diameter of your cast iron skillet.  Carefully remove the skillet from the oven and place the dough in the pan.  Don’t worry if you don’t hit the center.  The pan should be sufficiently hot to sear the dough enough so you can position it in the center.  Put the skillet back into the oven and bake for 5 minutes.

Remove the skillet from the oven and using a pair of tongs, flip the crust over.  Spread 1 Tbs. of hoisin sauce over the surface of the crust.  Top with the duck filling, the leftover onions if you have them and the cheese.  Put the skillet back into the oven and bake.  It will take 5 to 10 minutes if you are making a thin crust (1/2 of your dough) or 10 to 15 minutes if you are making a thick crust pizza.

Remove from the oven and lift the pizza carefully from the skillet with a large spatula.  Top with sprouts.

Assemble the Pizza – Pizza Stone

Roll the dough ball(s) into 10 to 12 inch diameter.   Put a generous sprinkling of cornmeal on a pizza peel.  Place a dough round onto the peel, and shake to make sure it will slide easily.  Spread 1 Tbs. of hoisin sauce over the surface of the crust.  Top with the duck filling, the leftover onions if you have them and the cheese.  Slide onto the hot pizza stone and bake for 10 to 15 minutes depending on the thickness of your crust.  Using the peel, slide the pizza from the oven.  Top with sprouts.

* Remove the dough from the refrigerator at least ½ hour before rolling to bake.  This is the same amount of time you will need to pre-heat the oven etc.


Duck Dinner-Roast Duck Breast with Wild & Brown Rice Risotto

DSC00305

Before I chose Lamb for our Easter feast,  I was thinking Duck Dinner.  Like Lamb,  Roasted  Duck Breast is another of my go to’s for special occasion meals.  For many years it was something I ordered in restaurants because I thought it was tricky to cook it well at home (not sure how I got that idea in my head)! Then I discovered how easy it was and it’s been on our festive list ever since.

There was a point in time when great duck wasn’t so easily found in Columbus and I ordered it from that great purveyor of specialty meats-D’Artagnan.   I like the fact that they are committed to free-range, natural production and sustainable, humane farming practices.   And as with the great meat I get from Bluescreek Farms, the quality shows up on the fork.  The shipping cost was a bit prohibitive, so it only made it to our table occasionally.  However, as Columbus became more of a food town I was able to find great duck  at North Market Poultry and Game in the North Market and then low and behold D’Artagnan fresh Margret Duck breast showed up in the meat case at Giant Eagle Market District stores.  At $10.99 per pound it may seem a bit pricey for poultry, but one 1 lb. duck breast will easily serve 3 to 4 people as part of a Duck Dinner or 2 with leftovers for making  “Peking” Duck Pizza (guess what next weeks post will be about).   And then there’s that liquid gold,  duck fat that comes as a by product of properly cooking a duck breast.

So here we go!  I think of this recipe as Scarborough Fair Duck as it utilizes that classic combo of Parsely, Sage, Rosemary and Thyme.   Unlike the tale of the ballad however, the task of cooking this dish is the exact opposite of impossible.  Also unlike the ballad which is English, the recipe has it roots in Italian cuisine and comes from Academia Barilla with just a couple of little tweaks.

 To pair with the Duck I often go with some type of Wild Rice as a side dish.  Somehow in my mind Duck and  Wild Rice go together.  Perhaps it’s from watching ducks swimming around on the lakes of Northern Minnesota where the best wild rice is grown.   The recipe here takes a slightly different tack on cooking a combo of rice types.   The inspiration for the recipe comes from a Gourmet 2002 recipe for Wild Rice and Toasted Almond Pilaf.  After making it once, as written and finding it a bit lacking,  I took some of the suggestions by some of the 20 other reviews and punched it up a bit in flavor and changed the cooking method from pilaf to risotto technique.   The cooking time wasn’t reduced much from the original (natural wild and brown rices just take time) but I preferred the finished texture. It’s not exactly like a classic risotto from Arborio rice because the starches are so different,  but pretty darn tasty.

Now the only thing to do before we start cooking is to stream some Simon & Garfunkel to put us in a Scarborough Fair frame of mind.

The Rice

We’ll start with the rice as it will take the longest time to prepare.  I’m using Wild Rice and Converted Brown Rice.  I’ve also made this dish with one of the Rice blends that are showing up in the bulk sections of many grocery stores these days.  It was very pretty but I like the texture and flavor of the simple wild and brown best.

 DSC00270

Start by soaking the dried porchini mushrooms in boiling water.  I’m weighing them because I also buy these from the bulk section and depending on the size of pieces you have, a volumetric measurement would be off.  But it’s not a critical amount, so if you don’t have a scale yet go for what seems right to you.

DSC00272DSC00275

Let the mushrooms soak for 10 to 15 minutes.  While the mushrooms are soaking you can work on dicing the onions and mincing the garlic.

After soaking,  the mushrooms should be soft and pliable and the soaking water a rich brown color.  Transfer them to a mesh strainer lined with a coffee filter.  If you don’t have either of these, no worries.  Simply lift the mushrooms out with a slotted spoon or fork.  The goal is to have grit free mushrooms and mushroom “stock” . 

DSC00276

Chop the mushrooms and add the mushroom “stock” and the chicken broth into a small pot over low-medium heat

DSC00277DSC00279

Now your ready to start cooking.  Heat olive oil in medium size heavy pot.  Add chopped onions and cook until the onions are soft and translucent.

DSC00280

While the onion is cooking, rinse the wild rice.

DSC00278

Add the wild and brown rice to the onions and cook, stirring until the rice is well coated with oil.

DSC00282

Add the chopped mushrooms and minced garlic and cook for a couple of minutes.  Turn the burner to low.

DSC00283

Add a ladle full (1/2 cup) of hot stock to the mixture and stir until the liquid is nearly all evaporated.  Continue cooking and stirring and adding stock in this manner until the rice is tender but not mushy.  You don’t have to stir constantly, but if you can put a glass of wine in someone’s hand and assign the task to them, go for it!  It will take a good 45 minutes or so to cook the rice.  When you have added nearly all of the broth, add salt and pepper to taste and check the rice for doneness.  If it still seems a bit underdone continue adding additional hot water in ½ cup increments.  

DSC00284

Once you’ve achieved the desired tenderness, stir in the butter and cheese and taste again for salt.   Wow-sorry for the blur.  The is the first time I’ve attempted to blog and put dinner on the table at the same time ;-)!  You’ll be stirring this in as the duck is coming out of the oven if all goes according to plan.  

DSC00300


The Duck

A simple set of ingredients and yeah it’s time to put in some fresh herbs by my front door. They won’t mind if I snip a few leaves for dinner.

DSC00286DSC00266

Pre-heat the oven to 375°F.  This is going to come together fast.

Cut the onion half into 4 pieces.

DSC00288

Lightly salt and pepper both sides of the duck breast and carefully score the skin to make a cross hatch pattern.  Be careful not to cut all the way into the flesh.  You just want to open up the fat layer so it will render more quickly and allow the meat to cook more evenly.

DSC00290

Place the duck breast skin side down in an oven safe skillet and place over medium-high heat and sear until golden brown.  This will take about 4 to 5 minutes.  

DSC00291

Flip the breast over, turn the heat up a bit and sear on the flesh side for another couple of minutes.

DSC00293

Scatter the onion, garlic (whole cloves with outer skin on), and herbs around the breast and put into the pre-heated oven for 15 to 20 minutes.  

DSC00294DSC00295

Check the internal temperature.  135° to 140° F is what you’re looking for if you want medium-rare.  

The official food safety word from the USDA is that duck breast should be cooked to 165°F.  If you cook a duck breast to 160°F (assuming that carryover cooking will continue to raise the temperature to 165°F as the duck rests), it will be medium well—safe to eat and maybe a little pink in the center, but drier than I like.   When cooking meat from a purveyor like -D’Artagnan, I’m comfortable with medium-rare.

DSC00296

Remember the skillet handle is very hotput a pot holder, dish cloth or one of those fancy pot handle covers on it.

Remove the breast to a warm plate and tent with foil.  Spoon out the excess duck fat and save for another day.  Press on those garlic cloves to extract all of that yummy flavor.

DSC00297DSC00298

Add the honey and balsamic vinegar to the skillet (today I’m using a  Black Mission Fig Balsamic I got for Christmas)

DSC00299

Heat until the sauce is slightly reduced and syrupy.  The amount of time will depend on the age and thickness of the balsamic you are using.  Strain the sauce by placing it in that fine mesh strainer you’ve been using for preparing this entire meal.  Press down on the onions and herbs to extract all of their goodness.

In the original recipe the stuff in the strainer would be discarded, but those onions roasted in duck fat are delicious, so feel free to pick out the herbs and send the onions to the table (if you can keep you family from eating them immediately) or save them for use  in another recipe- i.e. pizza topping!

 DSC00302

Remove to rested breast from the foil and slice diagonally.  

DSC00303

Arrange on warm plates and drizzle with the pan sauce.  I’d planned to serve this with steamed asparagus, but it’s still a bit early here in Ohio for local stuff and the imported at the market was sad.  So microwave steamed broccoli it is.

DSC00321

Enjoy!

M.B.


Wild & Brown Rice Risotto Style

by: M.B. Einerson

 Adapted from Wild Rice and Toasted Almond Pilaf – Gourmet March 2002

 Servings: 4

  •  5 oz. dried porcini mushrooms reconstituted in 2 cups boiling water
  • 2 cups chicken or vegetable broth
  •  1 Tbs. olive oil
  • ½ medium onion, finely chopped
  • ½ cup wild rice – rinsed under cold running water and drained
  • ½ cup brown rice
  • 1 clove garlic, minced
  • 1 tsp. unsalted butter
  • ½ to 1 teaspoon salt (amount will depend on the saltiness of the broth you are using)
  • Freshly ground black pepper
  • Freshly grated parmesan cheese (optional) or ½ cup toasted almonds

Soak the mushrooms in boiling water for 10 to 15 minutes.  Once the mushrooms are soft and the liquid is a golden brown color, strain the mushrooms in a fine mesh strainer lined with a coffee filter or paper towel.  Coarsely chop the mushrooms and set aside.

Combine the mushroom soaking liquid and the chicken broth in a sauce pan and bring to a low simmer.

Heat the oil in a heavy 3 qt. pot or Dutch oven over medium-high heat.  Add the onion and cook until soft and translucent.  Add the wild and brown rice and cook, stirring until the rice is well coated with oil.  Add the garlic and mushrooms and cook for 2 minutes.

Reduce the heat to low-medium and stir in a ladle full (approximately 1/2 cup) of hot broth.  Continue stirring and adding broth by the ladle full when most of the previous broth has been absorbed by the rice.  You don’t need to stir continuously if you are preparing other dishes to go with this risotto, but if you can put a glass of wine in someone’s hand and assign them the task, go for it!

When you have added nearly all of the broth (45 minutes minimum), add salt and pepper to taste and check the rice for doneness.  If it still seems a bit underdone continue adding additional water in ½ cup increments.

Once you’ve achieved your desired degree of doneness, remove the pot from the heat and stir in the butter and cheese or almonds depending on your preference.  I make the call based on what I’m paring the “risotto” with.


Scarborough Fair Duck

Roast Duck Breast with Balsamic Pan Sauce

by: M.B. Einerson

Barely Adapted from Academia Barilla 

Servings: 2 to 4 (duck breast is very rich and flavorful so a little goes a long way)

  • 1 lb. duck breast removed from refrigeration approximately 30 minutes before cooking
  • Kosher salt and freshly ground black pepper
  • ½ medium yellow onion, quartered
  • 1 to 2 cloves garlic, ends trimmed and at least one layer of skin left on
  • 1 sprig fresh rosemary or ¼ tsp. cracked dried rosemary
  • 2 to 3 fresh sage leaves or ½ tsp. dried whole leaf sage
  • 2 to 3 sprigs fresh thyme or ¼ tsp. dried thyme leaves
  • 1 ½ tsp. honey
  • 1 to 3 Tbs. balsamic vinegar (this will depend on the quality of balsamic you are using-if it’s a young and thin vinegar use 3 Tbs. and if it’s an older, thicker vinegar start with 1 Tbs. and adjust to taste.
  • 1 Tbs. fresh parsley, finely minced

Pre-heat oven to 375° F.

Trim any excess fat and skin from the sides of the duck breast to produce a nice, even shape.  Do not toss the trimmings however, they are the makings of culinary gold.  Carefully score the skin to make a cross-hatch pattern.  Do not cut all the way through the skin into the flesh, you just want to open up this layer so it will render the fat more quickly and allow the meat to cook evenly.

Lightly salt and pepper both sides of the breast.

Place the breast skin side down in an oven safe non-stick skillet  along with any trimmings and place over medium-high heat.  Sear until the skin is golden brown.  This will take 4 to 5 minutes.  Flip the breast so the skin side is up and turn the heat to high and sear for another 2 to 3 minutes.

Add the onion quarters, garlic cloves and herbs to the skillet and place in the oven for 15 to 20 minutes or to an internal temperature of 135° F (this is medium-rare so if you want it less pink inside roast it longer).

Once the duck is cooked, remove it from the skillet and wrap in aluminum foil to keep it warm and allow it to rest while you prepare the pan sauce.   Remember the skillet handle is very hot-put a pot holder, dish cloth or one of those fancy pot handle covers on it.

Spoon out and save the excess duck fat.  You will want approximately 1 Tbs. left in the skillet. Smash the garlic cloves to get all that good stuff from the center.   Add the honey and balsamic vinegar to the skillet and heat until the sauce is reduced slightly.  The amount of time will depend on the type of balsamic you have chosen.  Strain the sauce by placing it in a fine mesh strainer and pressing down on the herbs and onions to extract all of their goodness.  In the original recipe this would be discarded, but those onions roasted in duck fat are delicious, so feel free to pick out the herbs and send the onions to the table as well or save them for use in another recipe- i.e. pizza topping!

Remove the duck breast from the foil and slice diagonally.  Arrange servings on warm plates and drizzle with the pan sauce and sprinkle with the minced parsley.

Enjoy!

M.B.

Fusilli Lunghi Alla Rustica-Long Fusilli with Bell Peppers and Onions

DSC00251

This post is not so much about this recipe specifically but a nod to another of my favorite cookbooks The Classic Pasta Cookbook by Giuliano Hazan.   Slowly but surely I’m cooking my way through it in Julie &Julia  style but without giving myself the pressure of doing it all in one year and with no whining.   Cooking from this one is easy and satisfying.  This will be the 47th of the 102 recipes that I’ve made from it to date.  The book itself has a permanent home in the recipe stand on my kitchen counter, serving as a backbone of sorts to the myriad of things I’m planning to cook.

I’m certain I purchased it because it was written by the son of the Marcella Hazan, the Julia Child of Italian cuisine.   In the 80’s I had the great fortune to take a series of classes from Marcella at a small shop in Westlake Village CA.  The shop has since grown into the  Westlake Culinary School  (Home of  Let’s Get Cooking) so if you are one of my LA friends check it out!!  They have hosted every one from Marcella to Julia, Wolfgang and Jacques to name drop a few.

This little volume has a heartfelt forward from Marcella, an educational introduction by the author followed by one of my favorite parts-a catalog of pasta.  The pages of the catalog contain beautiful photos of all types of pasta with short descriptions explaining the meaning of their names and how they are most successfully used in dishes.  Today’s recipe for example uses Fusilli Lunghi – “These are “long springs”, like telephone cords.  They are good with chunky sauces, which cling well to the curves in the pasta”

The next section of the book has a tutorial on the equipment used to make home-made pasta, step-by-step instructions on making the dough, rolling the pasta, cutting the pasta, stuffing pasta and ends with cooking and serving tips.

Then come the recipes First a section on Classic Sauces.  There are eleven in all, each one with a beautiful photo of the finished dish as well as an array of the ingredients and picture of pastas that pair best with the sauce.   Needless to say all of them have been prepared in my kitchen on multiple occasions.  My daughter’s specialty was the All’Alfredo, with only 7 ingredients including the pasta and salt & pepper, it was a great starter recipe.   Not only did she master it, but she feed and taught several friends how to make it as well.

Next come recipes organized by pasta shape-long, ribbons, tubes, special shapes, soups and stuffed and baked!   These are the one’s I’m still cooking my way through – 35 down and 55 to go.

It doesn’t end there however.  There is also a section on preparing vegetables-photos of classic techniques for dicing and chopping and a great tip on how to peel a tomato/pepper or any soft fleshed fruit or vegetable.  This last tip is one that his mom taught in those classes I took and that I continue to pass on to those I teach.   Not quite ready to move to video in this blog, but I think you’ll get the gist of it in a still shot when I’m using fresh tomatoes some day soon.  Not today, however-canned diced are the ticket for almost all recipes in early April.

Last but certainly not least there is a section on the Italian Pantry followed by Notes with little gems of knowledge ranging from the meaning of molto al dente to why vegetable oil is sometimes preferred over olive oil in a recipe.

Wow!  I didn’t start this post as a sales pitch for this cookbook, but I do love it.  Sadly it is no longer in print, but available through guess who.  In any case, if you ever run across one at a garage sale, thrift store or in a box on a street curb in Brooklyn grab it.

This particular recipe fulfills my reducetarian goals with just a bit of pancetta for flavor.  It could be completely vegetarian, but that little bit of pork goes a long way when it comes to flavor.    It  does goes a bit out of season with the bell peppers but as with the tomatoes last week I’m craving fresh produce and when I found the lovely fusilli lunghi at the store yesterday I couldn’t resist.  As for the basil,  dried is not a good substitute for fresh  and I’m all out of my frozen stash from last summer’s garden-sooo.

buon appetito!

MB

Yes, that’s the original recipe in the stand on my counter with all of the ingredients I’ll be using to make this dish.  In the original the ingredients are shown in an array according to their inclusion in the recipe and in the form (minced, strips) to be used in your mise en place.

DSC00219

Just in case you need a pictorial of what to do when a recipe calls for onion, thinly sliced

DSC00221DSC00222

DSC00223

Next the pepper.  There are many ways of getting that pepper cut into uniform strips but this is my favorite.  Then I get too munch on the top and bottom while I’m working.

DSC00228DSC00229

DSC00230

Now those olives!  You can totally use pitted green olives of any type, but for Italian dishes I like the color, flavor and texture of Castelvertrano.  Sometimes you can find them in bulk in a good grocery store or market.  To remove the pit, either smash it with you palm on the fat part or the blade of your knife or use a cherry/olive pitter (yep I do like gadgets for some jobs)

DSC00235

I took a short cut with the pancetta (actually I was using up some from a previous recipe) and used pre-diced.  To be true to the recipe buy a 1/4 in slice and cut it into thin strips. 

DSC00232

If you don’t have both parmigiano-reggiano and pecorino romano in refrigerator, stick with the parm.  Much better to have a good quality parmesan (no pre-grated please and don’t even ask about substituting with the stuff in the green canister).  The pecorino has a stronger, sharper flavor but I doubt that in this dish you will miss it.

DSC00246

Now that nearly all of your mise en place is done you can start cooking.

Into the pan with the olive oil.  I find my wok skillet ideal for cooking Italian pasta sauces like this one. If you don’t have a wok, a large skillet is the next best thing.  Now it’s low and slow until the onions are soft and a rich golden color.  This brings out all the natural sweetness in the onions and makes the flavor mellow.

DSC00227

Stir frequently.

DSC00231

Now in with the garlic and red pepper flakes.  

DSC00233

As soon as you get them stirred in,  its time to add the pancetta.  Cook and stir frequently until it’s lightly browned but not crisp.

DSC00234 DSC00236

At this point it’s time to start heating the water to cook the pasta.  Note I have the salt ready and waiting.

DSC00245

Back to the sauce – it’s in with the pepper strips and parsley.  These need to cook until the peppers are tender.  It should take around 5 minutes.

DSC00239

Once the peppers are tender, add the tomatoes and oregano if you’re using dried.  If you are using fresh tomatoes they will need to cook for another 5 minutes or so.  If you are using canned all you need to do is stir them in and let them get warm.

DSC00242DSC00238

Next the olives, capers and basil (fresh oregano if this was your choice).  Stir to combine and then turn off the burner or remove from heat source if your cooking on an electric range.

DSC00243 DSC00244

Add that Tablespoon of salt to your boiling pasta water.  

So here’s the deal-the only thing I now always change when using this book is to cut the amount of dry pasta in half.  I know, I know,  we Americans over sauce our pasta, but even with half the dry weight of pasta, these recipes are never dripping or covered in sauce and actually turn out looking pretty much as pictured.  So I leave it to you to decide!

In any case I almost always weigh my pasta.  

DSC00241

Drop it all into the salted boiling water and give it a good stir to separate the strands.  I set my timer for a minute or two before the package directions indicate so I can check to see how close to that al dente I am.

DSC00247 DSC00248

Once I hit al dente, I move the pasta pot to the sauce and transfer the noodles to the sauce with a pair of tongs.  No pasta water facial from taking this big pot of hot water and trying to pour it into a colander!  Then if I need some of that nice starchy water to thin the sauce a bit, it’s ready and waiting.  But best of all no extra dishes (colander  and bowl to catch pasta water) to wash!!!

Add the cheeses.  Toss it all together and your ready to eat! 

DSC00249 DSC00250

It’s a vegetable pasta, but the flavor of this one needs a light red wine.  My hubby chose a Sangiovese Di Romagna!

DSC00253


Fusilli Lunghi Alla Rustica

by: M.B. Einerson

Barley Adapted from The Classic Pasta Cookbook-Giuliano Hazan

Servings: 4 for a main course and 6 if you are eating Italian style

For ½ lb. fusilli lunghi (note that the original recipe uses 1 lb. pasta) Alternative pastas: fusilli corti, penne, elicoidali

  • ¼ to ½ cup extra virgin olive oil (use ¼ if you are using the pancetta and the full ½ if you’re going vegetarian)
  • 3 cups yellow onion, thinly sliced
  • 1 tsp. finely chopped garlic
  • ½ tsp. red pepper flakes
  • 2 to 3 oz. pancetta, cut into thin strips from a ¼ inch slice or diced into ¼ in cubes
  • 1 large yellow or red bell pepper or ½ of each, cored and seeded, peeled and cut into strips ½ inch wide
  • 2 Tbs. finely chopped flat-leaf parsley
  • 1 lb. fresh ripe plum tomatoes peeled, seeded and cut into ½ inch dice or 1-14.5 oz. can diced tomatoes drained – see comment about adding dried oregano here.
  • ½ cup green olives, pitted and julienned
  • 2 Tbs. capers-drained if in brine or rinsed and drained if salted
  • 1 tsp. coarsely chopped fresh oregano or ½ tsp. dried (I prefer Turkish in Italian dishes and if I’m using dried I add with the tomatoes to give it more time to hydrate)
  • 2 Tbs. fresh basil leaves, torn by hand into small pieces or cut into ribbons
  • Salt – depending on your taste and the amount of salt in the tomatoes you may find there is enough already in the sauce, but be sure to salt the pasta water with 1Tbs of kosher salt
  • 4 Tbs. freshly grated parmigiana-reggiano cheese
  • 2 Tbs. freshly grated pecorino romano cheese (no worries if you don’t have this one-just use all Parmesan

If you’re like us you will want to take an additional piece of cheese to the table for grating on top.

In a large pot add 4 quarts of water and heat over medium-high heat. (You want it to be boiling when the time comes to drop the pasta)

Put the olive oil and onion into a large skillet over medium-low heat and cook until the onion has softened and turned a rich golden color.

Increase heat to medium-high and stir in the garlic, red pepper flakes.  Sauté for 30 seconds or less.  Add the pancetta and cook until it is lightly browned but not crisp.

Add the bell pepper and parsley and cook, stirring occasionally until tender.  Add the tomatoes (and the oregano if using dried) and cook another 5 to 6 minutes.

Stir in the olives, capers, oregano (if using fresh) and basil and remove from heat.

When the pasta water is boiling, add 1 Tbs. salt and drop in the pasta all at once, stirring until the strands are submerged and separated from each other.

When the pasta is cooked al dente (taste a strand about a minute before the package directions indicate it should be done).  Drain it or lift from the water with tongs and toss it with the sauce and the grated cheeses.  Taste for salt and serve at once with a light red wine.

buon appetito!

M.B.

Lambchetta

DSC00264

Thanksgiving is the only holiday menu that for the most part remains the same from year to year in our family. OK I did try to play with it a few times-Duck Strogonoff in the late 80’s comes to mind. Then there was one year in a New York rental apartment that the center of our plate was a lovely Chanterelle mushroom dish with a side of Roasted Sweet Onions with Blue Cheese, turkey did not make an appearance.  But for the most part we stick to Turkey and Dressing with all the trimmings.  All other holidays however run the gamut from Sushi for Christmas Day dinner to Rabbit for Easter (yep, we’ve done that a couple of times).

This year thanks to Bluescreek Farm we are going with Lambchetta.   Meat like theirs is why I will never make it beyond being a reducetarian.  We have a custom CSA with them which means that each month I pick up a surprise package of meat to tickle my taste buds and sometimes challenge my culinary skills.  Cheryl & David and their team raise animals in the manner I grew up with and it shows up in the flavor each and every time I cook it.   No matter if it’s a burger on the grill or lamb heart, the care that goes into producing this meat shines through.

Now I am pretty familiar with Porchetta thanks to a great spot on St. Mark’s Place in NYC.  The Columbus Ribs and Pork Belly that I’ve gotten in the past from Bluescreek have been awesome.  I’m also pretty good at cooking other cuts of lamb-racks often make the cut for Christmas and roasted leg at Easter more than once.  This Lambchetta however was giving me some trepidation.  I like my leg of lamb cooked medium to medium rare, so what was going to happen to all of that lovely lamb belly???

I consulted with the Bluescreek folks and of course Google.  My Lambchetta was already seasoned with lemon, garlic and herbs and vacuum sealed (this is how all of my CSA items come, which allows me to stock my freezer with no loss of quality).    The vacuum sealing made it the perfect candidate for Sous Vide.  So this is how it went!

My lambchetta ready to go and my Sansaire  sous vide set to 135 °F

DSC00255DSC00257

I let it cook for 2 hr. at 135°F and then kicked it up to 140° F for one more hour.  The range I found on Google ran from 2 hours to over 8 for lamb loin or leg!!! At this point, I was pretty sure I was going to be happy with the loin in the center.

DSC00258

Then it was onto a hot grill with a dusting of alder smoked salt to get some of that great flavor that comes from cooking over an open flame.  When I turned it one little piece of the loin fell out.

DSC00259DSC00260

That little piece of loin that fell out didn’t last long-more that half was gone before I could snap this picture-but you can get an idea of what a beautiful medium rare it was!!  The rest of the “roast” kind of fell apart as I brought it in for carving.

DSC00261DSC00262

One one end some of it was a little fatty for my taste (I’ve seen shots on the Blues Creek site that seem to be a tad leaner, which would be a positive I think)

DSC00263

But at the other end there was plenty perfectly cooked lean for all three of us!  Some simple garlic haricot vert and roasted fingerling potatoes with a splash of good Balsamic-Easter Dinner doesn’t get much easier or better!  And for that extra lamb belly, a certain someone has plans for it too.

DSC00265

Hope you had a beautiful Easter or Passover feast as well.

M.B.

Masoor Dal – Spicy Red Lentils

DSC00215DSC00216

The first time I heard the term flexitarian I literally laughed out loud.  However, the more I thought about it, the more I came to realize that this is exactly the direction I’ve been headed over the course of years.  Meat, although still very much enjoyed at my table has become less and less of a center point.  The portions have definitely become smaller and it is often not present at all or simply as a flavoring.  So, while I  would not consider myself a true flexitarian and according to Wikipedia I should actually be classified a reducetarian, it is the way I enjoy eating these days regardless of what you call it.

A good part of the credit for the change in our diet his must go to my lovely daughter who came home from a study abroad as a  pescetarian (there is absolutely a name for every diet)!  This challenged me to explore more and more vegetarian dishes when she was home.  Low and behold, they were so tasty,  many of them now have a spot in often repeated dishes appearing on my table.

Another large factor is my families love of Indian food.   In this cuisine,  the brilliant use of spices and spice combinations leaves ones senses fully satisfied without a hint of meat.   Now don’t get me wrong, I do love a  hearty dish of lamb or beef Rogon Josh.  However,  I can be just as happy with a bowl of this Masoor Dal, some basmati rice and a piece of nan to scoop them up.

The recipe comes from another of those great little cookbooks that form the backbone of my collection.  The Best of India – A Cookbook – Balraj Khanna.   I just checked and it is still available on Amazon, so if you love Indian food it should have a place in your collection as well.  In addition to great recipes and photography it has a glossary of ingredients that is especially useful when shopping in Indian markets and for the making of several masala’s that you can use in creations of your own.  This Masoor Dal is definitely the dish I’ve made the most often from this book and amazingly one that I never feel the need to tweak or adjust to suit my taste-it’s perfect just as written.  The only changes I’ve made are to update the quantity of tomatoes in a can (it’s dropped from 16 oz. to 14.5 oz) and to mince the garlic, jalapeno and ginger by hand rather than dirtying a blender!  OK maybe I’ve also thrown in a bit more onion and  garlic and a tad less ginger, but if you follow it the first time I think you’ll be happy and then you can go about adjusting to suit your tastes.

Happily nearly all of these ingredients are almost always in my pantry and refrigerator.  I broke down this week and bought some fresh tomatoes for the garnish.  The real deal is still far away from appearing in my garden and the little Campari tomatoes are actually pretty tasty even in March.   I do have a weakness for fresh tomatoes.

DSC00196

Start by rinsing and draining the lentils

DSC00198

Into the pot with the lentils, onion, spices and water.  

DSC00199

Bring to a boil, reduce heat, cover and simmer for 30 minutes.  Give it an occasional stir, especially if you do not have a heavy pot.

DSC00212

While the base is simmering you can prep the garlic, fresh chili (in a pinch you could use canned jalapeno) and ginger.  The easiest and safest way to peel ginger is to simply scrape the brown away with a spoon.

DSC00201

Finely minced, they all go into a small skillet with the ghee or butter.  Ghee is becoming easier to find but butter works just fine.  Just keep the heat low, you want them to sweat not burn.

DSC00204

I prefer whole peeled tomatoes in dishes like this where I want them to melt into the dish.  Diced tomatoes usually have calcium chloride added to help them keep their shape and remain firm.  The easiest way to chop whole peeled tomatoes without having them squirt is with a pair of kitchen shears (every kitchen needs at least one pair).

DSC00205DSC00207

At the end of the 30 minutes, stir the tomatoes, oil, salt and garlic mixture into the lentil base.  Cover and cook an additional 30 minutes or until the lentil mixture is slightly thickened.

DSC00208

While the dal is on its final simmer you can make some basmati rice.   I’m a fan of brown rice and have switched to it for most of my rice containing recipes.  However,  when it comes to Indian food I prefer white basmati from India.  Indian grown rices will have been aged for a minimum of 1 year before packaging.   This gives the rice a nuttier flavor and a fluffier texture.   If the rice were to be aged with the bran and germ intact, the oils would oxidize and rancid off-flavor would develop.  So save the whole grain for other rice varieties, buy them in small quantities and store them in the refrigerator or freezer.    

DSC00195

And yes, I almost always use a rice cooker when making any type of rice.  It comes out perfect every time if you measure accurately and that keep warm function is awesome.

DSC00211

Now all that’s left is a bit of garnish with cilantro & tomato (totally optional) and heating a bit of nan to use in scooping up all that goodness.   There are many options for good nan in my markets these days.  One of my favorites is one from La Brea bakery in LA and sold at Costco.   I always have a package in my freezer.

DSC00217

One more story before the recipe!  The place mats remind me of a great meal I enjoyed in Singapore where the plates were banana leafs and the utensils were our hands.   One of the dishes we shared was fish head curry.  If you want a chuckle,  check out the youtube video on how to eat Singapore Fish Head Curry.   It’s the real deal.

Masoor Dal

(Spicy Red Lentils) 

by: M.B. Einerson Barely Adapted from The Best of India A Cookbook – Balraj Khanna

Servings: 4 to 6

  •  1 cup split red lentils (masoor dal), rinsed & picked over
  • ¾ cup finely chopped onion
  • 3 cups water
  • ½ tsp. ground turmeric
  • ½ tsp. ground cumin
  • ½ tsp. ground coriander
  • ½ tsp. chili powder
  •  1 Tbs. ghee or unsalted butter
  • 2 garlic cloves, minced
  • 1 fresh hot green chili, seeded and finely minced
  • One 2-inch piece fresh ginger, peeled and finely minced
  • One 14.5 oz. can diced or whole peeled tomatoes, undrained
  • 3 Tbs. vegetable or olive oil
  • 1 ½ tsp. salt
  • 2 Tbs. cilantro, finely chopped for garnish
  • 2 medium tomatoes, thinly sliced for garnish

In a medium heavy saucepan or pot, combine the lentils, onions, water, turmeric, cumin, coriander and chili powder.  Bring to a boil and then reduce heat to low and cook covered for 30 minutes.

Meanwhile, in a small skillet heat the ghee or butter over medium heat.  Add the garlic, chili and ginger and cook for approximately 2 minutes or until aromatic and slightly softened. Set aside until the lentils have cooked for their 30 minutes.

Stir the garlic mixture, tomatoes, oil and salt into the lentils.  Cover and cook for an additional 30 minutes or until the lentil mixture is thickened.  Serve garnished with the fresh cilantro and sliced tomatoes.


Best Ever Pancakes

DSC00189

My children certainly consumed their share of frozen waffles.  They were fast and easy to pop in the toaster and onto a paper plates as we were headed out the door to Sunshine Day Care or Britton SACC.    On the weekends however, we made pancakes from scratch.  They were a staple for sleepovers for sure, but very often we made them just for us.  The cinnamon and vanilla (the vanilla is my only addition to the recipe) made them tasty enough to eat without being drowned in syrup and even back in the 1990’s I thought whole wheat was a plus.  OK sometimes we dropped on a few mini chocolate chips for fun!

The source for this recipe is Pancakes And Waffles by Elizabeth Alston.  I don’t recall where I found this little gem of a cookbook but it has a time honored spot in my collection and it now falls open to page 14 where this stained and spattered recipe for pancakes resides.  In the margins are written quantities for doubling (almost always) and tripling (weekend sleep-overs).  There is also a spot in the instructions where my daughter underlined the directions for combining the wet ingredients and adding them to the dries.   It is almost certainly one of the first recipes that she learned to make on her own.   As testament to this, there is a certain yellow bowl that to this day sports a pour spout from a too close encounter with the electric griddle.  For years after the bowl served as a strainer when pouring off water from shocked green beans etc.  It now has an honored spot in the sauna.

That griddle is also an important contribution  to this recipe’s place as a sleep over institution.  It was a wedding gift from my sister-in law and her husband.  The intended use being, the making of lefse.  If you are not of Scandinavian heritage (as I certainly was not), this is a delightful tortilla like flat bread made primarily of potatoes and flour.  It is a critical component of any true Norwegian or Finnish Christmas feast-especially for those of us who only tolerate the lutefisk.  If you don’t know about lutefisk, consider yourself lucky and if you do you will likely understand what I’m talking about.   At some point I’ll share this time honored delicacy with you (the lefse, not the lutefisk) but it will wait until I have the helpful hands of my daughter, as it is  a project.  In any case I remain grateful to my sister-in-law for introducing me to this awesome piece of cookware.  On this,  you can make pancakes fast enough to keep even the hungriest of sleep over crowds happy.

Ingredients : Flour (half whole wheat and half all purpose), sugar, baking powder and soda, cinnamon,salt, buttermilk, egg, vanilla & oil.

DSC00176

Start by combining the dries-it’s important to mix well.  No one wants to bite into a lump of baking powder or soda. The cinnamon not only adds great flavor but it helps you see that you’ve done a good job of mixing.

DSC00177

Now do the same thing with the wet ingredients.  If you don’t keep buttermilk in your refrigerator you can substitute with a combo of plain yogurt and water, if you don’t have yogurt you can  use milk plus vinegar or lemon juice.  If you don’t have any of these you’ll need to go to a Waffle House.

DSC00181

Sometimes on the eve of a big sleep over party I would do the first two steps ahead and refrigerate the wet mixture.  Then it was just a matter of mixing the two together and heating up the griddle. The batter should be smooth but not over beaten.  If it seems too thick, thin it with a bit more buttermilk or milk.  

DSC00183

How thick is too thick??  This depends on how you like your pancakes, so cook one and adjust-I’ve never had the batter be too thin as written, but have often thinned it just a bit.

I usually cook one pancake to make sure the temperature of the griddle is perfect and to munch on while I cook the rest.  They are ready to flip when you see these little bubbles forming on the surface and the bottom is nice and brown.  

DSC00187

Resist the urge to smash or flatten the pancakes while you are waiting for them to cook on the second side.  If you must do something with that spatula in your hand, turn the sausage that should be cooking to go along with your tasty cakes.

DSC00188DSC00191

My personal favorite toppings are sautéed apples and a drizzle of berry syrup with a side of sausage but real maple syrup and bacon have a following at my table as well.  Oh and don’t forget the mug of hot Nestlé Quik.

DSC00193

Happy Breakfast-or Lunch or Dinner!

M.B

Best-Ever Pancakes

by: M.B. Einerson

 Adapted just barely from Pancakes And Waffles by Elizabeth Alston 

Servings: approx eight 4-inch pancakes (rarely made just a single batch)

  •  ½ cup all-purpose flour
  • ½ cup whole wheat flour
  • 1 Tbsp. granulated sugar
  • 1 tsp. baking powder
  • ½ tsp. baking soda
  • ¼ to ½ tsp. cinnamon
  • ¼ tsp. salt
  •  1 cup buttermilk, or ¾ cup plain yogurt plus ¼ cup water
  • 1 large egg
  • 1 tsp. vanilla
  • 2 Tbsp. mild olive or vegetable oil
  • Oil for cooking

Combine flours, sugar, baking powder and salt in a large bowl and stir or whisk to mix well.

Measure the buttermilk in a 2-cup or larger glass measuring cup.  Add the egg, vanilla and oil.  Beat with a fork or whisk to blend.

Add the milk mixture to the flour mixture and stir to form a smooth batter.  If the batter seems too thick add a splash more buttermilk or milk.

Heat a griddle or large skillet over moderately high heat until it feels hot when you hold your hand directly above it.  Lightly grease using a silicone brush or a folded paper towel.

For each pancake ladle approximately ¼ cup batter onto the griddle.  Cook until bubbles appear on the surface and the undersides are golden brown.  If your griddle is at the right temperature this will take from 3-5 minutes.  If the pancakes are browning too fast, turn down the heat!!!  Turn the pancakes over and cook 1 to 2 minutes longer to brown on the second side.

Resist the urge to flatten the pancakes with your spatula.

If you are cooking these to order over a span of time, the batter will likely thicken-just add a splash of milk to get it back to the correct consistency.

If you’re cooking some ahead of time to try and keep up with a crowd, keep them warm in a 200°F oven.  Place them on an oven safe plate and cover loosely with foil to keep them moist.

* if you don’t have either buttermilk or yogurt the next best substitute can be made by putting 1 Tbs. vinegar or lemon juice into a liquid measuring cup and filling to the one cup mark with milk.  Stir and let sit until the milk thickens and is acidified.

Crema de Chile Poblano

DSC00165

Sometimes in life you need a personal vacation.  This is a time to venture off on your own to follow a passion without having to consider anyone else’s needs or desires.   I fondly call it time to  contemplate the great undifferentiated aesthetic continuum.  Not sure I ever really grasped the deep meaning of this one but love the way it rolls off one’s tongue.  For me it was about taking some time away from the responsibilities of work and family to do something I really loved and charge my batteries.

I’ve done this a few times over the years, mostly by extending a business trip with a few days of personal time to explore a new country or city on my own.  Once however, I took an entire week just for me. My destination was  La Villa Bonita Cooking School.  At that time the school was located in the  lovely and then relatively safe city of Cuernavaca, Mexico.  The city  which is about a 30 minute drive south of Mexico City, lived up to its name of  the City of Eternal Spring with beautiful weather during my entire stay.  The school was located in a former convent just down the street from a beautiful cathedral, the Museo Robert Brady and a short walk to the Zócolo.   As with nearly all of the homes lining the streets of Cuernavaca, the beauty of the spot was completely unnoticeable from the street, sitting behind high walls and locked doors.  Inside however, was an oasis of vegetation and a beautiful courtyard leading into a spacious kitchen perfect for conducting small hands on classes.  The school has since outgrown this spot (it had only three guest rooms) and moved to a more spacious and luxurious spot in the Tepoztlán  mountains.   If there weren’t so many other spots on my bucket list, I’d be headed back there to check it out!  This time I wouldn’t need to carry back the binder filled with recipes, tortilla press and molcajete that came as a part of the class (long before the airline 50 lb weight restrictions).

This trip came when I was still missing some of the foods I loved in Los Angeles.  In particular I was craving  the hand-made tamales I bought by the dozen from the parents of one of my colleagues.   The other dish I was determined to master an authentic  Mole Colorado.  These were the two that I left home determined to add to my culinary repertoire.  However, as is usually the case when I travel I discovered several dishes that I had never experienced before – Chiles en nogada, Quesadillas with Squash Blossoms and Huitlachoche just to name a few.   I always feel a little sad when I  hear someone declare “I don’t like Mexican food”.  I’m also  fairly certain that their exposure to this fabulous cuisine doesn’t go much beyond Taco Bell.  From simple street tacos to complex moles I love it all.

Of all of the dishes that I experienced on this culinary adventure, the one that has definitely become a favorite at my table and has been shared with many others over the years is a simple Poblano Soup.  Before this trip, poblano’s weren’t yet on my radar and hadn’t gained the popularity that they have so rightfully claimed since.  Today we can find them year round in most supermarkets and buy plants  or seeds for our gardens at most nurseries.  They are an easy to grow and prolific plant, so having several recipes in which to enjoy  the fruits of my garden is a must for me.  The other great thing about them, is they can be roasted and frozen for use in soups such as this one, all winter long.

The soup could be made entirely from my frozen stock, but let’s start with a fresh pepper so you can master this one in any season

Roasting the Peppers-over an open flame until blackened and blistered over the entire surface.

DSC00145

If you’re making a dish that requires only a few peppers this is my go to method.  It’s also the way I first learned to do it during my stay in Cuernavaca.   If you are not lucky enough to be cooking with gas, you can achieve much the same result by roasting them on a sheet pan under the broiler unit of your oven. I suggest cutting them in half to speed up the process and limit the number of times you have to go into the oven to turn them.

In the summer  when I’m working from my garden I use my gas grill (just wait a few months and you’ll see)!!

Let it steam!

DSC00146DSC00149

I’m a big fan of these silicone covers but plastic wrap works as well.  Simply place the charred peppers in a bowl and cover.  It will take only a few minutes for the steam to loosen the skin from the peppers, but you will be peeling it by hand, so wait until you can handle the pepper comfortably.

If you have sensitive hands you may want to wear gloves, but most poblanos are on the lower end of the heat scale so you may be able to handle them bare handed.  In any case the most important thing to remember is Do no rinse them under running water.  I know that you will want to do it, because it just seems to be the natural thing to do, but you’ve worked hard to get those lovely roasted, charred flavors and you don’t want to rinse them away.  Simply peel off the loosened skin with your fingers or a small paring knife.  Remove the stem and cut the pepper open and remove the seeds and veins (those tough white parts running down the length of the pepper).

DSC00152

Now you’re ready to concentrate on making the soup!

Ingredients

DSC00150

So I have one freshly roasted pepper in the front and the last remaining peppers from my freezer stock are  just behind.  I use them all winter long in dishes like this soup where I want the flavor but don’t need great texture.  The only other things you need are onion,  potato, butter, stock, milk/cream, a soft, creamy cheese and perhaps some sour cream/crema/crème fraiche.

Start with diced onion in melted butter on medium heat.  You just want to soften the onion until it is translucent but not browned.  In the original version of the recipe it suggests straining out the onion and just using the onion flavored butter, but that’s definitely not my style!

DSC00153

Next you need a cooked potato.  You can cook it anyway you choose-boil, steam,bake etc.  For me the easiest method is to poke a few holes in it and microwave until it’s soft.  Depending on your microwave , a rather large russet potato like this one it will take from 5 to 8 minutes.  Any type of potato good for baking (Russet, Yukon Gold etc..) will do. Just stay away from waxy boiling potatoes (often red,)these are great for potato salad but not for soup or mashed potatoes

DSC00157

Cut the potato in half and scoop out the fluffy interior (don’t throw away that skin though)

DSC00159

Peppers, cooked onion and potato all go into a blender or food processor.    This is one puréed soup where I actually prefer using one of these devices over my immersion/stick blender.  I like this soup to be perfectly smooth and silky and since I’m not working with a hot liquid or dirtying an extra pot, it’s the way to go for me.

DSC00161

Puree these ingredients until perfectly smooth.  You may need to stop the blender and scrape down the sides a few times and you can add a bit of the room temperature stock after a bit of blending.

DSC00162

Pour the puree into the pot where you sautéed the onion.  Rinse the blender with the remaining broth. I start with a total of 4 cups of broth and then taste to see how much more I will use.   If the soup seems really spicy to you, you will want to use whole milk and/ or heavy cream for the rest liquid.  In this batch I ended up using 1 cup of cream and 2 cups of whole milk.  It’s really up to you and how spicy vs. creamy you want it to be.

DSC00163

If you’re using all fresh peppers, the soup will be a brighter and more vibrant green.  The freezing process takes a bit of a toll on the color, but in mid March when my garden is still months away from producing, I’m happy to have a bowl of homemade soup made from frozen peppers!

DSC00164

Now all you need is some cheese and for those who like it spicy some of that pepper you saved for garnish.   The cheese of choice is Mexican Panela.  I found it in my local Mexican Market-La Michoacana for $4.99/lb.  If you can’t find Panela, most stores carry Queso Blanco-generic for white cheese.  The beauty of Panela is that it gets soft in the hot soup but does not melt or string as a mozzarella or Jack cheese would.  Queso Blanco has a very similar flavor and is just a tad more crumbly in texture, so if you can’t find panela it makes a great substitute.

Today this soup is so delicious and creamy it  doesn’t even need the addition of the crème fraiche I had planned to top it with.  This, I attribute to the goodness of the Snowville Creamery whole milk and whipping cream I use.

DSC00168

But what this blogger really enjoyed for lunch was that leftover potato skin, topped with some soup, that lovely panela cheese and of course a cerveza!

DSC00172


Crema de Chile Poblano

Panela

by: M.B. Einerson

 Adapted from La Villa Bonita Cooking School

One of the most popular fresh cheeses in Mexico, this cheese is mild, white and crumbly.  Like Queso Blanco, it will not run when heated—it will get soft and creamy but will not lose its shape.  The cheese is used in Mexico for many cooked dishes and is commonly crumbled over salads, tacos, chili and burritos.

 Servings: 4 to 6

  • 3 to 6 poblano chilies, roasted, cleaned and de-veined. (6 will make it very spicy depending on the heat level in your chilies, so adjust according to your heat tolerance and size of chilies.)
  • 1 large cooked and skinned baking potato (a second way to tame the heat-use more potato)
  • 2 Tbs. butter
  • ½ medium white onion*, chopped
  • 7 cups chicken broth (the third way to tame the heat is a substitution of whole milk, half & half or cream for part of the broth-I often use 4 cups of broth and then a combo of whole milk and cream)
  • 6 ounces of Panela cheese, cubed or shredded (it’s an add in to your bowl, so don’t fret about the weight/ quantity.  I add between 1/4 and 1/2 cup of cubes per serving)
  • Sour Cream, Mexican Crema or Crème Fraiche for garnish

In a medium soup pot melt the butter and add the chopped onion.  Cook until the onion is soft and translucent, but not browned.  Add the onion, roasted chilies (set aside a small portion of the chilies for garnish if you wish) and potato to a blender or food processor and puree until very smooth.  Add a small portion of the broth and blend again.

If you are a silky, smooth soup lover, strain the puree through a fine mesh strainer back into the soup pot.  If you are like me and don’t mind a little texture to your soup, skip the straining part.  Rinse the blender or food processor bowl with the remainder of the broth you are using to make sure you get every last drop of that yummy puree.

Simmer the soup until it thickens slightly.  Stir in the milk or cream if you are using it, add salt to taste and heat to serving temperature.

Ladle into bowls and top with a dollop of sour cream, a generous portion of cheese and a few pieces of roasted chile poblano.

* Yes, any onion will do but the white variety is the onion of choice in classic Mexican cooking. They have a clean, sharp flavor, have less of a sulfurous bite than yellow onions and are tender and thin-skinned.


Ropa Vieja and Saffron Orzo

DSC00138

As I began cataloging the recipes in my Tried & Liked file I realized that many of them have been gleaned from the pages of  Gourmet magazine.  This particular recipe pays homage to both the great travel information and food that  Gourmet gave us over many, many years.  Thank goodness for Epicurious which allows us to access much of the best that the magazine had to offer for such a long great run.

This favorite goes back to a great Spring Break trip that my family took to Key West, Florida in the late 90’s.  Armed with my magazine, there were several restaurants in this idyllic  community that I was determined to try.  One in particular was a  hole in the wall Cuban spot.  It took us a bit of walking and searching to find it (long before the days of GPS and i Phones), but it was  definitely worth the effort.  The star dish of the evening was the Ropa Vieja that my son ordered and we all loved (this is the son who didn’t eat vegetables at the time).  To this day I don’t know what drew him to the dish, but I was certainly pleased that my years of encouraging all children at my table to try new things was finally paying off.

When we were back at home and I wanted to recreate the dish, Gourmet came through once again with a recipe that hit the mark.  With their help it became possible for me to easily recreate the flavors and memories of a great family vacation.  The recipe is still on the Epicurious site to this day with 79 reviews but sadly without the beautiful photo’s that accompanied it when published in January of 1995.  My shots certainly won’t hit their mark, but I think you’ll get a good idea of how this colorful dish can brighten even the grayest of winter days. Yes I know it’s March, but we still have snow on the ground and a bit of comfort food it still the ticket.

I’ve tried a few other recipes for this dish over the years including a Ropa Vieja Pot Pie with Pepper Jack Biscuits from Cuisine At Home which was very good, but at the end of the day the Gourmet version is the base recipe that I always return to when someone in my family says “We haven’t had Ropa Vieja for a while”.  Of course I’ve adapted it a bit here and there over the years.  My latest take on it  is the version I’m sharing with you now.

Ropa Vieja

The name of this recipe translates directly into “old clothes”, as the colorful shreds of meat and peppers and onions resemble a pile of colorful rags.  I often hesitate to tell this to people until they’ve tasted it, as it seems to be off-putting to some but I personally love the descriptiveness of the name.

Also note that this recipe makes a lot-never a problem for us as it just keeps getting better and seems to disappear in a couple of days, but you can easily cut it in half.

It starts with some Flank Steak, Onion, Carrot, Celery, Garlic, Cumin, Oregano, Bay Leaf, Black Peppercorns, Beef Broth, Olive Oil and Salt

DSC00081

The original recipe simply has you put all of the ingredients in a 5-quart pot and simmer until the meat is tender.  I believe you can coax more flavor from the beef by sprinkling it with a bit of salt and freshly ground black pepper and browning it in some olive oil.  I’m using a 5 quart braiser here which allows me to brown all of the meat at once, if you have a smaller diameter pot brown one piece of meat at a time and set it aside until all are nicely browned.

DSC00083

DSC00084

Once the beef is nicely browned on both sides add the onion, celery and carrots followed closely by the garlic, bay leaf, cumin and oregano.

 DSC00086

When the aroma of the onion starts to become noticeable, add the beef broth. Cover and simmer for at least 1 ½ hours.  The meat should be very tender at the end of this simmer.

DSC00088

While the meat is simmering start prepping the next set of ingredients.  Fresh Poblano Peppers, Red Onion and some Olive Oil

DSC00089

The original recipe uses green bell peppers but I much prefer the flavor of Poblanos.  I’m not sure if they grow and use them in Cuba but can’t wait to visit and find out!

As I explained earlier,  the name of this recipe translates directly into “old clothes”,with the colorful shreds of meat and peppers and onions resembling  a pile of colorful rags.  To gain this look, the cut for all of the vegetables should be ¼ inch strips.

In a second Dutch Oven or skillet sauté the strips of poblano and red onion in olive oil until just softened.

DSC00091

When the meat is tender, remove it to a separate dish to cool to the point that you can shred it by hand.   Strain the vegetables from the broth and gather the next set of ingredients Whole Peeled Tomatoes in Juice, Tomato Paste,  and more Garlic, Oregano and Cumin

DSC00093

Add the Oregano, Cumin, Garlic and Tomato Paste to the pot with the softened peppers and onions and give it all a stir.  This is to bloom the spices, brown the tomato paste a bit and take the raw edge off the garlic.

DSC00095

While this is happening on one burner, return the strained broth to the braising pan along with the whole peeled tomatoes.  You can either cut the tomatoes with a pair of kitchen shears or mash them up a bit with a potato masher, pastry blender or a fork.  No matter what you do they will likely squirt you, so mash gently!!!

DSC00096

Next add the meat that has been cooled and shredded (easiest to pull it into shreds with your hands into strips approximately the same size as the peppers) along with  the poblano peppers and onions into the pan with the broth and tomatoes. Cover and simmer for another 20 minutes.

DSC00099

While this is simmering you can prep the last set of additions to this colorful stew – Red and Yellow and Orange Bell Peppers and Pimento-Stuffed Spanish Olives along with a bit more Olive Oil.  Any combination pepper colors will do but I’m partial to 2 red, 1 yellow and 1 orange.

DSC00101

Going back to the pot where you sautéed the first set of peppers (so maybe it’s not a one pot dish, but two pots for one great dish isn’t so bad), add the olive oil and the peppers that you’ve cut into ¼ inch strips.  Cook them until they are just tender.

DSC00103

Add the  beautiful peppers along with the olives  to the pan with the meat and you’re close to eating.   The original recipe calls for a cup of frozen peas, thawed but I like my peas to maintain their color and texture, so I prefer to serve them on the side.   Now all you need to do is bring the stew to serving temperature and microwave some frozen peas!

DSC00105

Now if you’ve simply had enough cooking for the day you can stop here and enjoy the fruits of your labor, but this dish traditionally served over a bed of Yellow Rice.  I’ve made the Yellow Rice with Toasted Cumin that appears in the Gourmet article and it is very good (the only adjustment I recommend is to save your saffron for another time and use turmeric as the color component in the dish).  Over the years however, I’ve switched out the Cumin Rice for a  side of Saffron Orzo.

Saffron Orzo

Saffron Orzo is super fast to put together and the flavor of the saffron is a nice complement to the earthy cumin and oregano flavors in the stew.  The other great thing about it is, you can make it while the stew heats, you set the table and pour the wine.  It has 3 ingredients Orzo Pasta, Chicken Broth and Saffron.  Notice the saffron?  I brought it home from a recent trip to the mountains of Monteferino Italy where we met the grower and stood next to the field where the crocus grew!!   More on this fantastic trip in future posts, but suffice it to say that there are some great recipes coming.  But back to this quick cooking side dish.

DSC00108

Crumble the saffron into a small pot.  I use a 1.5 quart Dutch Oven (yes I do love my Le Creuset) and heat until the saffron becomes a bit more brittle.  Add the chicken broth, bring it to a boil, add the orzo and give it a good stir

DSC00110

Cover the pot, reduce to a simmer and cook for 5 to 7 minutes or until nearly all of the liquid has been absorbed by the pasta.  I like it a bit soupy because it reminds me of risotto but doesn’t need all of that stirring.

DSC00112

The only other thing I serve with this meal are black beans.  I cook mine from dry, but feel free to open a can and warm them up.  And last, but certainly not least pour yourself a nice glass of red wine  and enjoy!

M.B

DSC00141

Ropa Vieja

 by: M.B. Einerson

 barely adapted from Gourmet January 1995

Servings: 8 to 10

Braising Ingredients

  • 3 lb. flank or skirt steak
  • salt and freshly ground black pepper
  • 1 Tbsp. olive oil
  • 2 carrots, coarsely chopped
  • 1 large onion, coarsely chopped
  • 2 celery ribs, coarsely chopped
  • 1 bay leaf
  • 3 cloves garlic, crushed
  • 1 tsp. dried oregano (I prefer Mexican for this one but any will be fine)
  • 1 tsp. ground cumin
  • ¼ tsp. black peppercorns
  • 2 quarts beef broth or stock (I usually use low-sodium and then adjust the dish as I go with salt)
  • 2 poblano or green bell peppers, cut into ¼ inch strips
  • 1 red onion, cut into ¼ inch strips
  • 1 Tbsp. olive oil
  • 3 Tbsp. tomato paste
  • 3 cloves garlic, minced
  • 1 tsp. ground cumin
  • ¼ tsp. dried oregano
  • Braising liquid from above
  • 14.5 oz. can whole peeled tomatoes with juice, chopped (it’s hard to find this size can of whole peeled tomatoes, so I usually just use half of a 28 oz. can and save the rest for another recipe. The whole peeled ones break down into the recipe so much better than standard diced tomatoes in juice. Diced tomatoes usually have calcium chloride added to help them maintain their shape and texture.  Nice for many dishes but not this one!
  • 4 bell peppers of assorted colors, cut into ¼ inch strips – I like 2 red and one each yellow and orange but any combo you like is great.
  • 1 Tbsp. olive oil
  • ½ cup pimento-stuffed Spanish olives, drained and halved or quartered.
  • 1 cup frozen peas (optional-I prefer my peas on the side so they don’t become over cooked especially when the leftovers are reheated!)

Braising the Beef:

In a 5 qt. Dutch Oven or braiser, heat the olive oil on medium-high heat.  Lightly salt and pepper the beef and brown on all sides.  If your pot has a small surface area you will need to do this in batches.

Once all of the beef is browned, add it all back to the pot along with the onion, carrot and celery.  When you start to smell the aroma of cooked onion, add the garlic, oregano, cumin and peppercorns.  Lift the meat to allow the spices to get some heat.  This will only take a minute or so.

Add the beef broth, bring to a simmer and cover and cook for at least 1 ½ hours, or until the meat is tender.

When the meat is tender, transfer it to a cutting board or platter to cool.  Strain the liquid from rest of the braising mix and press on the vegetables to extract as much liquid and flavor as you can.  Toss the vegetable solids, they’ve given up all their flavor to the broth and you don’t want to bite on those whole peppercorns or the bay leaf when you’re eating your stew.

Cooking the Poblano Peppers & Red Onion and Blooming the Flavors:

While the meat is cooling, sauté the poblano pepper and red onion strips in 1 Tbsp. of olive oil.  Use a clean Dutch oven or large skillet for this step. You will be using it again later so don’t worry about generating lots of pots to clean-there will only be two for the entire stew.

Once the peppers are slightly softened and the onions are translucent, stir in the tomato paste, cumin, oregano and garlic.  This will deepen the color and flavor of the tomato paste, bloom the spices and give the garlic that lovely caramelized flavor.  Don’t overcook it however as you don’t want to generate burnt/charred flavor.  Turn the burner off and let this mixture rest while you shred the beef.

Shredding the Beef:

The beef should be cool enough to handle by now, so start pulling it into shreds.  You want shreds that are approximately 2 inches long and ¼ inch wide.  To do this, cut the pieces of meat across the grain into 2 inch lengths and then shred with the grain into strips approximately ¼ inch wide.  This goes against the way you typically tough cuts of meat like flank steak but is should be nicely braised and tenderized so that you will have a bit of chew to the stew, but not a mouthful of tough meat!

The Second Simmer:

Now that you have the simmering liquid strained, the beef shredded and the peppers, onions and seasonings ready you are all set to start the second simmer.  Add the strained braising liquid to your original 5 qt. pot along with the whole peeled tomatoes, the beef and the pepper onion mixture.  Bring it all to a simmer, cover and simmer for 20 minutes or so while you prepare the last of the peppers and cut the olives.

The Home Stretch:

Back in the pot that held the Poblano and Red Onion mixture, add 1 more Tbsp. of olive oil and heat on medium heat.  Stir in the colored pepper strips and sauté until just softened.

Once the beef mixture has simmered for 20 minutes or so, stir in the colorful peppers and olives and heat to serving temperature.  You can make the Saffron Orzo and cook some peas while it’s heating.

Enjoy with a nice glass of red wine!


Saffron Orzo

by: M.B. Einerson

 Inspiration from Gourmet March 1990 

Servings: 4 to 6

  • ¼ tsp. saffron threads
  • 1- 14.5 oz. can chicken broth (2 cups)
  • 1 cup orzo (rice-shaped pasta)

Crumble the saffron threads to small Dutch over or saucepan and heat over medium-high heat until the saffron becomes a bit more brittle.  Add the chicken broth and bring to a boil.  Stir in the orzo, cover and cook for 5 to 7 minutes or until nearly all of the liquid has been absorbed and the rice is al dente.

Note:  if you’re serving this as part of an Italian meal or eating it on its own, you may want to stir in some unsalted butter and freshly grated Parmesan cheese (this will take it really close to the original Gourmet recipe.